How to Record a Screen | Recommended practical tools
In today’s increasingly digitized world, 🧐screen recording is no longer an exclusive skill for specific individuals but an indispensable part of our daily work, study, and entertainment. 📢Mastering various practical tools and understanding how to efficiently and conveniently record screens is crucial for improving work efficiency and enriching digital life.📌
🔻There are various methods and tools available on the market to achieve screen recording, such as:
📍Desktop software: WorkinTool RecWit, WorkinTool VidClipper
📍Online websites: Recorder Online, Clideo
Mastering the usage of these tools can help us easily meet various screen recording needs and add assistance to work and life.🔮
How to Record a Screen | Recommended practical tools
How to Record a Screen? 🧐Screen recording plays an increasingly important role in modern digital life. 🔮Whether it’s creating instructional videos, recording exciting moments in games, saving important online meeting content, or providing remote technical support and troubleshooting, efficient and convenient screen recording tools can greatly improve our efficiency.👀
😉In this article, we will take you on a deep exploration of several practical and easy-to-use screen recording tools, and provide detailed instructions on their usage to help you easily master screen recording techniques. Let’s take a look together~🥳

🔎About screen recording
🔷To achieve screen recording, there are various methods and tools available on the market, each with its focus on functionality, usability, and applicable scenarios. ⭕We can understand the diversity of screen recording from the following dimensions:
| ✨Dimension | 📝Description |
| 1️⃣Multipurpose | Screen recording can be used in various scenarios such as education, business, technical support, entertainment, etc. |
| 2️⃣Diversified recording methods | According to the requirements, you can choose to record the entire screen, designated area, or window, and also choose whether to record system sound, microphone sound, or even overlay camera images at the same time. |
| 3️⃣Types of tools | Mainly divided into operating system built-in tools, third-party desktop software, and online web tools. |
| 4️⃣Output format and post-processing | After recording, videos can usually be saved in various formats such as MP4, AVI, MOV, etc. Some tools also provide basic editing and annotation functions for easy editing and sharing in the future. |
🔎Recommended and User Guide for Practical Screen Recording Tools
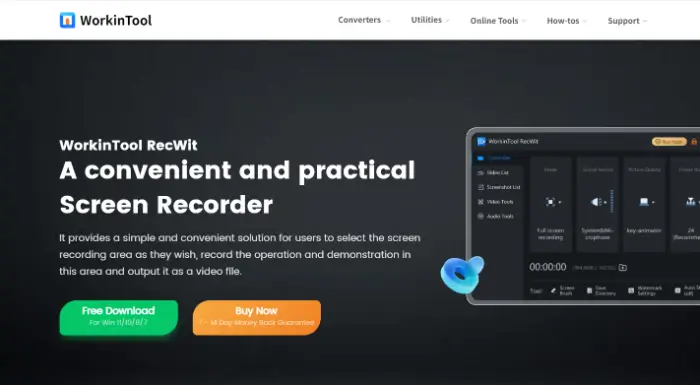
1.WorkinTool RecWit
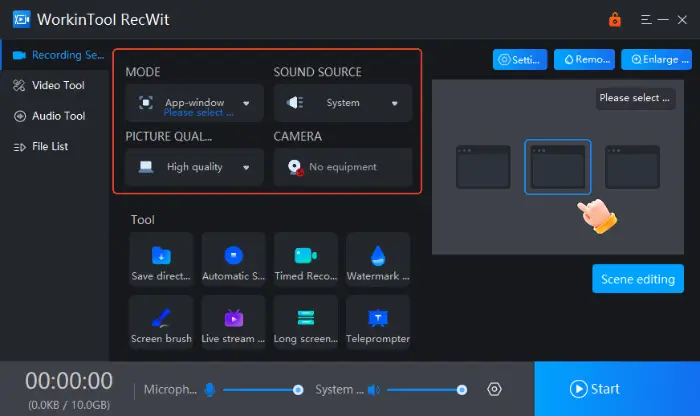
WorkinTool RecWit is a feature-rich and intuitive desktop screen recording software. 📍It provides multiple recording modes (full screen, area, window), supports simultaneous recording of system sound and microphone sound, and can overlay camera images. 💡Its advantages lie in high recording quality, strong stability, support for scheduled task recording, and real-time annotation tools, making it suitable for users who require high-quality and professional recording.📖

🚩Screen recording steps:
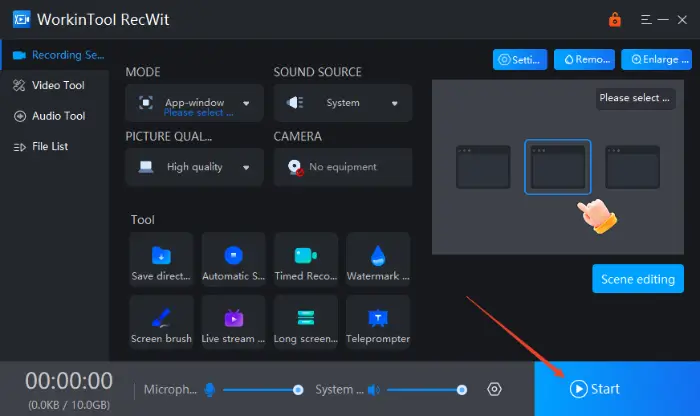
Step 1: Install and download WorkinTool RecWit on the device. After opening the software, you can adjust the relevant parameters of screen recording in the main interface of the software, including recording mode, recording image quality, audio input, etc.
Step 2: After completing the setup, click “Start” to start screen recording.
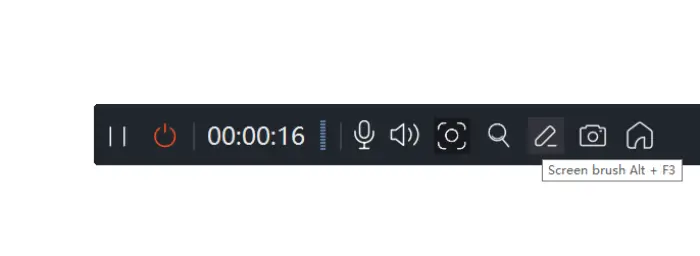
Step 3: If you want to stop recording, call up the floating toolbar and click “Stop” to complete the operation.
Step 4: After the recording is completed, the software will automatically save the recorded content, which can be viewed directly.

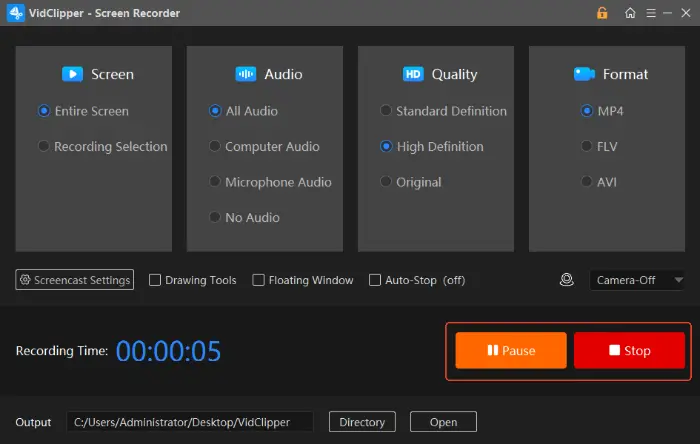
2.WorkinTool VidClipper
WorkinTool VidClipper is a tool that integrates video editing and screen recording, with a simple and intuitive interface and powerful features, suitable for users who need to quickly record and edit videos. 🔑This is very convenient for users who need to edit and add subtitles, special effects, and other operations immediately after recording.🎉

🚩Screen recording steps:
Step 1: After starting the software, find the “Screen Recording” function in the “Tools” and click to enter.
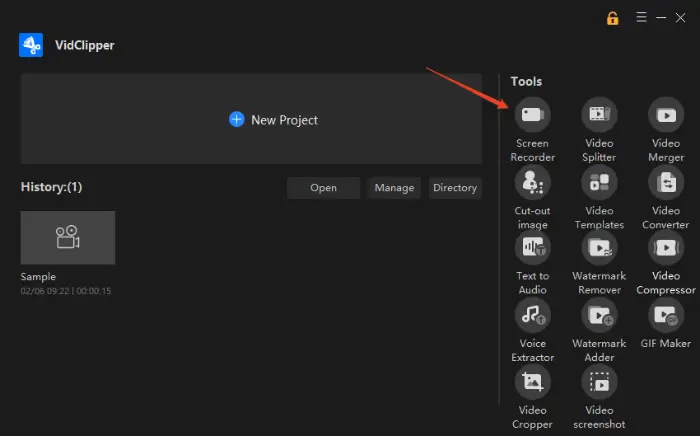
Step 2: After entering the recording interface, adjust the relevant parameters of the recording screen according to actual needs. Click on ‘Settings‘ to make more detailed adjustments.
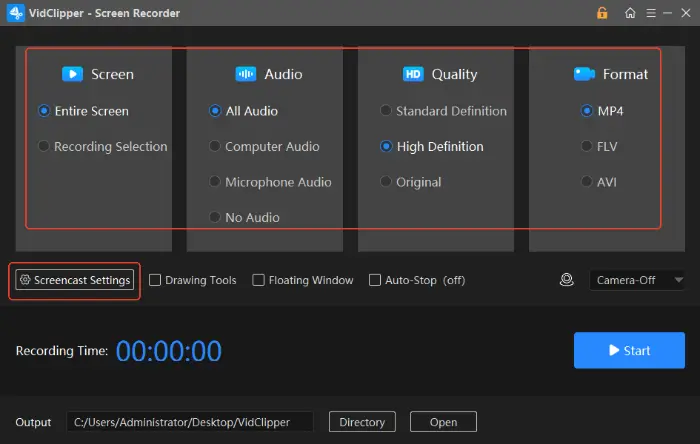
Step 3: Click on “Start” in the bottom right corner of the interface, and the software will start screen recording. Click ‘Pause‘ or ‘Stop‘ to stop screen recording.
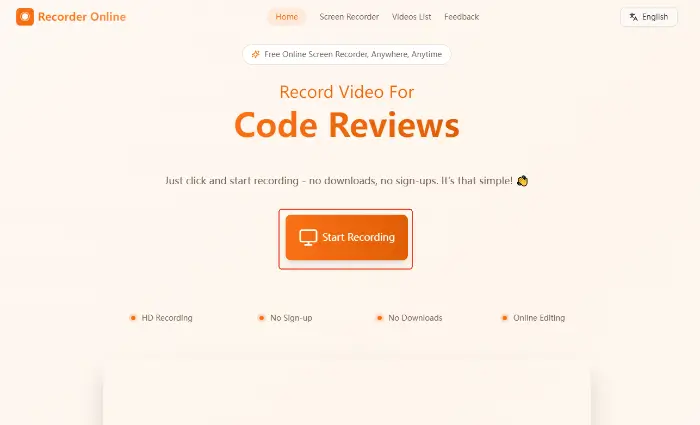
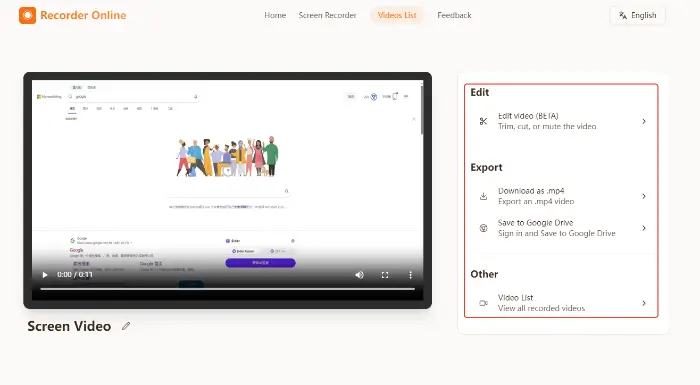
3.Recorder Online
👀This is a web-based screen recording tool that can be used without downloading or installing any software. Its advantage lies in convenience, recording can be done by opening a webpage, supporting cross–platform (as long as there is a browser), with a simple and intuitive interface, suitable for fast and simple screen recording tasks,😉 especially for users who do not want to install additional software or temporarily record screens on different devices.
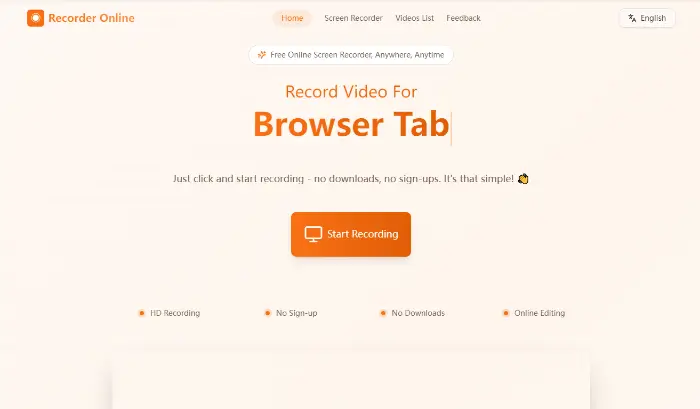
🚩Screen recording steps:
Step 1: Open any browser, enter the online website, find and click the “Start Recording” button.
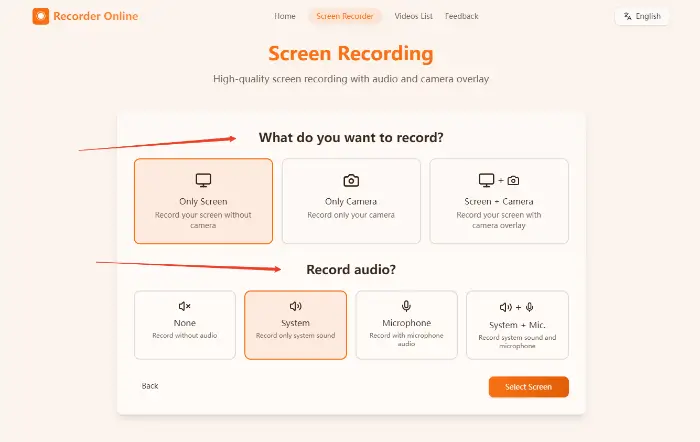
Step 2: Select the content to be recorded:
- Screen only: Record a screen without a camera.
- Camera only: Only set your camera.
- Screen+Camera: Record a screen with a camera overlay.
🔻While choosing to share content, you can also choose whether to record microphone sound and system sound.
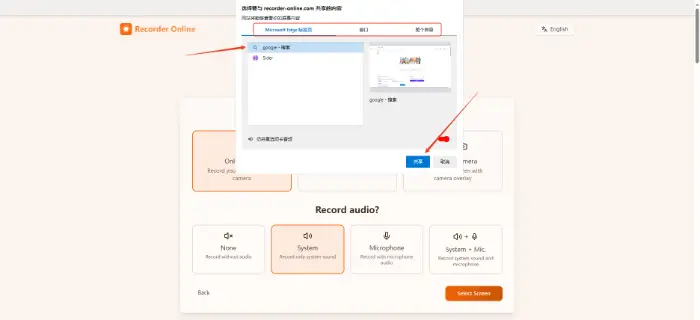
Step 3: After selecting, the browser will pop up a permission request window. Select the window you want to share and click “Share“.
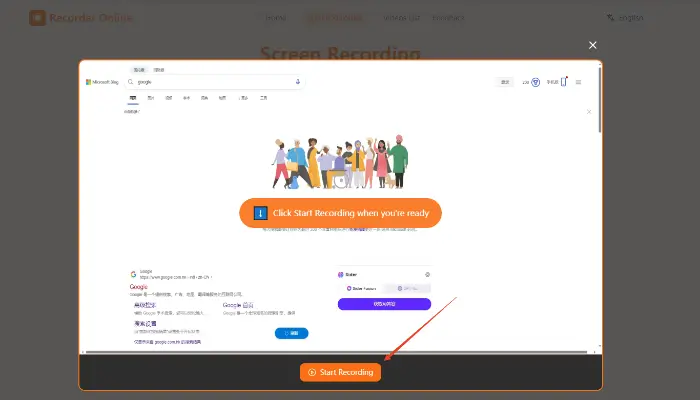
Step 4: Click “Start Recording“, and after the countdown ends, the website will start recording screens.
Step 5: Click “End” and the website will stop recording. Moreover, the recorded content will be displayed on the webpage, and you can choose to edit or export it according to your needs.
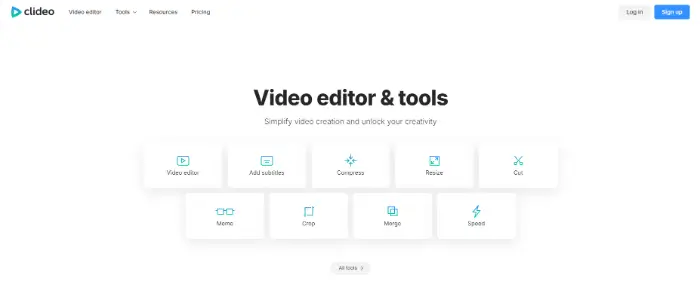
4.Clideo
Clideo provides screen recording services and is also a web-based tool that does not require installation. 📎Its advantages lie in its user-friendly interface design, simple operation, and seamless integration with other Clideo tools. ✨After the recording is completed, it can be easily processed.💡
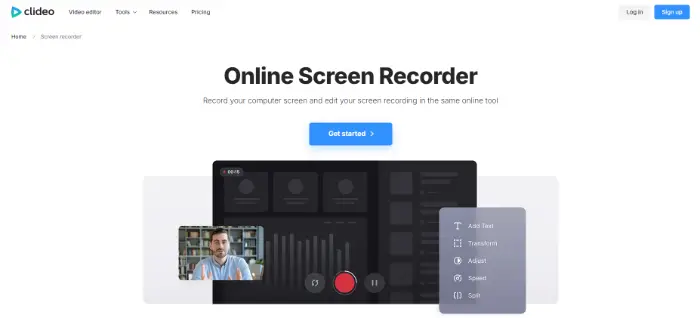
🚩Screen recording steps:
Step 1: Find the “Screen Recorder” tool in Clideo, enter it, and click “Get Start“.
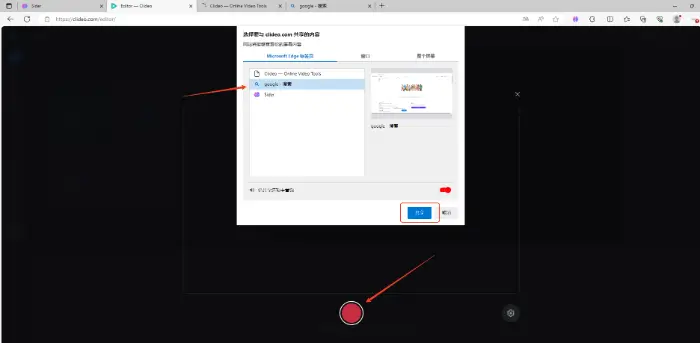
Step 2: In the operation interface, find “Record” and select the type that needs to be recorded.

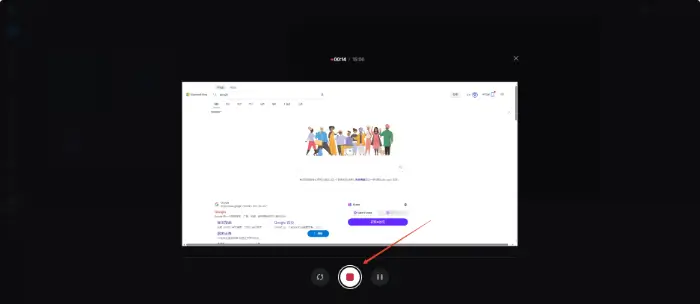
Step 3: Click the red button on the interface, select the window that needs to be shared in the pop-up permission request window, and start recording the screen.
Step 4: Click the “Stop” button, and the website will end the recording.
Summary and selection suggestions
🎊Screen recording, as a fundamental and powerful digital skill, has a wide range of applications. From simple operation demonstrations to complex professional productions, its presence can be seen. ⌛Mastering multiple recording methods and tools allows us to respond more flexibly to different recording needs.
🎈When choosing a screen recording tool, the following aspects can be considered:
|
Through the introduction in this article, I believe you have gained a clearer understanding of “How to Record a Screen“. 😉Screen recording is not only a practical skill but also a tool to enhance efficiency and creativity. ⭐I hope these recommendations and usage guides can help you find the right screen recording tool for yourself, easily master screen recording skills, and make digital life more efficient and exciting!🎊
Related Article
 How Do You Get to Screen Recording|A Practical Tutorial for Beginners WorkinTool Capture Screen Recorder Review: Screen Record Anything
  How to Screen Record on Acer Laptop in 2024 | 4 Ways