How to Turn on Screen Recording: From Zero to Mastery
📣Screen recording has become an indispensable part of modern work, study, and entertainment. Whether it’s for creating tutorials, recording meetings, or facilitating remote collaboration, screen recording is the go-to solution.💥However, for many beginners, figuring out how to start screen recording can be a daunting task. Fear not! 🔔This guide will walk you through four simple and user-friendly screen recording tools, complete with detailed instructions, to help you master this essential skill.
📌 Built-in Tools in Computer Systems – Windows/Mac
📌 Professional Screen Recording Software – WorkinTool RecWit/VidClipper
🌈Now, keep reading to discover the secrets of screen recording and give it a try!
How to Turn on Screen Recording: From Zero to Mastery
Do you want to save amazing screen moments permanently❔ Or need a tool to record steps clearly for sharing❔ Screen recording meets these needs perfectly, capturing activities accurately and making sharing easy. Let’s start exploring how to turn on screen recording and become a pro❕
✅ Using Built-in Tools on Your Computer
✨ Windows System – Xbox Game Bar
Initially designed for gamers, Xbox Game Bar has expanded to offer versatile screen recording features. It supports high-definition video and optional microphone audio for enhanced recordings.
💡 Three-Step Guide:
◾ Press “Win + G” to open Xbox Game Bar. First-time users need to enable it via “Settings” > “Gaming”.
◾ In the Capture tab, click “Start Recording” and toggle the microphone as needed.
◾ Press “Stop Recording” when finished. Your video will be saved in “View My Captures”.
✨ Mac System – QuickTime Player
QuickTime Player, Apple’s built-in multimedia tool, provides a user-friendly interface for screen recording. It supports full-screen and partial screen capture, along with system and microphone audio.
💡 Three-Step Guide:
◾ Open the “Applications” folder and launch QuickTime Player.
◾ Click “File” > “New Screen Recording”, select the area, and choose your audio source.
◾ Click “Start Recording”. The video will be saved in “.mov” format and can be previewed immediately.
✅ Leveraging Third-Party Software
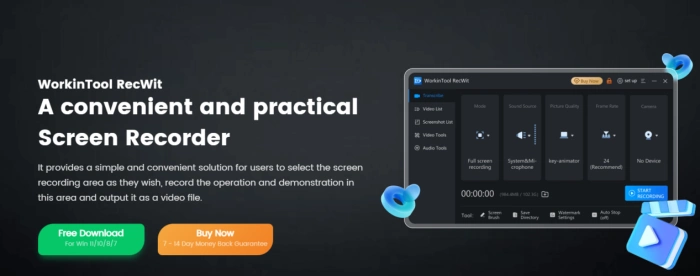
🥇 WorkinTool RecWit
WorkinTool RecWit is a versatile and user-friendly screen recording tool. It allows you to freely select the recording area and precisely capture operations within it, outputting them as video files to meet various needs.

💡 Detailed Steps:
◾ Visit the official website to download, install, and open WorkinTool RecWit.

◾ Adjust settings like MODE, SOUND SOURCE, PICTURE QUALITY, and CAMERA as needed.
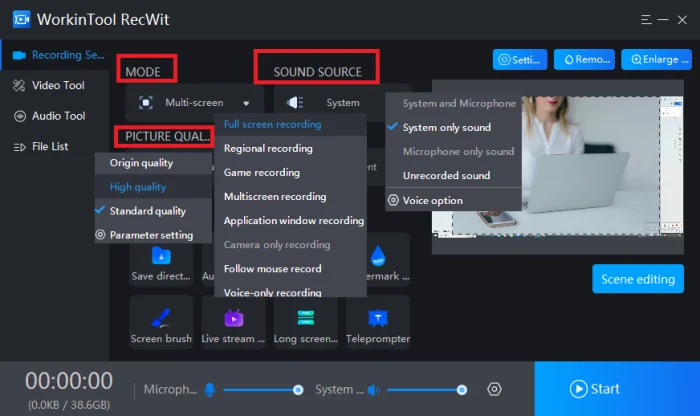
◾ Click “Start” to begin recording, the main interface hides by default, but real-time duration tracking is available.
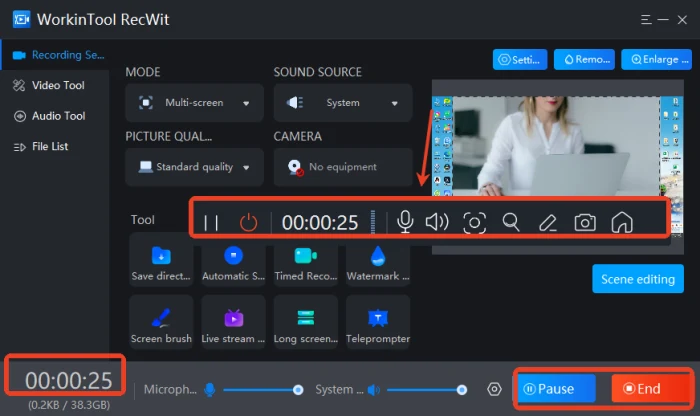
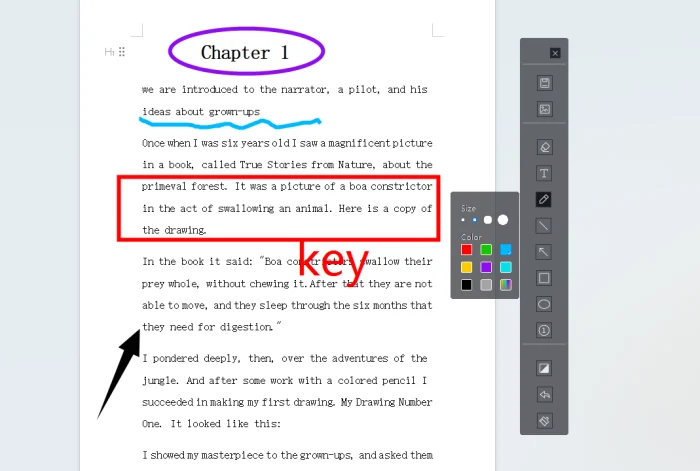
◾ While recording, use the “Screen brush” to add text notes, doodle, and insert images.
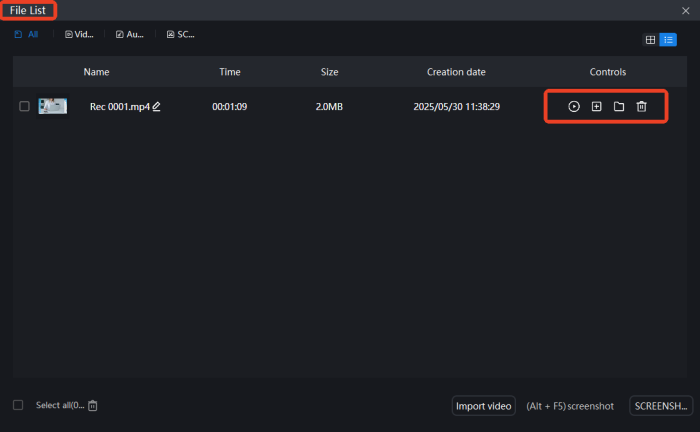
◾ Press “Alt+F2” to stop recording, your video will auto-save to “File List“, enabling play, deletion, or management.
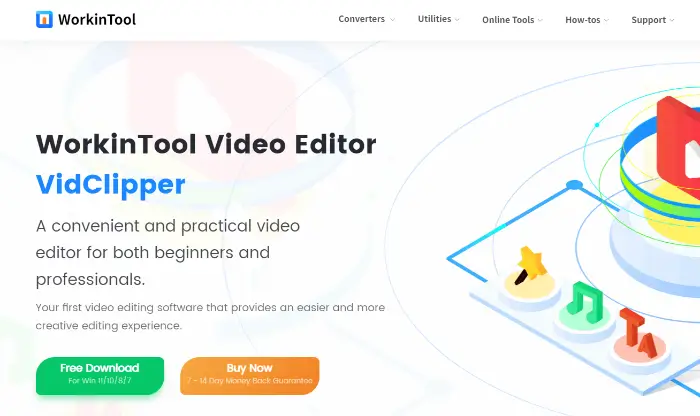
🥈 VidClipper
VidClipper is a powerful tool that includes both screen recording and video editing features. After recording, you can easily perform quick edits, keying, watermarking, and more to enhance your videos.
💡 Detailed Steps:
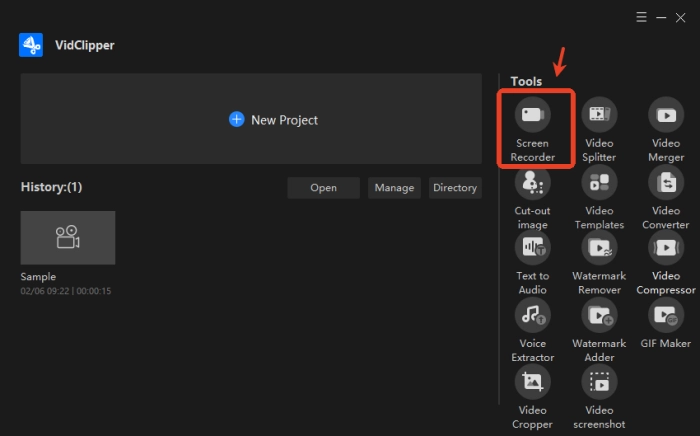
◾ Open the software and select “Screen Recorder” on the right side of the interface.
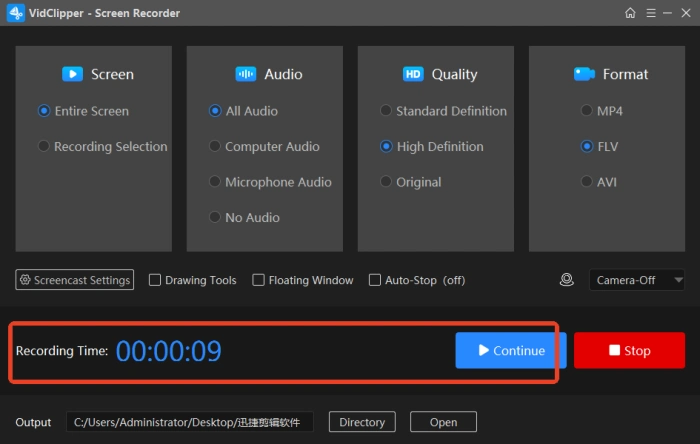
◾ Choose your recording settings for Screen, Audio, Quality, and Format.
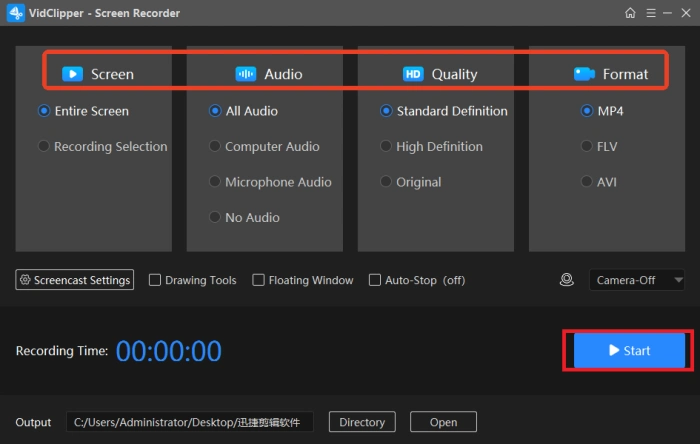
◾ Press “Start” to begin recording. You can pause or resume at any time.
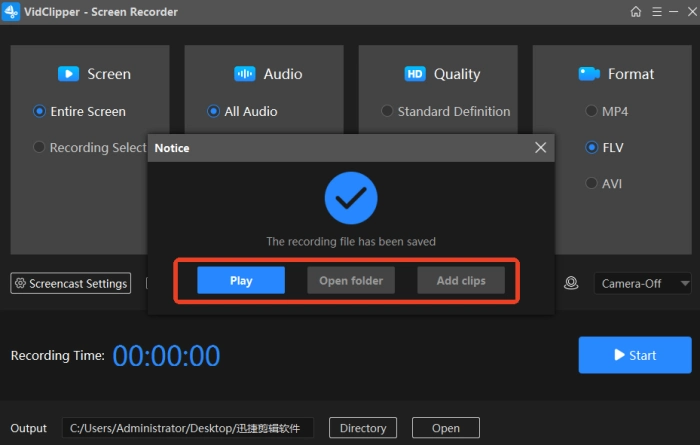
◾ Stop recording when done. Video saves automatically. You can then play, open the folder, or add it as a clip.
👀 Precautions for Screen Recording
🔸 Before Recording
| ◽ Check storage space: Clear unnecessary files and apps to free up space for smooth recording.
◽ Adjust recording parameters: Set resolution and frame rate based on content. For games, increase parameters for smooth visuals. ◽ Turn off notifications: Disable all notifications to avoid interruptions during recording. |
🔸 During Recording
| ◽ Keep the device stable: Use a holder or tripod to stabilize the device and prevent shaky footage.
◽ Pay attention to audio quality: Ensure the microphone works properly, select the right audio source, and record in a quiet environment. ◽ Monitor the status in real-time: Keep an eye on the time, recording area, and other status indicators, and make adjustments promptly if needed. |
🔸 After Recording
| ◽ Check the recorded video: Review the video quality and content promptly. Re-record if necessary.
◽ Post-edit the video: Trim, add music, adjust speed, and add subtitles as needed. ◽ Save and share: Save the edited video and share it through social media or other channels. |
🔎 Application Scenarios of Screen Recording
| 📢 Scenarios | 📍 Descriptions |
| ⭕Teaching, Training, and Knowledge Sharing | Teachers and trainers can use screen recording to demonstrate software operations and formula derivations with voice explanations, making it easy for students to review. Office workers can record tutorials on skills like PS image editing or Excel functions and upload them for knowledge sharing, building their personal brands. |
| ⭕Game Live Streaming and Highlight Recording | Gamers can create exciting highlight compilations by recording game footage in real-time, adding commentaries or music, and uploading them to attract fans. The background recording function can automatically save in-game highlights for later editing and sharing, enhancing account activity and interactivity. |
| ⭕Remote Work and Meeting Collaboration | Screen recording during online meetings captures PPT presentations and operational demonstrations, helping those who couldn’t attend to catch up. In remote collaboration, recording and sharing operational procedures with team members reduces communication costs and improves efficiency. |
| ⭕Software Testing and Problem Feedback | Developers or testers can record operational steps and system feedback to visually present bug phenomena, aiding the development team in locating issues. Users encountering software malfunctions can record the process and attach explanations to help customer service quickly understand and resolve the problem. |
📝 Conclusion
Now, you should have a clear understanding of screen recording. If your system’s built-in tool doesn’t meet your needs, WorkinTool RecWit is worth trying. It has a user-friendly interface and can handle various scenarios easily. 👏You can quickly master it without spending much time learning. Don’t hesitate! Download it and give it a try. Experience its efficiency and convenience firsthand and start a new screen recording journey❗
Related Article
 Easy to Get Started! How to Turn on Screen Recording Screen Recording for Training | How to Do It on PC 2024
  How to Highlight Mouse Pointer in Screen Recording on PC