How to Do Screen Recording: An Easy Guide
💥Screen recording is an essential skill in today’s digital world. 💪Whether you’re creating engaging teaching videos, recording those thrilling moments in games, or making remote collaboration smoother, screen recording can be a real game-changer. 👀This article will guide you through four easy-to-learn screen recording methods, helping you tackle your screen recording tasks with ease and efficiency.
📌Computer Software: WorkinTool RecWit/VidClipper
📌Online Tools: Online-Video-Cutter/Loom
👏Now, let’s dive in and learn the specific steps to try them out for yourself!
How to Do Screen Recording: An Easy Guide
Want to capture that epic comeback moment in a game and share it with your friends with a single click❔ Do you need to record the key points from an online course for later easy review? Want to clearly demonstrate software operations to help others get up to speed quickly? 🔎It’s actually incredibly simple—let screen recording work its magic! It precisely captures your screen while also recording clear audio. ✍Today, I’ll walk you through how to do screen recording step by step. Unlock this highly practical skill and enjoy a whole new way of recording and sharing!
🎊Preparation Before Screen Recording
✅ Check Device Performance: Close any background programs you don’t need to free up memory and CPU resources. Make sure your device has enough battery or is plugged in. Also, check that you have enough storage space to avoid interruptions during recording.
✅ Adjust Recording Parameters: Pick a resolution like 1080P, 2K, or 4K. For frame rate, go with 60FPS for games and 30FPS for regular recordings. Don’t forget to enable both “system sound” and “microphone” to get synchronized audio.
✅ Test the Recording Environment: Do a quick test recording to check the video quality, sound, and smoothness. Also, double-check that the recording area doesn’t have any sensitive info to keep your privacy safe.
✅ Comply with Copyright Laws: If you’re recording copyrighted content, make sure you have the right permissions. Avoid recording private content that isn’t public to stay on the right side of the law.
🌈Screen Recording Software Tools
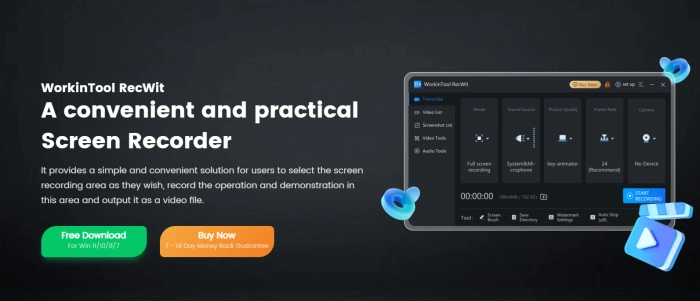
🥇 WorkinTool RecWit
A professional screen recording software that offers various recording modes such as full screen, region, and application window to meet different needs. It also includes multiple video and audio tools for detailed editing and optimization of recorded content.

🔑Steps to Use WorkinTool RecWit:
◾ Download and install the software on your computer, then open it.
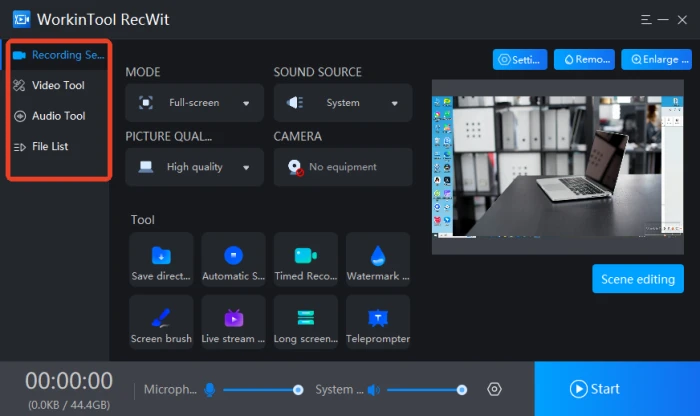
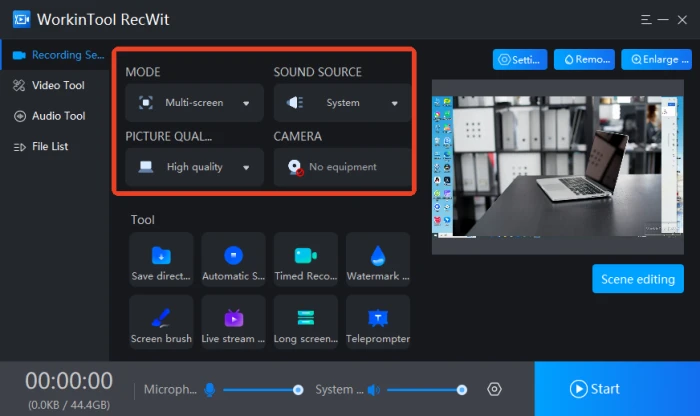
◾ Adjust MODE, SOUND SOURCE, PICTURE QUALITY, and CAMERA in the “Recording Settings” interface.
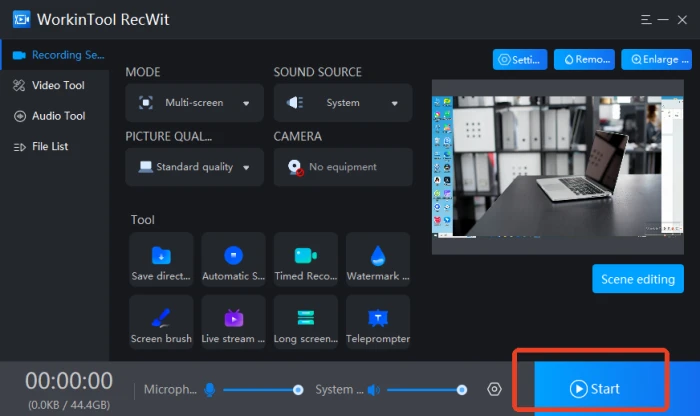
◾ Click “Start” or use the default shortcut “Alt+F1” to start recording.
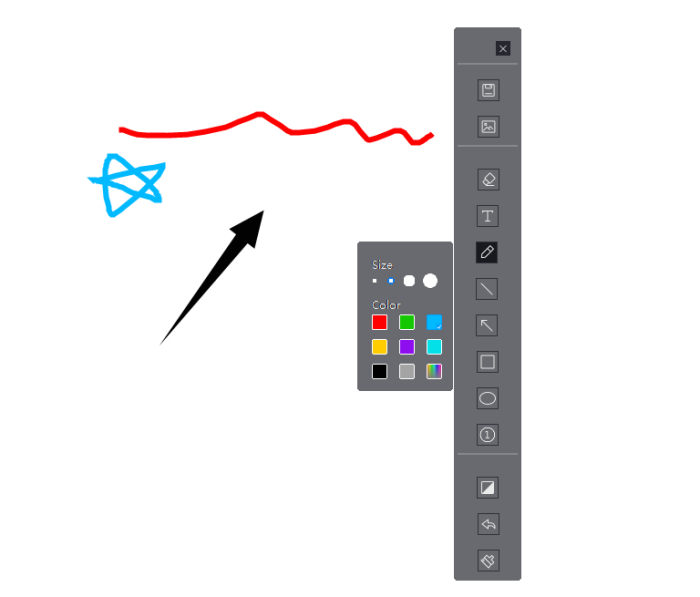
◾ Perform editing tasks like adding annotations and inserting images using the “Screen brush” tool.
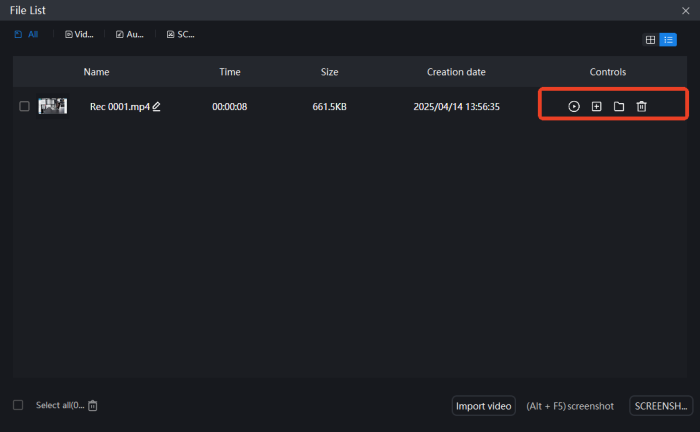
◾ Press “Alt+F2” to stop. The file will be saved to the “File List” for playback, deletion, or other processing.
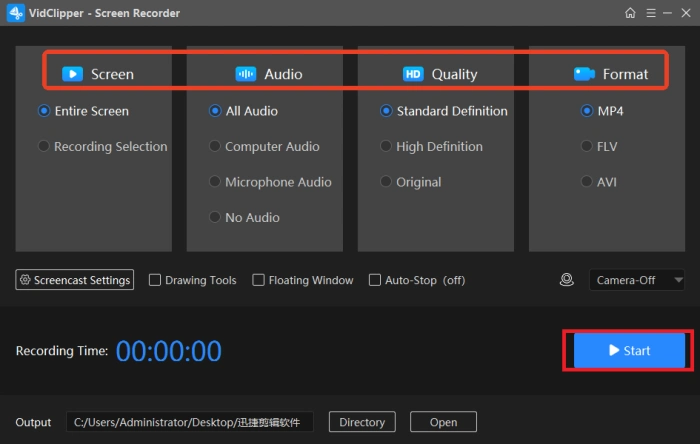
🥈 VidClipper
A video editing software that includes a Screen Recorder among its many useful tools. Its user-friendly interface makes it easy for beginners to quickly create high-quality video content.
🔑Steps to Use VidClipper:
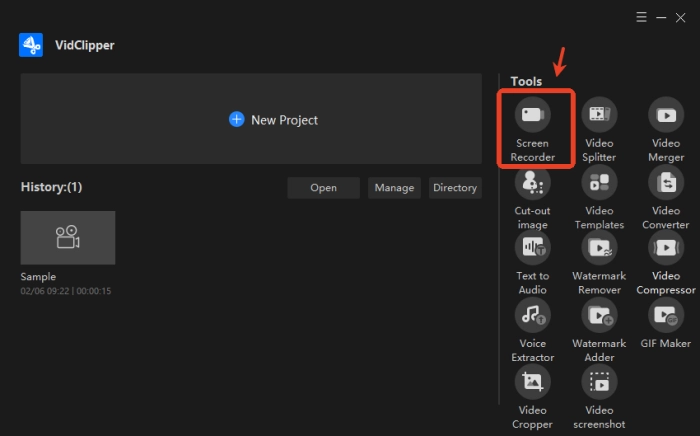
◾ Open the software and click “Screen Recorder” on the right of the interface.
◾ Adjust settings for Screen, Audio, Quality, and Format as needed.
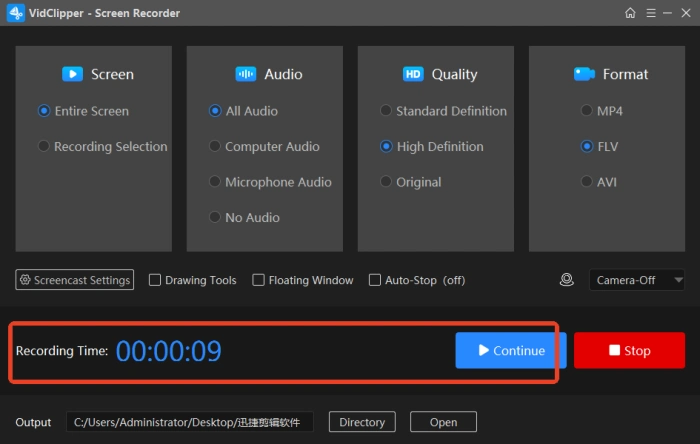
◾ Press “Start” to begin recording. You can pause or resume it anytime.
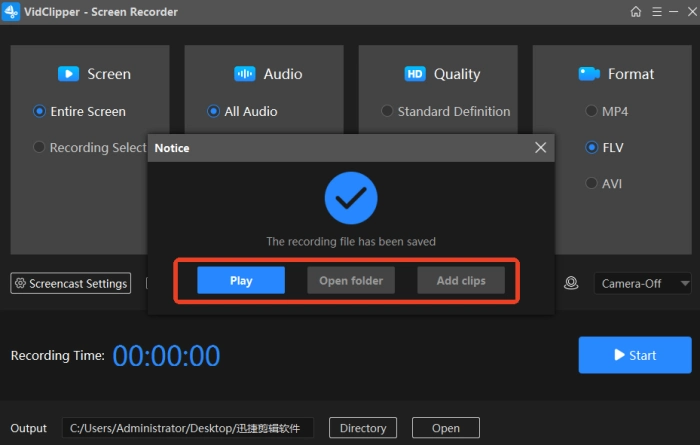
◾ The recorded file will save automatically. You can play it, open its folder, or add it as a clip.
🏅 Online-Video-Cutter
An online screen recorder that captures activities on your computer screen. It also features a built-in video editor for trimming, adding text, and adjusting volume, making your recordings more professional.
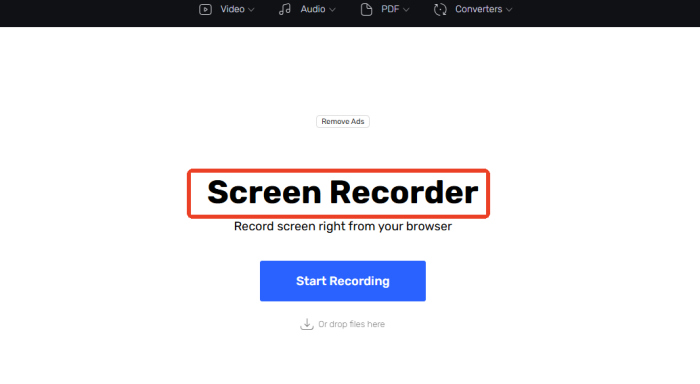
🔑Steps to Use Online-Video-Cutter:
◾ Search and open the website, then select “Screen Recorder” from the “Video” drop-down list.
◾ Click “Start Recording” on the redirected page to choose the recording area, including full screen or custom.
◾ A notification will appear in the upper right corner of the screen when the recording starts. The video will be automatically saved when you stop recording.
🏅 Loom
An online screen recording and sharing tool that works directly in mainstream browsers like Chrome and Firefox. It records your screen, webcam, and microphone sound, and allows you to share the content via a link.
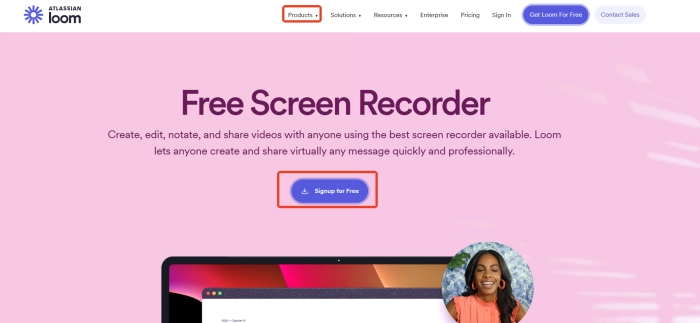
🔑Steps to Use Loom:
◾ Visit the official website, register or log in, and choose the recording mode (three presets available).
◾ Select the audio source and set the video quality and frame rate for better recording results.
◾ Click “Start Recording” and a share link will be generated automatically when you finish.
📢Screen Recording Tips
🔸 Choose the Right Recording Mode
| Select the appropriate recording mode for your content to save storage space and enhance video quality. |
🔸 Adjust Audio Settings
| Adjust the volume levels of your microphone and speakers to reduce noise or echo. Select whether to record system sound, microphone sound, or both, depending on your needs. |
🔸 Maintain Stability
| Ensure your recording remains stable to prevent shaking or jittering, as these can degrade the viewing experience. Use tools like tripods or phone stabilizers if necessary. |
🔸 Save and Backup
| Immediately save your recorded files and back them up to the cloud or other devices to avoid data loss due to device failure or accidental operations. |
🔔Common Issues and Solutions in Screen Recording
| 🎈Issues | 📍Solutions |
| Large Recording File Size | Reduce the video resolution and frame rate, use efficient encoding formats like H.265, or compress the file again with editing software to balance quality and file size. |
| Audio and Video Out of Sync | Check the settings of the recording software to ensure that the audio and video sampling rates are consistent. Update your sound card driver. Use professional software to manually adjust the audio and video delay parameters. |
| Recording Stuttering and Frame Dropping | Close background programs that are consuming resources, reduce the recording quality settings. Upgrade your hardware (such as graphics card, memory, etc.). Enable hardware-accelerated recording. |
| Incorrect Recording Area | Carefully preview and adjust the recording area before recording. Use shortcut keys to quickly switch between full screen and window modes. Some software offers custom grids to aid in positioning. |
✨Conclusion
This article has thoroughly explored the practical knowledge of screen recording,💡from planning the preparatory work, selecting recording tools, explaining the operational steps, and addressing common issues to reminding you of crucial considerations. Once you’ve mastered these, screen recording will no longer be a daunting challenge. 👍I wholeheartedly recommend WorkinTool RecWit. It boasts a user-friendly interface, is packed with diverse features, and is suitable for a wide range of scenarios, including teaching, gaming, meetings, and surveillance. Why not give it a shot and embark on your thrilling recording journey right now❕
Related Article
 Easy to Get Started! How to Turn on Screen Recording Screen Recording for Training | How to Do It on PC 2024
  How to Highlight Mouse Pointer in Screen Recording on PC