Illustrated Guide: How to Record Screen Video on Windows
🙋♀️Whether you want to make instructional videos, share games live, record software operation processes, or capture important meeting moments, screen recording can play an important role. 👀Windows system provides a variety of screen recording methods, including:
⭕ Using built-in tools: Xbox Game Bar, Chrome Developer Tools
⭕ Using third-party tools: WorkinTool RecWit, WorkinTool VidClipper
⭕ Using online tools: Recorder Online
This article will delve into how to screen record on Windows to help you master the art of screen recording easily.🧐
Illustrated Guide: How to Record Screen Video on Windows
How to Record Screen Video on Windows? 🧐Screen recording is a basic and useful skill in modern digital life. ⌛Whether you need to create instructional videos, record gameplay, save online meeting content, or for troubleshooting purposes, screen recording is a way to provide visual information.🚩For Windows users, we have a wide range of screen recording solutions. 👀Understanding how to use the software and selecting the appropriate tools are key to mastering screen recording techniques.

🔎Guided Tour
This article aims to provide you with a professional guide covering:
|
👀Below we will follow the types of tools, a detailed description of the advantages of each method, and the specific operating procedures.
1️⃣ Windows system built-in recording features
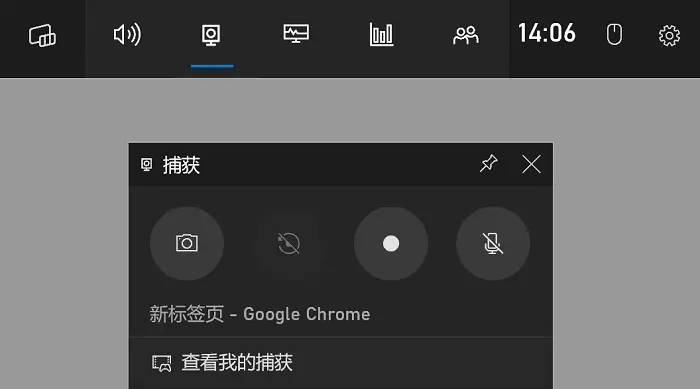
1.Xbox Game Bar
✨For many temporary or simple screen recording needs, the Xbox Game Bar that comes with Windows is sufficient.❕It is mainly used to record the current activities of the application window, the operation is extremely simple and fast.
📌Steps:
Step 1: Press Win + G to launch the Xbox Game Bar.
Step 2: Click the “Start Recording” button (round icon) on the Game Bar or press Win + Alt + R to start recording.
Step 3: Click the “Stop Recording” button (square icon) on the Game Bar, or press Win + Alt + R again to stop recording.
Step 4: The recorded video file is saved in the “Video \ Capture” folder by default.
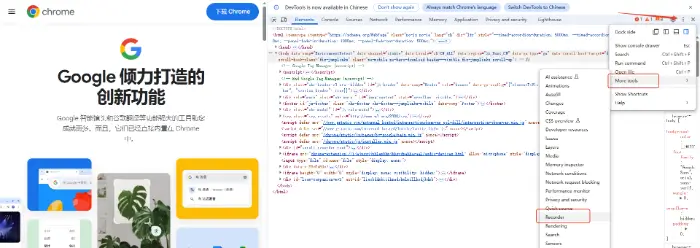
2.Chrome Developer Tools
✨Chrome’s developer tools also hide the screen recording function, no need to install additional recording software, and directly use the browser features. ⭕You can record the content of specific tabs, convenient for recording web page presentations or online videos.
📌Steps:
Step 1: Open Chrome, press F12, or right-click on the page and select “Check” to open Developer Tools.
Step 2: Click the three dots icon in the upper-right corner and select “More Tools – Capture Video“.
Step 3: Adjust the recording area and settings, click “Start Recording“, and then click “Stop” to save the video.
2️⃣ Powerful Third-Party Software
1.WorkinTool RecWit
✨WorkinTool RecWit is a professional screen recording software, that provides a variety of recording modes and advanced settings. ⌛It is powerful and supports various modes such as full-screen recording, regional recording, camera recording, and so on. 🙋♀️Meanwhile, it also provides rich customization settings, such as frame rate, bit rate, audio source, etc., to make the recording effect clear.

📌Operation Steps:
Step 1: Download and install WorkinTool RecWit on your device.

Step 2: In the main interface of the software, you can set the parameters related to screen recording. Such as recording mode, audio input, and screen quality logging, and choose according to your needs.
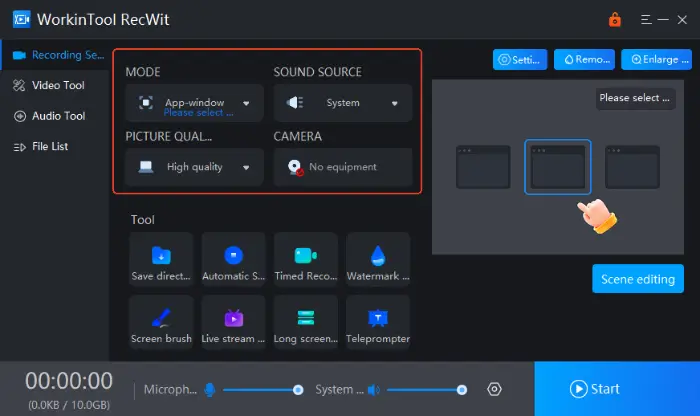
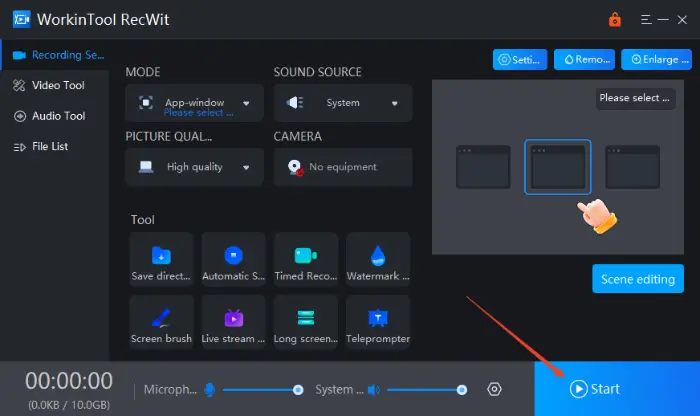
Step 3: After finishing the settings, click “Start” to start the screen recording.
Step 4: If you want to stop recording, click “End“, the software will automatically save the recorded content to the specified location.

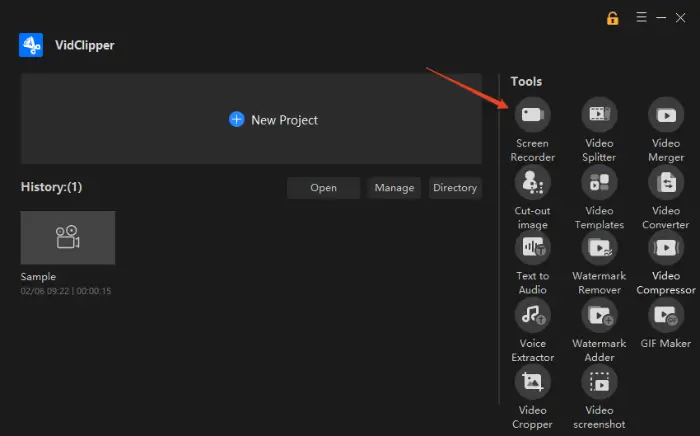
2.WorkinTool VidClipper
✨WorkinTool VidClipper is a powerful video editing software, which integrates screen recording and professional video editing functions together, especially suitable for users who need to record the screen for post-processing. 💡Of course, its screen recording function itself is quite complete, supporting multiple modes and settings.

📌Operation steps:
Step 1: Download and install VidClipper.
Step 2: Open the software, find the “screen recording” function in the main interface, and click to enter the screen recording module.
Step 3: After entering the screen recording interface, its operation interface and configuration options are similar to WorkinTool RecWit. You need to: select the recording area, configure the audio input, adjust the screen quality settings, and so on.
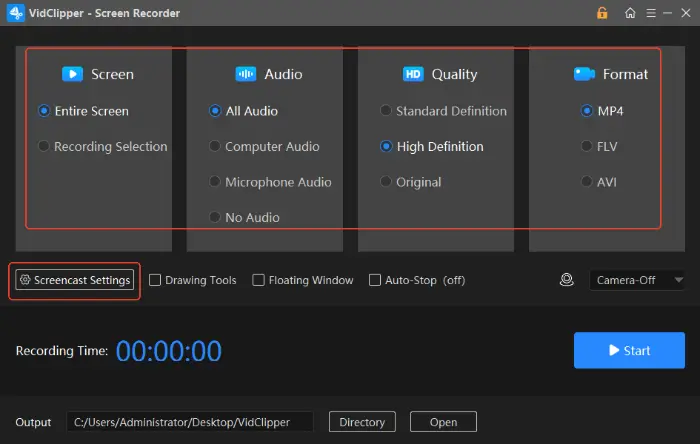
Step 4: When the settings are complete, click “Start” to start the screen recording.

3️⃣ No installation of online tools
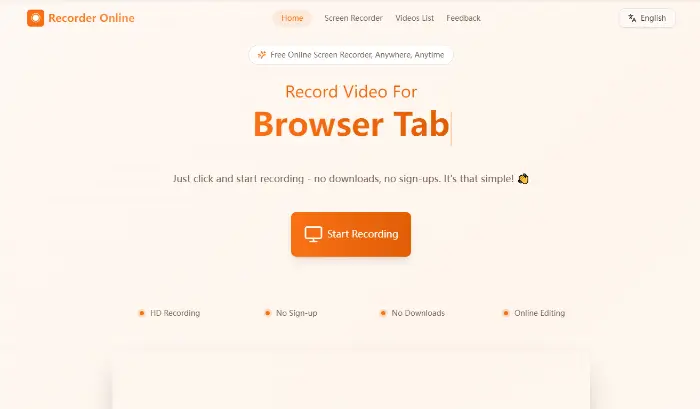
For users who don’t need to record screens frequently, don’t have high functionality requirements, or don’t have the convenience of installing software on public computers, online screen recording tools, such as Recorder Online, are a very convenient choice.🔮
✨With Recorder Online, users can record the screen directly in the browser, which is easy to operate.👀 After recording is complete, the video will be saved in the specified format on your local device for easy editing and sharing.🙋♀️
📌Operation Steps:
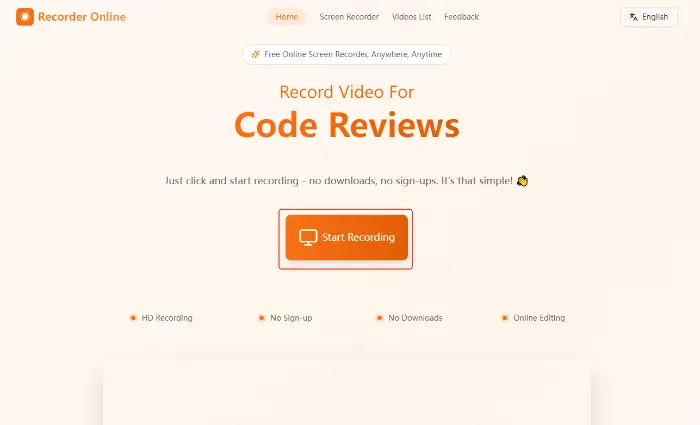
Step 1: Go to the online website, find and click the “Start Recording” button.
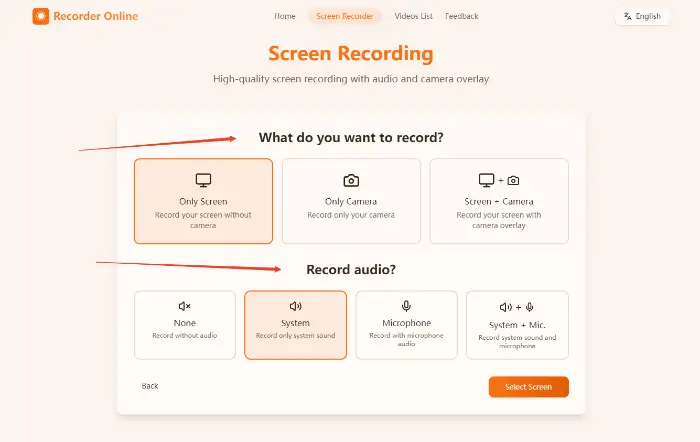
Step 2: In the recording interface, you can freely choose what you want to record and whether to record microphone sound and system sound.
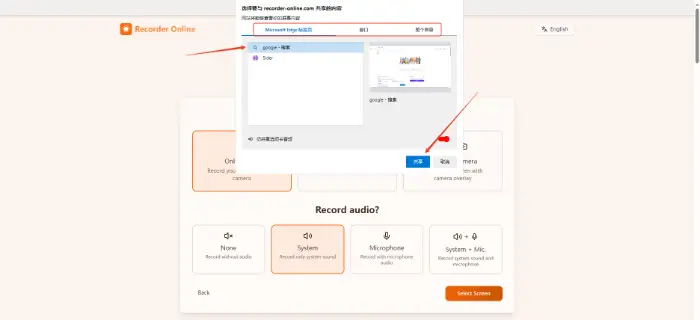
Step 3: After you finish the selection, a permission request window will pop up in your browser, select the window you want to share and click “Share“.
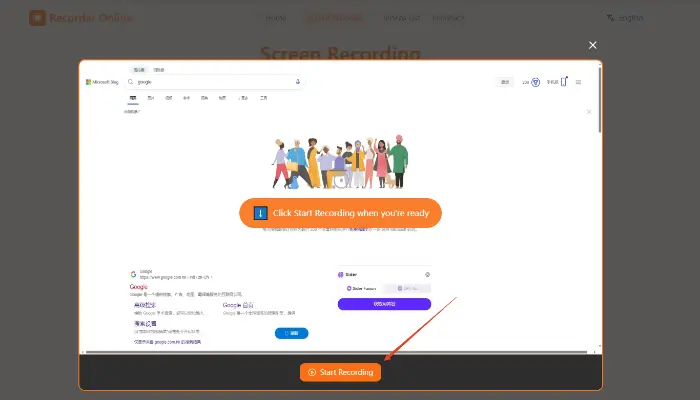
Step 4: Click “Start Recording“, after the countdown, the website will start recording.
🎯Useful Tips
When recording screen videos on Windows systems, there are a few things to keep in mind:
| 🔘 Stage | 🔘Precautions |
| ⭐ Before recording | Check the system configuration: Make sure there is enough hard disk space to store the recorded video files, especially for long recording sessions. |
| Close unnecessary programs: Close programs that may pop up notifications to avoid notification windows interfering with the recording content. | |
| ⭐During recording | Avoid frequent operations: During the recording process, try to avoid moving the mouse or switching windows as often as possible to avoid interfering with the recording content. |
| Pay attention to the recording area: If you choose to record in an area, make sure the size and position of the recording area are appropriate to avoid recording irrelevant content. | |
| ⭐After recording | Check the recorded content:After recording is complete, open the video file and check that the video content is complete. |
| Backup the recorded file: If the recorded video needs to be stored for a long time, it is recommended to make regular backups to ensure data security. |
📝Summarize
All of the tools introduced in this article can be used to meet your screen recording needs.⭐ By mastering these methods, keeping in mind the precautions before, during, and after recording, you can easily deal with the problem of “How to Record Screen Video on Windows” and efficiently complete the screen recording task.🥳
Related Article
 Quick Start Guide: How to Stop Screen Recording in Windows? How to Do Screen Recording: An Easy Guide WorkinTool Capture Screen Recorder Review: Screen Record Anything