[Shortcut] How to Take Partial Screenshot Windows
I am sure many of you have already known how to take a full-screen shot on Windows. But how about creating a partial screenshot Windows? Here in the post, we will give you a brief tutorial on how to get a partial screenshot on Windows, Chromebook, and Mac systems. One particularly useful tool is included, you can use it to capture any screen you want, and directly draw your notes on them. More importantly, it is 100% free of charge without limits or watermarks. So, don’t wait up and go to experience the magic yourself.
[Shortcut] How to Take Partial Screenshot Windows, Chromebook, and Mac System
Taking a screenshot of your computer screen is very basic practice when you are using the computer. Just like people used to take notes on handwritten papers back then, in today’s digital age, people are using computers more to work online. That is why people need to take a full screen or partial screenshot Windows or Mac. You can use the screenshot image to take notes, access information, and store more visual content than mere text.
Many of you may know the common way of using a keyboard shortcut to take a full computer screenshot. But what if you only want a certain part of the screen? Don’t worry, there are a great number of methods and hotkeys for you to solve the problem. Now, follow me and check out the best ways 2022 can take a full and partial screenshot of your Windows, Chromebook, and Mac systems.
How to Screenshot on Windows 10/11/8/7
If you want to capture a specific part of the screen on a Windows computer, we’ll give you the most convenient way to use a partial screenshot of Windows 10.
💖 Take a Screenshot from WorkinTool VidClipper
WorkinTool Video Editor – VidClipper is a third-party screen recording tool on the Windows system. Though as a video recorder, it also supports the screenshot function as well. You can use it to capture a full screenshot or take a partial screenshot of the content in JPG or BMP image format. If you want to create GIF content or want to make a GIF from a video, it is also available as well. Whether it’s a static screen capture or a live video clip, you can use WorkinTool to deliver a satisfying answer.
In addition to merely getting a screenshot, WorkinTool VidClipper also provides users with a built-in drawing on the screen while taking screenshots. You can directly process the screenshot without getting the second operation in the paintbox. More importantly, it is 100% free to use all the functions inside, no lies.
How to Take a Screenshot on Windows
1. Go install this freeware and launch the screencast function.
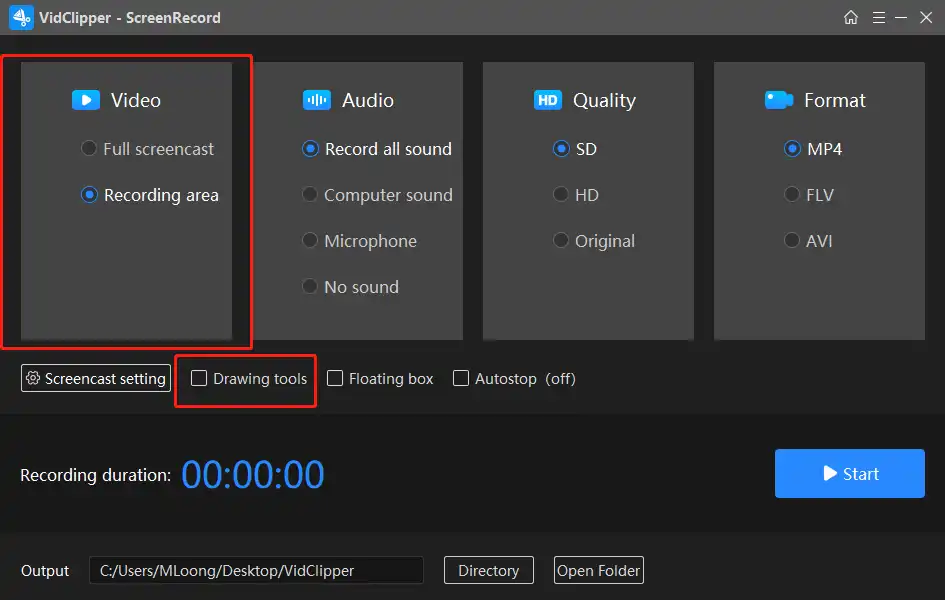
2. In the video section, go to select a full-screen mode or partial screen area. You need to select the drawing tools as well. If you want to take a screenshot of your computer, we will need this.
3. Then switch your computer to the screen you want to capture. Click the Start button.
Note: If you choose to capture a specific area of the screen, you will be asked to circle the area you want after you click the Start button. I was ready to take a partial screenshot of the Elden ring map of dungeons.
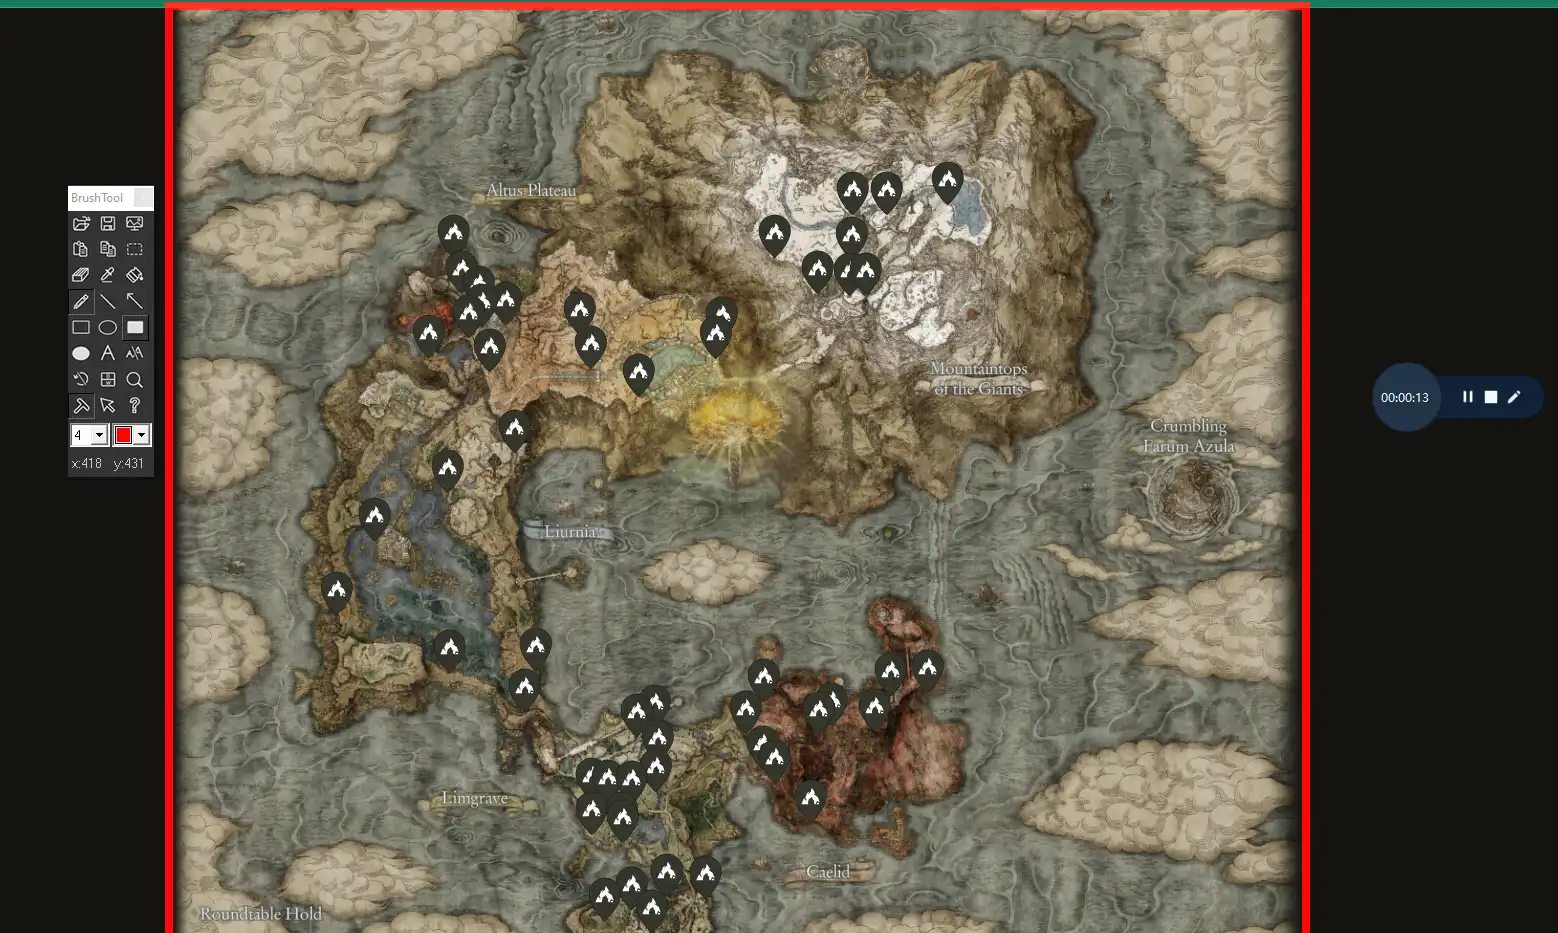 (Then dungeons on the Elden Ring map)
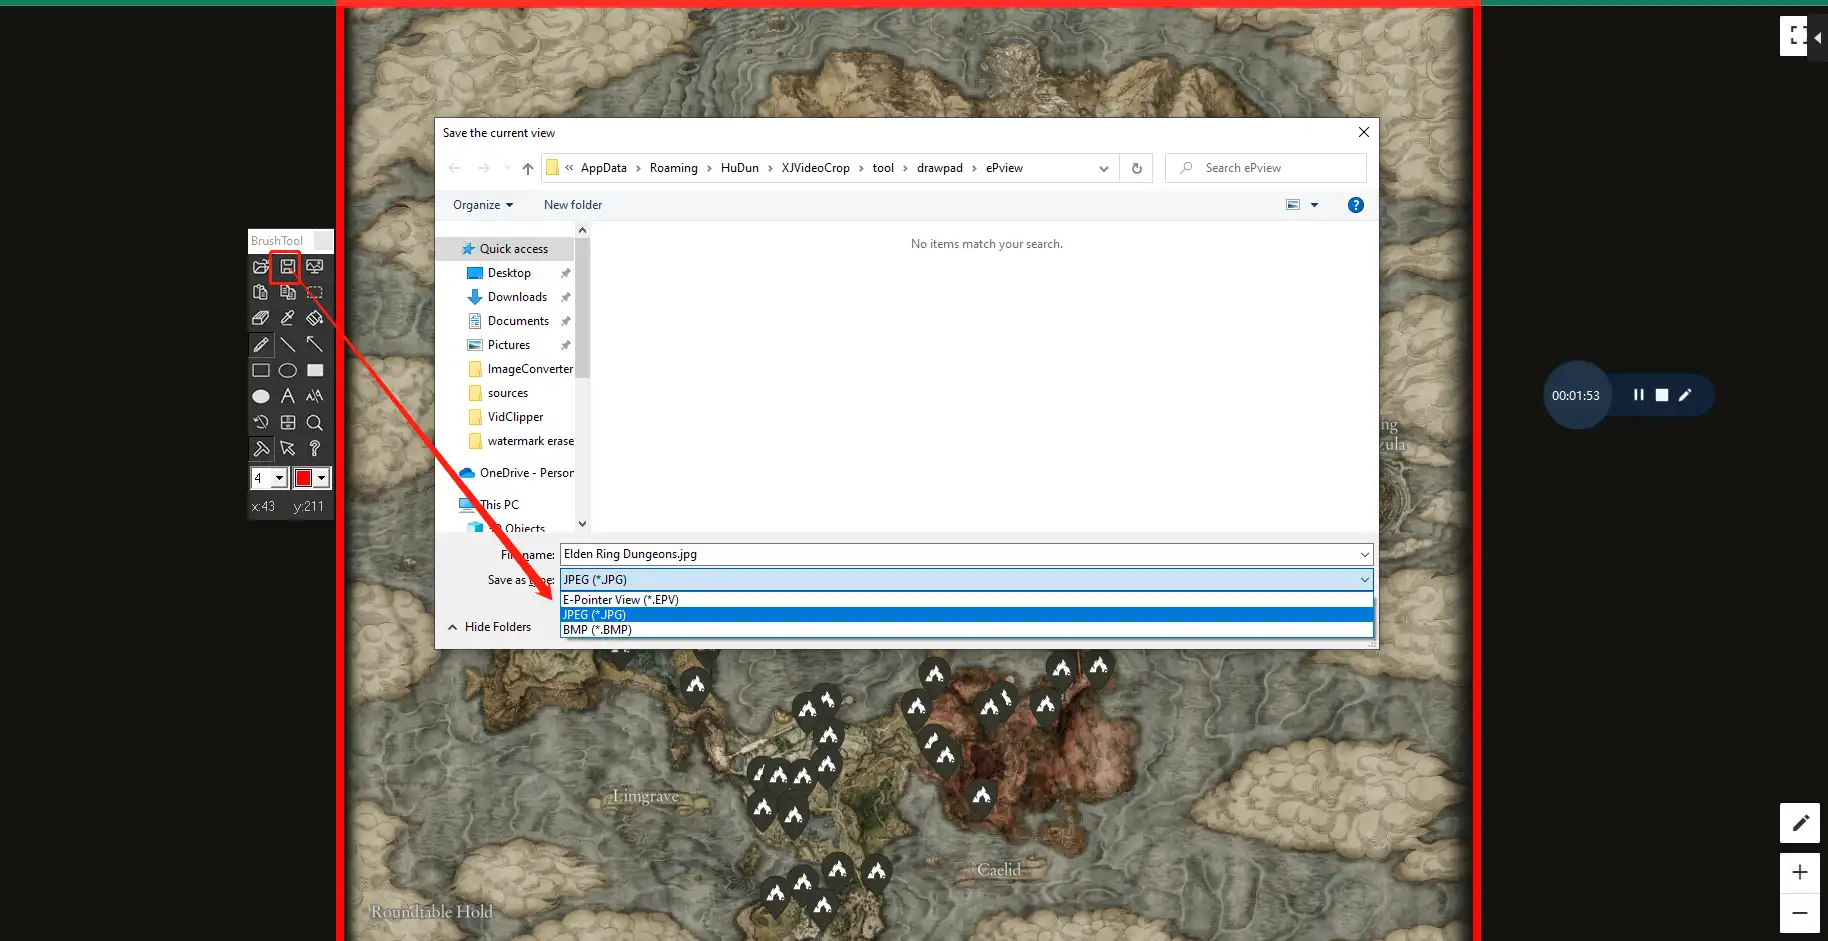
4. Lastly, click on the Save Pictures icon on the right drawing toolbar, and here you can alter the image name, format, and save location. Once it is done, you can check the screenshot on your computer.
📌 Take a Full or Partial Screenshot of Windows – Snipping Tool
Of course, you can also pick the default screen capture tool directly from Windows. Snipping Tool is a screen capture feature that comes with the Windows system. You can use it to get the information you need for the interface content.
Users can use the built-in screenshot tool in two ways.
How to use the Snipping Tool
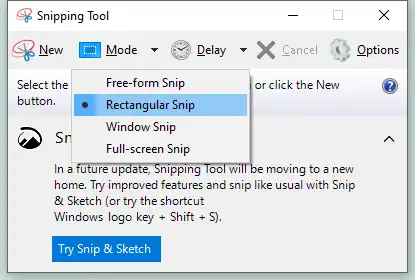
- There are four different modes for you to decide.
| Free-form snip | Customize the free-angle selection box for screenshots. |
|
Rectangular snip |
Create a screenshot selection box by dragging one of the corners of the rectangle. |
| Window snip | Directly select a window to snap a screenshot. |
| Full-screen snip | will take a full screenshot right away. |
- Click New to take the screenshot you want. Once you’re done, directly right-click your mouse and paste the screenshot picture to any folder or image processor you want.
2. You can also use the hotkeys on your keyboard to use the Snipping Tool.
| Windows 10/11 | Windows 8/8.1 | For Windows 7 |
| 1. Start > Snipping Tool > New.
2. Press Win + Shift + S. |
Swipe down from the right side of the screen, Search > Snipping Tool > New. | Start > Snipping Tool > New |
Snipping Tool Hotkeys
Capture full-screen image: Windows + PrtScn.
Take a partial screenshot: Windows +Shift + S.(According to the selected mode you choose. If you choose Window snip, this hotkey will help you capture an image of the computer window.)
How to Capture a Selective Screen Area on a Chromebook
With a Chromebook, it’s pretty easy to take a full-screen image or just a snapshot of a specific area. All completed screenshots will be stored centrally in your FILES document. There is no need for users to copy and paste a user-friendly direct view.
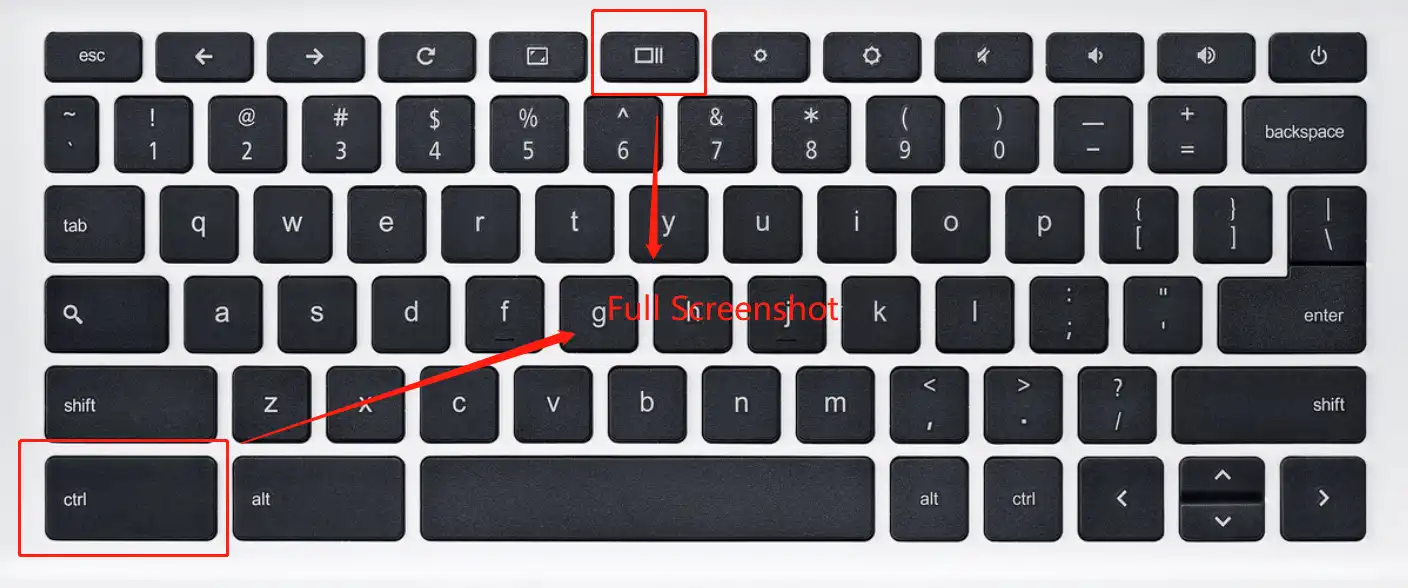
📸 Take a Full Screenshot of your Chromebook
Go to your keyboard, press Control (Ctrl) + the Shift Window Key.
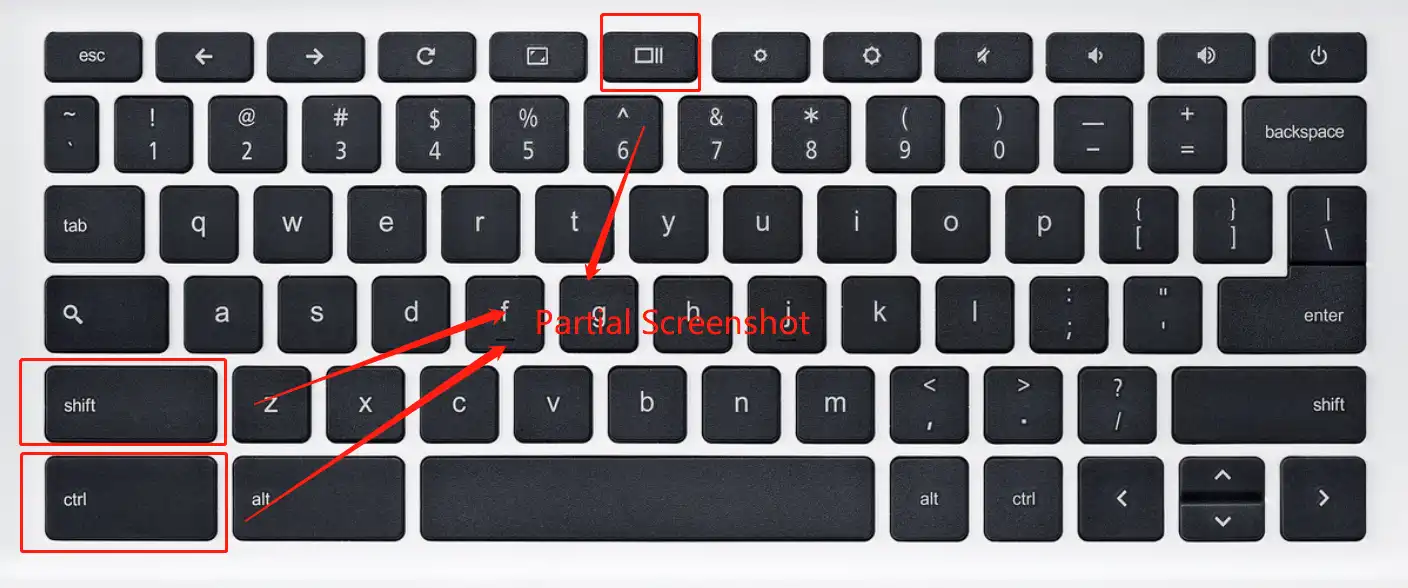
📸 Take a Partial Screenshot of your Chromebook
Press Control (Ctrl) + Shift + the Shift Window Key.
How to Take Partial Screenshots on a Mac System
Again, screenshots on your Mac are as easy as on your Chromebook. If there is no extra action, just use the hotkey combination on the keyboard to complete a satisfactory screenshot image.
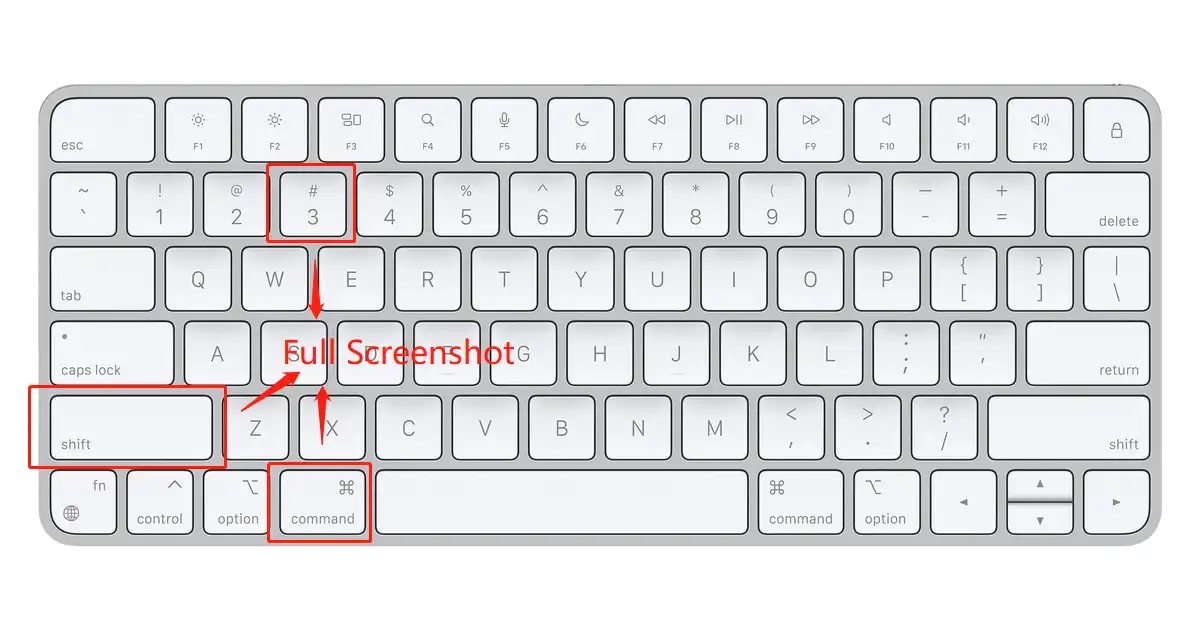
📷 Capture a Full Screen on Mac
Press Shift key + Command key + Number 3. The screenshot image will be saved on your desktop.
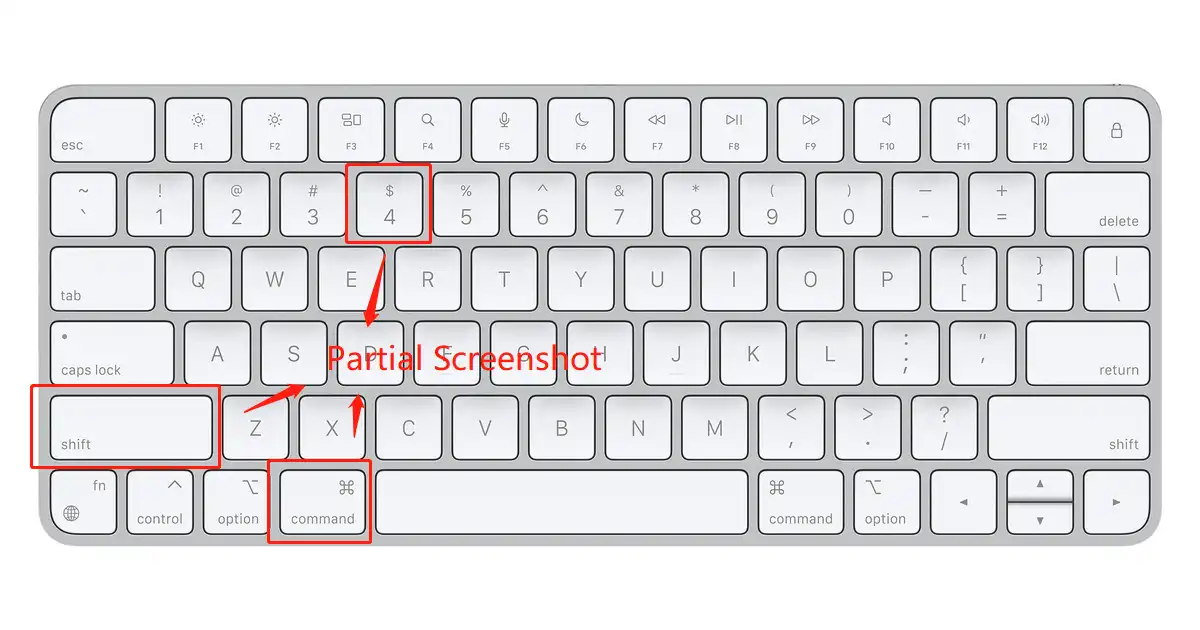
📷 Capture the Selective Screen Area on Mac
Press Shift key + Command key + Number 4.
Drag a selection box to form a rectangle to capture the screen. When you are dragging, hold the pressing keys and release your mouse or keyboard and the screenshot will be completed on your desktop immediately.
Conclusion
To sum up, we are here in this post providing you with four individual ways to help you with the problem of how to take a partial screenshot on Windows, Chromebook, and Mac. Each method has been tested by us and is guaranteed to be effective.
For Windows users, the default Snipping Tool is a very simple and easy-to-use method, if you don’t mind the image format. If you want to use more screenshots of your work, then the WorkinTool VidClipper is definitely something to try. Many video image functions, as well as the format conversion all in one. All features are free of charge with no restrictions or watermarks. It’s a treasure you don’t want to miss.