How to Add Overlays for Edits to Video Easily [2024 Tutorial]
Overlays for edits can add professionalism and clarity to your videos, making them an easy solution to elevate your final products. If you are going to add overlays for edits to a video, no matter for photos, animations, stickers, and textures, this article will present a wonderful way to help you achieve the effect you want. Therefore, don’t wait any longer, just read on to get more information!
Suppose you are a video editor, you must know that adding overlays for edits to video will elevate video quality to a very large extent. Meanwhile, The ready-made aesthetic overlays can shorten hours of work, instead of inching your way into editing videos and creating special effects.
If you are going to add overlays to a video, no matter for photos, animations, stickers, and textures, this article will present a wonderful way to help you achieve the effect you want. Therefore, don’t wait any longer, just read on to get more information!
Something About Overlays for Edits
📔What Are Overlays for Edits?
In photography, overlays are an image or texture that is added to a photo or video as an additional layer using an editing program.
It can be an animated object, like a dynamic sticker. It can be a video texture, such as a halo, frame, and filter. A still image also works, such as your selfie that is to be added on the top of a photo or video. When you use overlays for edits, you can choose your photo or video clip as an overlay, or you can use one of the predefined overlays.
📔What Overlays for Edits Are Used for?
Overlays are useful in a variety of scenes. For instance, whenever you want to create aesthetic effects, highlight persons or objects, or insert additional text as video captions, and so on.
Many people use overlays to achieve these effects:
- showcase the person who is speaking in a voiceover
- place the logo or stickers on the top of a video
- edit green screen videos
- merge two or more photos or videos on one screen
- add blur effects or lens flares to videos
- add masks over portions of a video
- Make PIP effect
These effects can add professionalism and clarity to your videos, making them an easy solution to elevate your final products. Whether you’re doing your work, posting on social, or simply growing your designing skills, adding appropriate video overlays for edits will wow your audiences.
How to Add Overlays for Edits to Video?
Adding overlays to edits may sound simple, but it also requires some skills, especially for beginners. There are so many excellent overlays editing software on the market, you may feel confused that which one can meet your requirements and is right for your skill level. But as long as you find the right software, all problems can be solved at your fingertips.
After we tested dozens of editing programs across the web to identify the best software for overlays, we strongly recommend WorkinTool VidClipper as your first choice.
Let’s see what effects can WorkinTool VidClipper make.
Note: We assume that you’ve already downloaded the WorkinTool VidClipper software and entered its project editing panel.
1. Photo/Video overlays📙
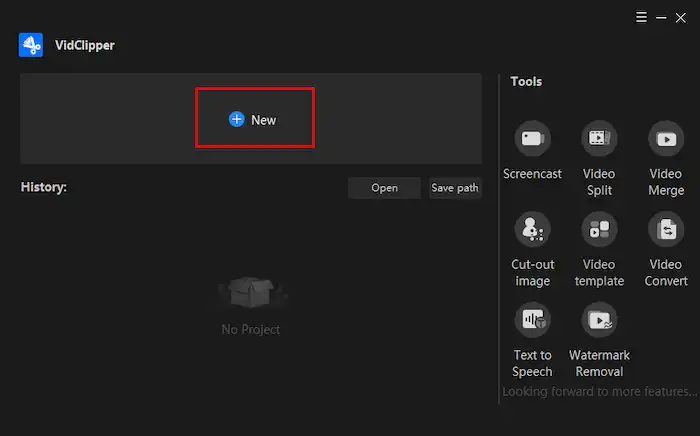
Firstly, open WorkinTool VidClipper and find “New”.
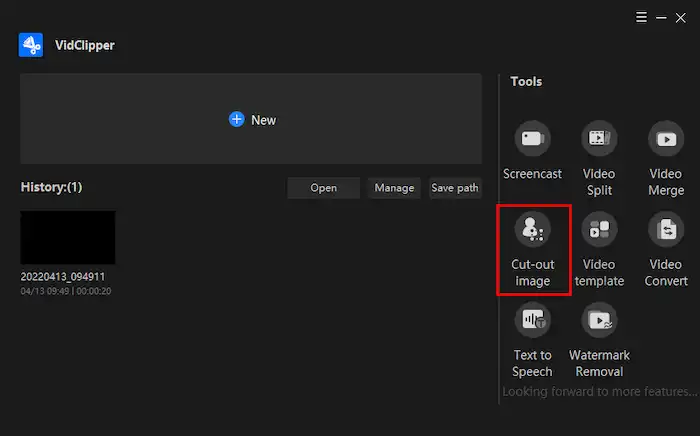
Secondly, add the images and videos you want them to show on the original video to sources.
Thirdly, drag them to the editing panel and adjust the playing time.

Notes: If you want to showcase the person who is speaking in a voiceover, the Cut-Out Image feature works. You just need to add a cut-out image or video and choose or add a background for it. It’s up to you.
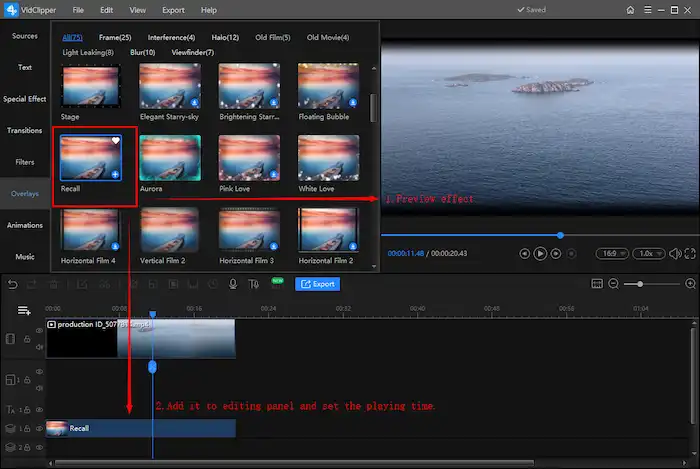
2. Texture overlays📙
Firstly, find “Overlays” on the left toolbar, and choose an overlay you want.
Secondly, add an overlay to the editing panel and set the playing time.
3. Animations/Stickers overlays📙
Firstly, find “Animations” on the left toolbar, and click animation to preview.
Secondly, add an animation to the editing panel and set the playing time.
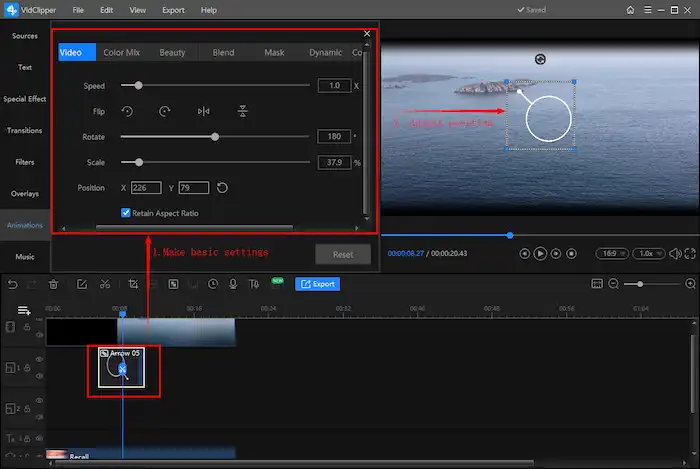
Notes: You can make basic settings in the upper toolbox by clicking the animation or overlay you added. Your work will be automatically saved during editing, so don’t worry about data loss.
Finally, after making all the adjustments, click “Export” and find your video in the selected path.
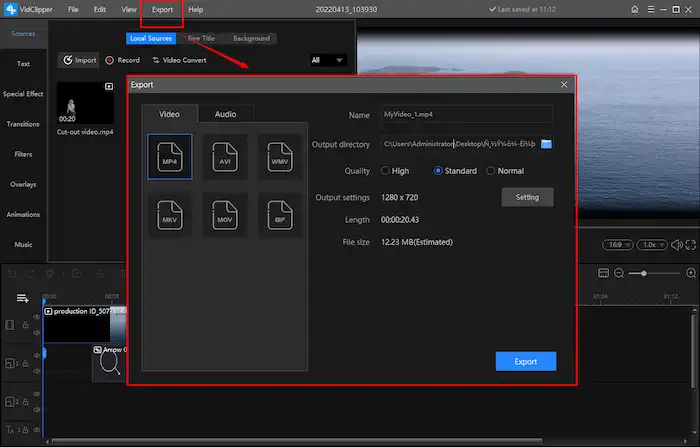
Tips: The output formats include MP4, AVI, WMV, MKV, MOV, and GIF now.
More Tips About WorkinTool
📌What is WorkinTool VidClipper?
WorkinTool VidClipper is a powerful and FREE video editor designed to solve nearly all your problems concerning video editing. There are multiple editing templates for you to export a creative video like overlays, filters, transitions, elements, and audio tracks. Also, it allows you to create a professional video through its post-production functions, including video cropping, background removal, color adjustment, audio modification, and more.
Besides, it is also a video converter, text-to-audio converter, video watermark remover, screen recorder, video splitter, video merger, and so on. Much as there are so many practical features in this tool, its designers still strive to make it lightweight and simple for beginners.
In addition to basic video editing (overlays for edits adding, video trimming, color transformation, and audio adjustment), WorkinTool VidClipper provides you with multiple features to customize your videos.
-
- Add subtitles to a video
- Reverse a video
- Combine a video
- Convert a video
- Add music to a video
- Transcribe text to audio
Therefore, you can make your videos conspicuous and gripping with the practical functions. Furthermore, your video project will be saved in the tool, and it can be retrievable at any time. More importantly, WorkinTool VidClipper is entirely FREE for users currently. Hence, all its features are accessible without a license payment and compulsory registration.
📌Why Should You Choose WorkinTool VidClipper?
💡No Registration:
You have permission to all the features of WorkinTool VidClipper without personal registration or signup.
💡Lightweight and Simple:
WorkinTool is lightweight enough to take up little PC space. Also, with an easy-to-use interface with clear guides on some of its feature pages, even beginners will find it simple and convenient to use.
💡Practical Features:
Your videos are easily and instantly customizable through our various editing features, including 100+ stylish texts, 60+ filters, 300+ transitions, 70+ overlay effects, 200+ elements, and 600+ sound effects.
💡High-Quality Guarantee:
Your finished work via WorkinTool VidClipper will be exported without losing quality. Meanwhile, you can set resolution and bitrates as you want.
💡Green Without Ads and Intrusive Watermark:
There will be no advertisements in the course of your video editing and no intrusive watermark added to the outcomes.
Summing up
WorkinTool VidClipper is an excellent choice for beginners, professionals, and everyone in between. Try WorkinTool VidClipper today to experience this program’s incredible range of tools and features firsthand. Now, go make your videos come alive with unforgettable overlays!