How to Add Subtitles to a YouTube Video | 4 Ways Windows
In this article, we will discuss how to add subtitles to a YouTube video for FREE. We have divided the theme into two topics:
🎯How to Add Subtitles to a YouTube Video Before Its Uploading–3 Ways (a third-party tool-WorkinTool VidClipper, a built-in program–Video Editor and an online tool–Clideo)
🎯How to Add Subtitles to a YouTube Video After Its Uploading-YouTube Studio
You will understand the useful tools and their guides for realizing these goals. However, it is strongly advisable to try WorkinTool VidClipper since it is simple, convenient, powerful and FREE without output watermark. Please read on to find out the specific information.
How to Add Subtitles to a YouTube Video on Windows | 4 Ways in 2024
Video is now playing an increasingly important role with the advent of YouTube. Therefore, people are making use of YouTube videos to fulfill their different objectives, such as idea expression, product promotion and digital marketing. In order to make the content fully understood, it would be better to use subtitles or captions to help the audience catch on. So inserting subtitles into YouTube videos is a critical skill presently. Today, we will discuss how to add subtitles to a YouTube video.
Why Need You Add Subtitles to a YouTube Video?
As mentioned above, YouTube has become a “battlefield” for individuals and enterprises. The main purposes of uploading a video are to share a person’s ideas, promote a company’s image or undertake a video marketing strategy. Therefore, it is incredibly significant that the main contents of your videos are properly transmitted and comprehended. Obviously, subtitles or captions will be an easy solution to this problem.
Also, suppose the content in your video is presented in a foreign language. In that case, it is necessary to create subtitles in a universal language like English on your video for global users to understand it. Hence, the ability to add subtitles to a YouTube video is pretty essential nowadays.
In this article, we will discuss this theme with the following topics:
Please read on to find out the specific information.
How to Add Subtitles to a YouTube Video Before Its Uploading
There are many methods of generating subtitles or captions on a video before its uploading on Windows. This chapter will introduce you to three ways to embed subtitles into a video.
1️⃣How to Add Subtitles to a Video for YouTube with a Third-Party Tool?
using a handy tool will definitely be the easiest way to realize this goal. Since the options vary in the market, which one should you choose? Well, here, we would like to introduce you to a practical video editor–WorkinTool VidClipper.
✅WorkinTool VidClipper
WorkinTool VidClipper is a powerful video editor designed to solve nearly all your problems concerning video editing. Besides, as a super multi-functional tool, you can enjoy a smooth all-in-one editing experience, including:
Therefore, it saves you the trouble of finding and installing each individually. Furthermore, VidClipper boasts a simple and clear interface, which will facilitate users. Much as there are so many features in this tool, its designers still strive to make it simple and convenient for beginners. For professionals, they can rely on VidClipper’s editing console to create professional-looking or movie-like videos with the help of the features.
In addition to basic video editing (video trimming, color correction and audio adjustment), WorkinTool VidClipper provides you with multiple features to customize your videos. When it comes to subtitle insertion, you can determine the duration of each subtitle and its style. Therefore, you can make your videos conspicuous and gripping with the unique subtitles you set. Furthermore, your video project will be saved in the tool and can be retrievable at any time. More reasons for choosing WorkinTool VidCliper are listed here:
|
💡How to Use WorkinTool VidClipper?
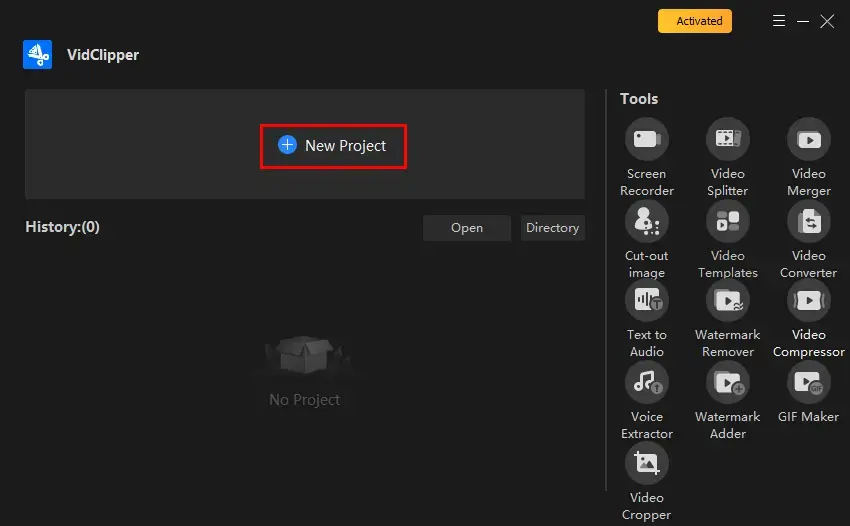
Step 1. Open VidClipper and then click +New Project to activate its editing console.
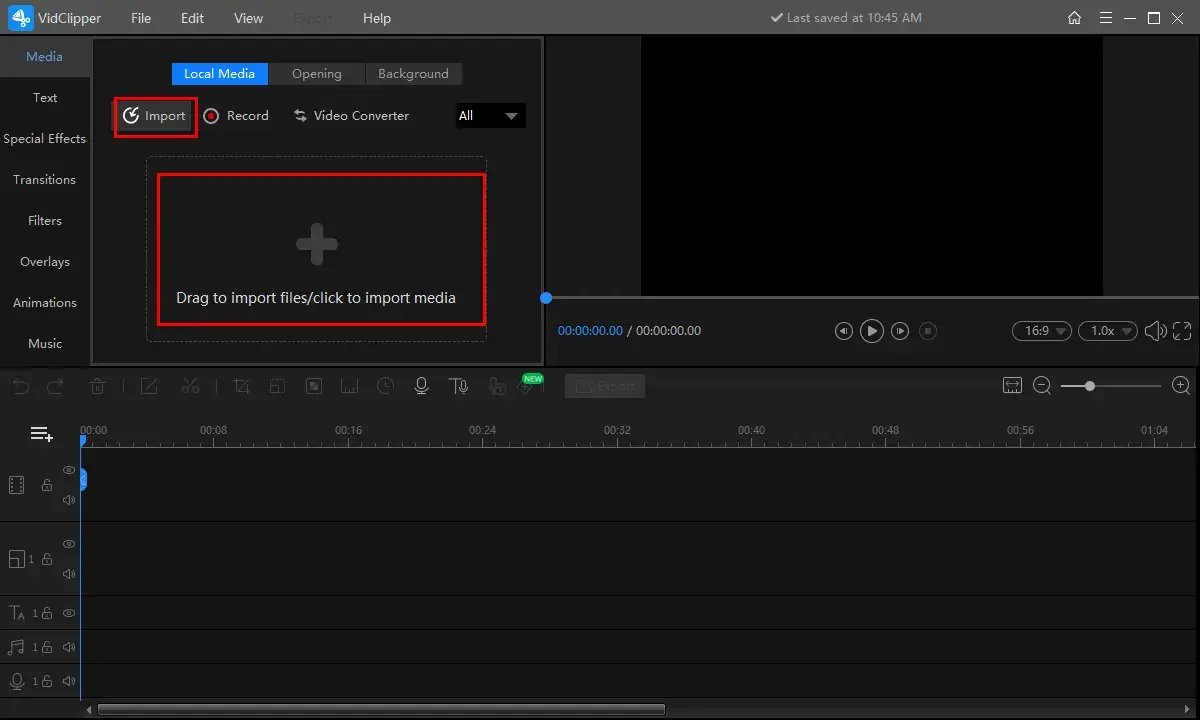
Step 2. Hit Import to upload your video or drag it to the + area to fulfill this purpose.
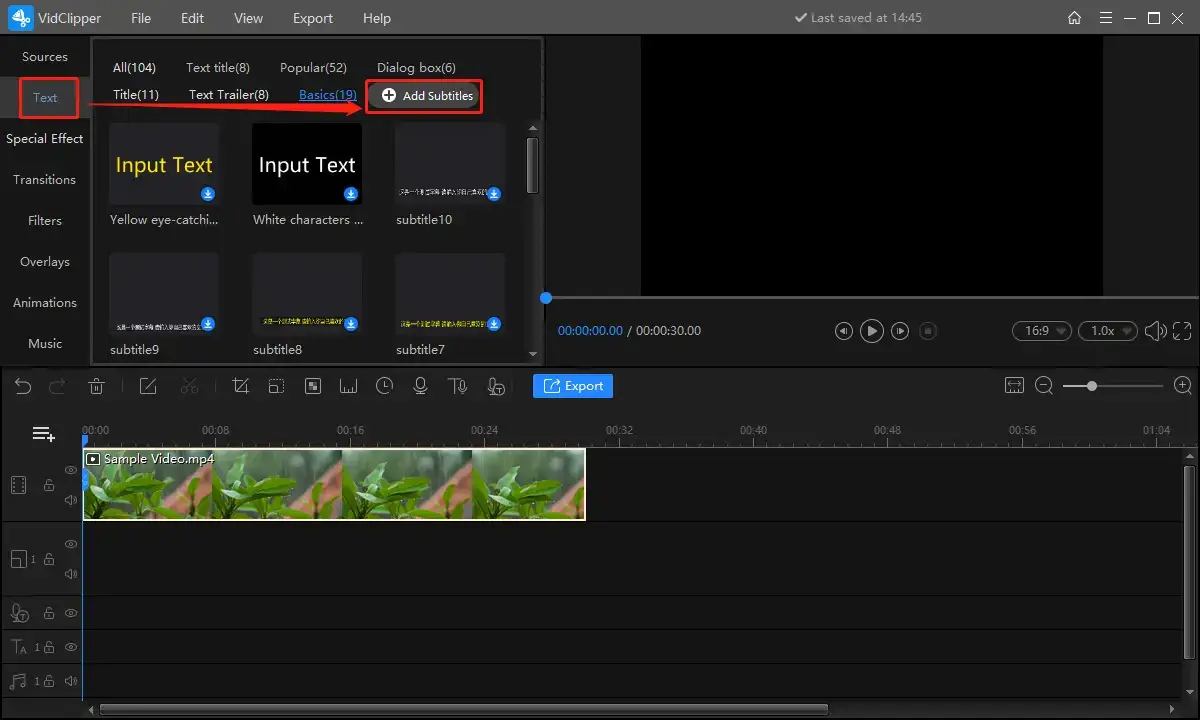
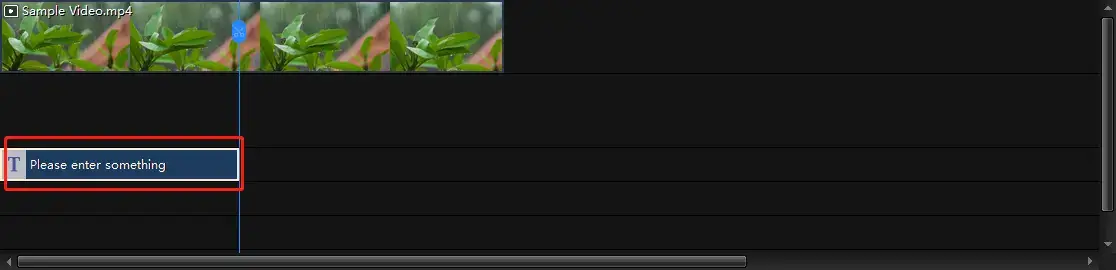
3. Drag the imported video to the timeline below and then find Text > Add Subtitles.
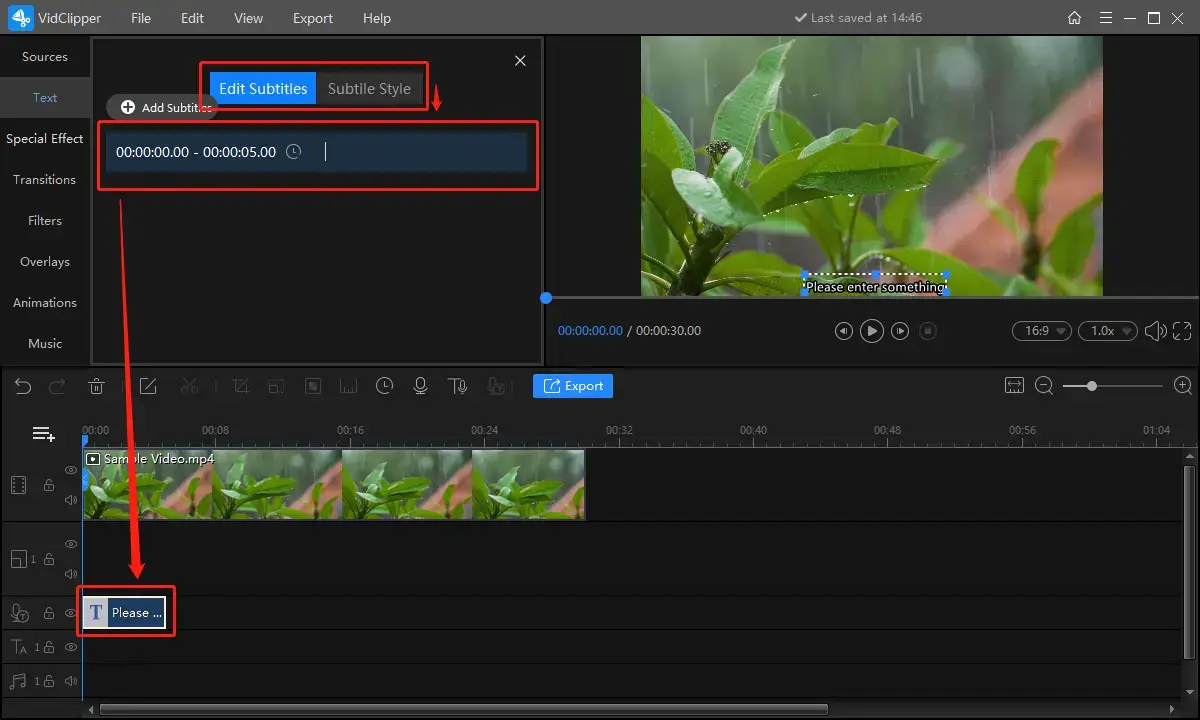
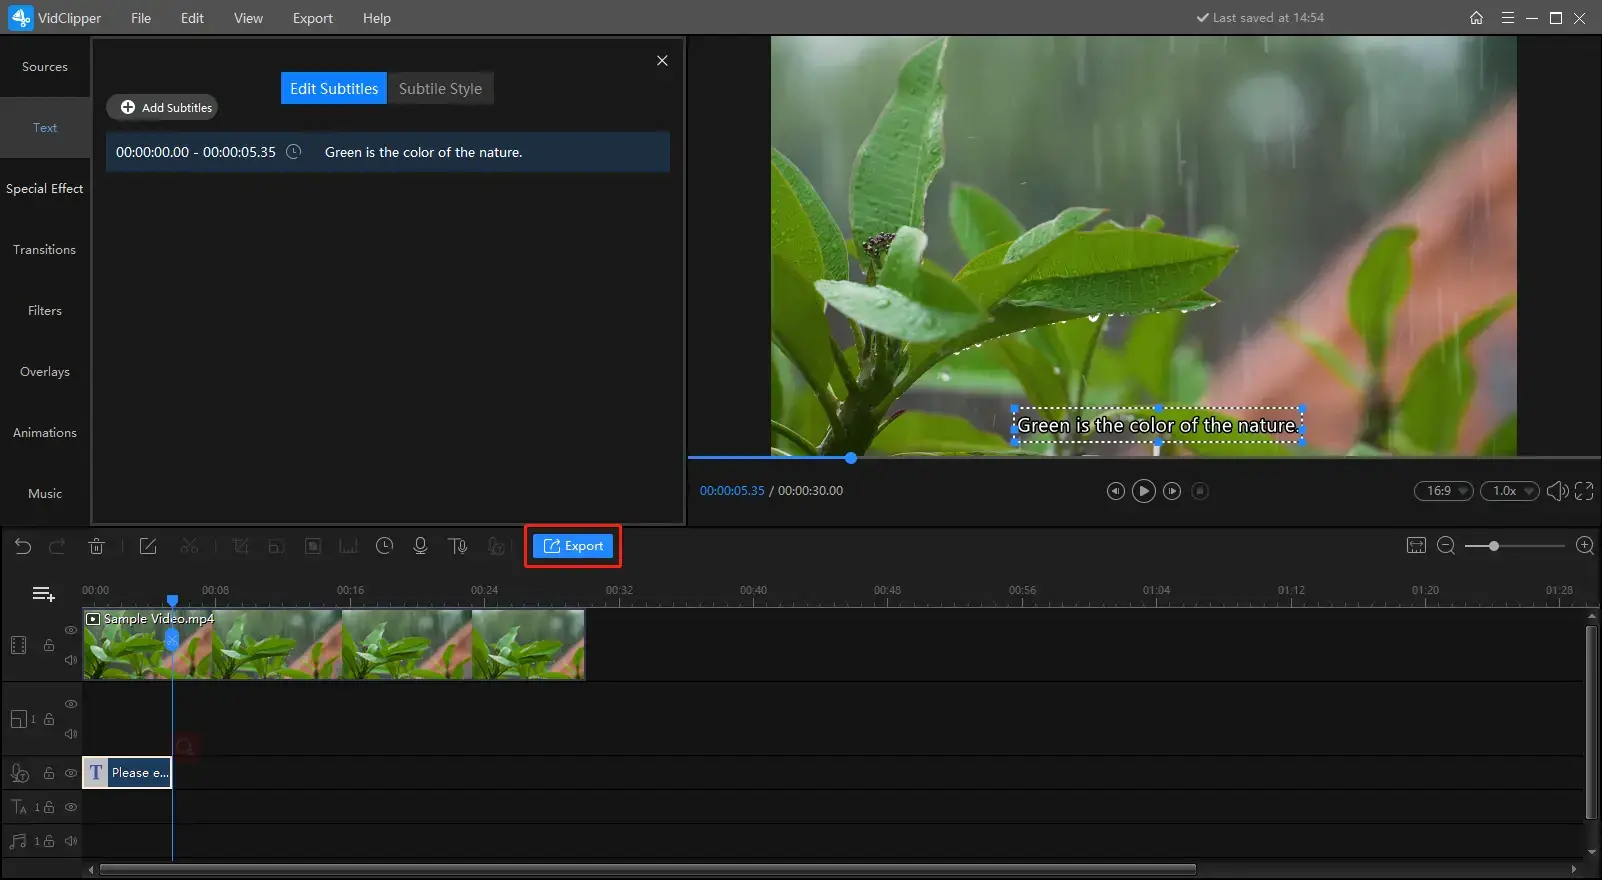
 4. Enter your subtitles and customize them through all the adjustment features.
 5. Then cllick Export to get your subtitle-added videos.
6. Choose the export format, adjust the settings, decide on the directory and then press Export.
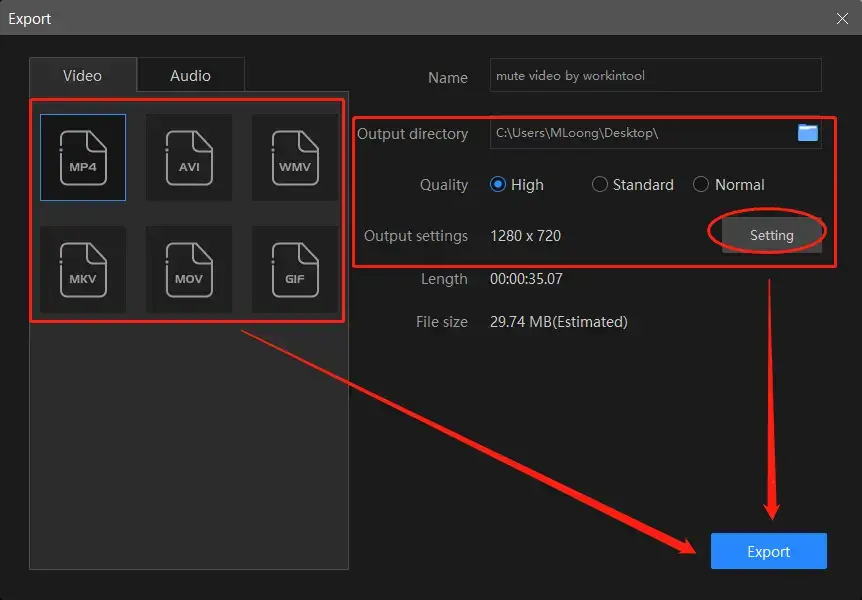
- Video Formats: Six formats are optional based on your needs: MP4, AVI, WMV, MKV, MOV and GIF.
- Video Quality: Three standards are available, including High, Standard and Normal.
- Output Settings: Further video parameters can be adjusted to export a more custom video, such as video resolution and audio bitrate.
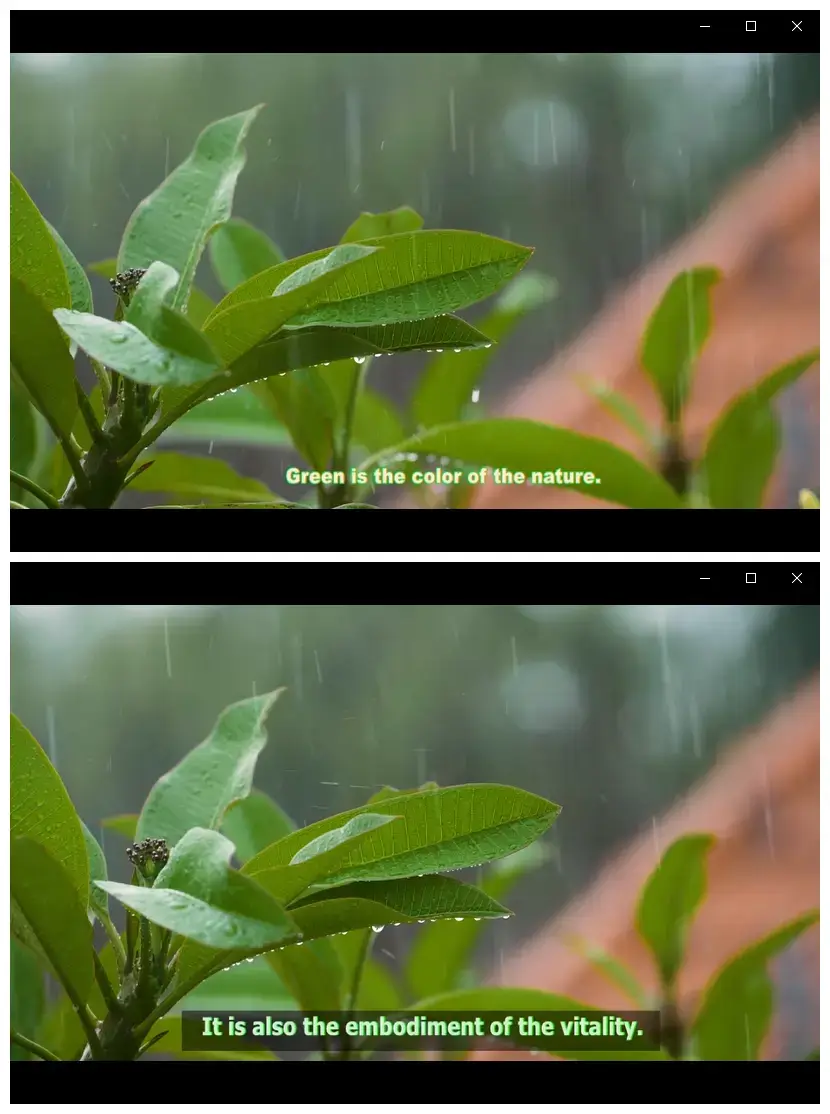
Here are the results.
📢Notes:
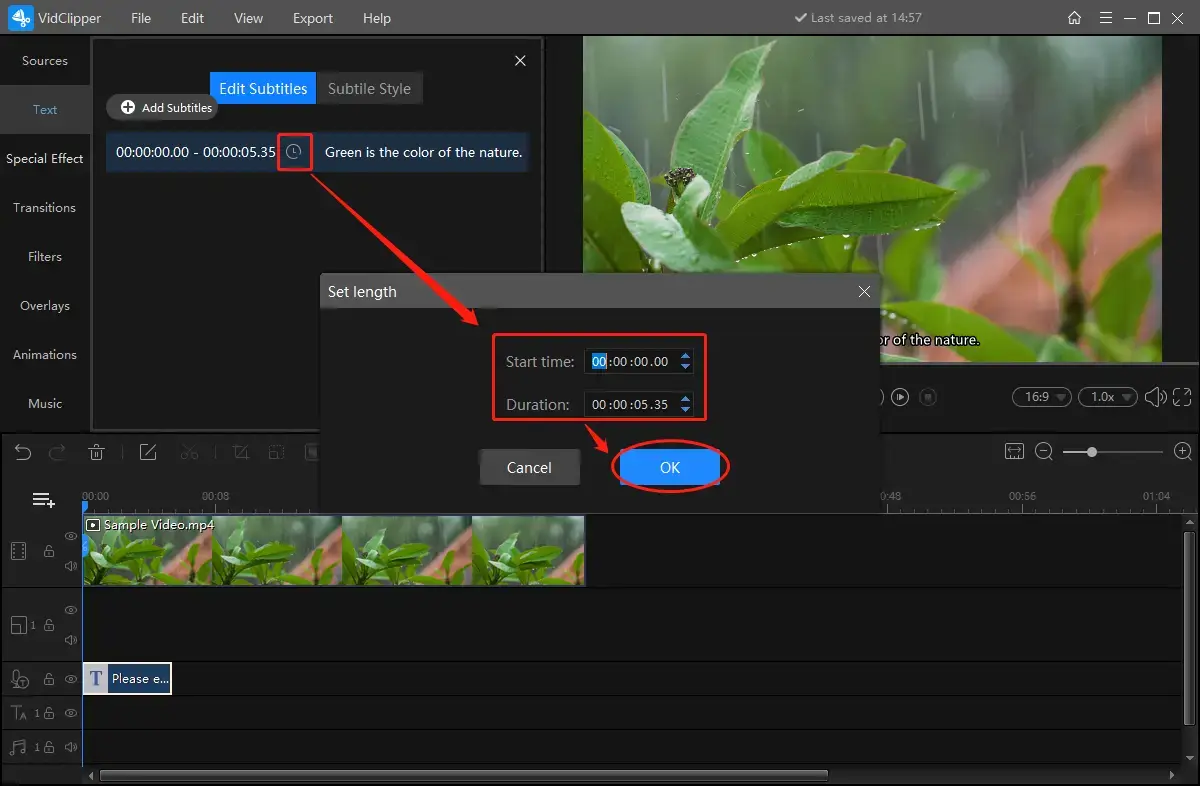
1). The duration of your subtitles is totally adjustable and there are two ways:
🔑Click the clock-like icon and then change the start time and duration in the new window.
🔑Drag the progress bar starting with T to determine the final subtitle duration.
2). You can customize the subtitles with the help of the feature–Subtitle Style. You make the following alterations:
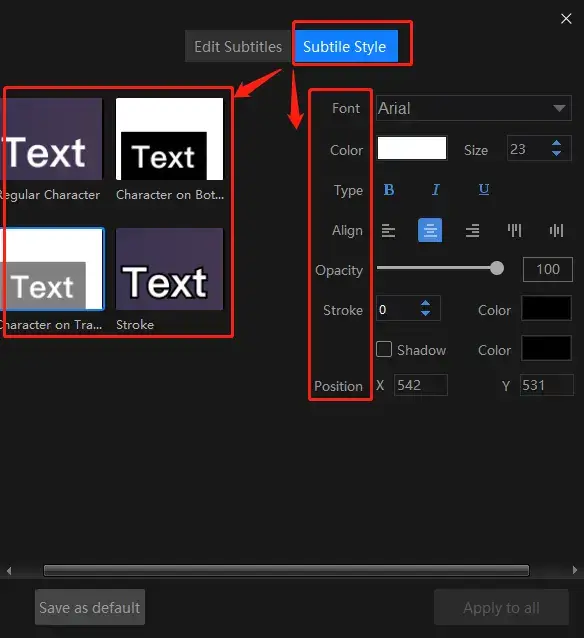
- Subtitle Background: Four background styles are addable to your subtitles: plain background, black background, gray background and stroke.
- Font, Color, Size and Type: You make these changes to export outstanding subtitles. Type refers to bold, italics and underline.
- Align: The presenting direction of your subtitles are changeable through this feature, such as horizontal and vertical.
- Transparency: You can deice how transparent your subtitles should be
- Stroke: The edge of your subtitles will be made bold and its color can be adjustable.
- Shadow: You can “decorate” your subtitles with shadow and its color is entirely up to you to decide.
- Position: It is alterable by either adjusting the X and Y parameters or dragging your subtitle box directly in the video.
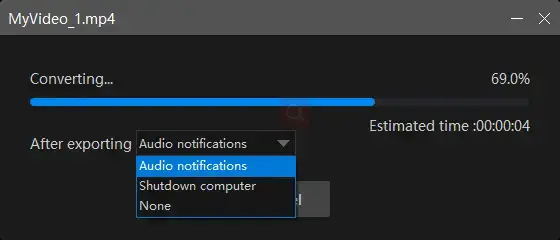
3). You can customize the notification settings during the output export; for example, a ringtone reminder, PC shut down and no further operation.
📝More About WorkinTool VidClipper
📌Can I edit my subtitle-inserted video further with WorkinTool VidClipper?
Of course. You can rely on WorkinTool VidCliper to edit your video like a pro, such as
Therefore, you can make your videos conspicuous and gripping with the unique subtitles you set. Furthermore, your video project will be saved in the tool and can be retrievable at any time.
2️⃣How to Insert Subtitles into a Video for YouTube Without a Third-Party Tool?
Is it possible to include subtitles on a video for YouTube with a built-in program on Windows? Well, yes. If your operating system has undergone a complete updation, becoming Windows 10 or higher, then you will have a more powerful version of Microsoft Photos.
✅Video Editor (Microsoft Photos)
On top of its ability to view photos and play videos, Photos boasts useful video editing feaures, such as text insertion and filter addition. Hence, when you feel like resorting to a pre-installed tool on Windows only, you can trust the Video Editor equipped in Photos. However, if you are a frequent video sharer online or a professional video content creator, this approach may be unsuitable for you.
💡How to Use Video Editor (Microsoft Photos)?
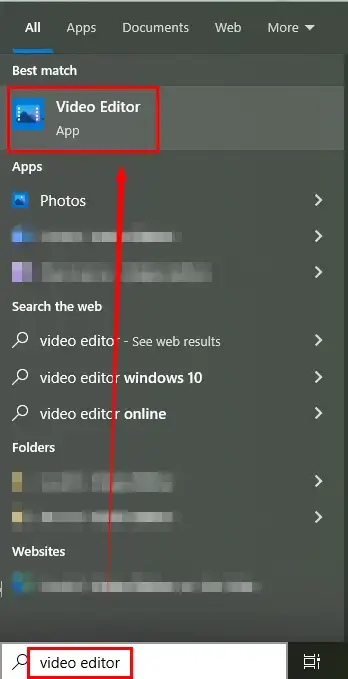
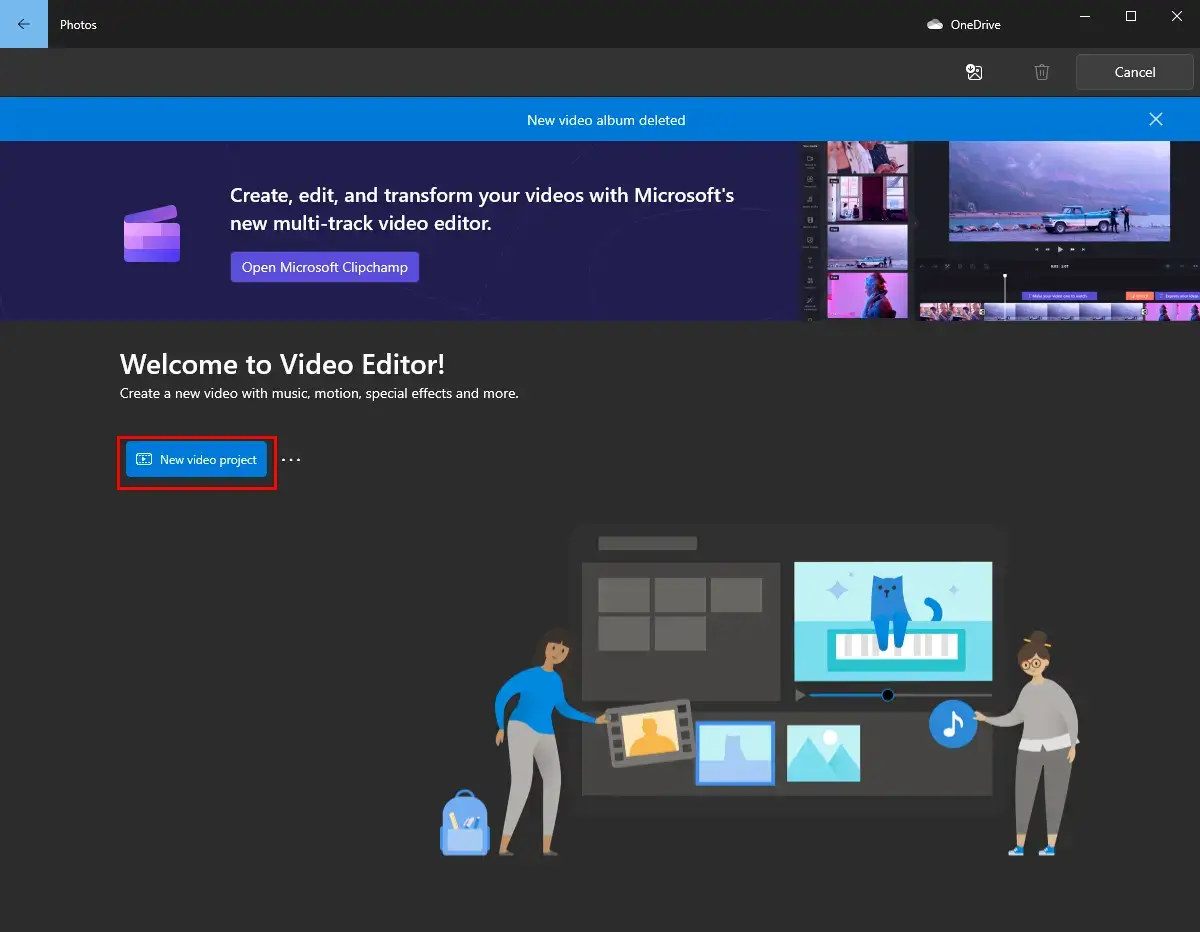
Step 1. Launch Video Editor by typing the same words in the search column beside the Win icon.
Step 2. Click New video project and then add a name to it if you want to.
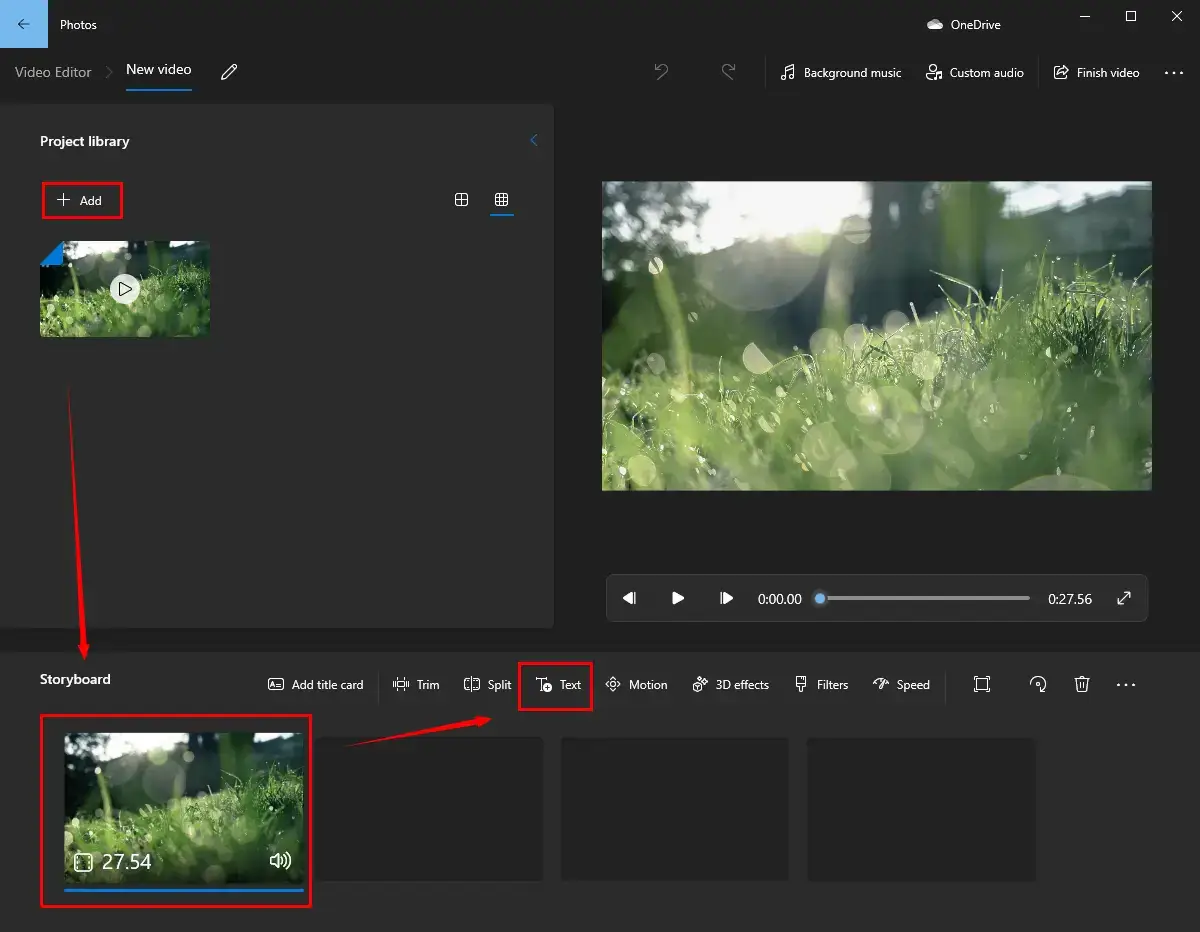
Step 3. Hit +Add to import your clip, drag it to the area below Storyboard and then click Text.
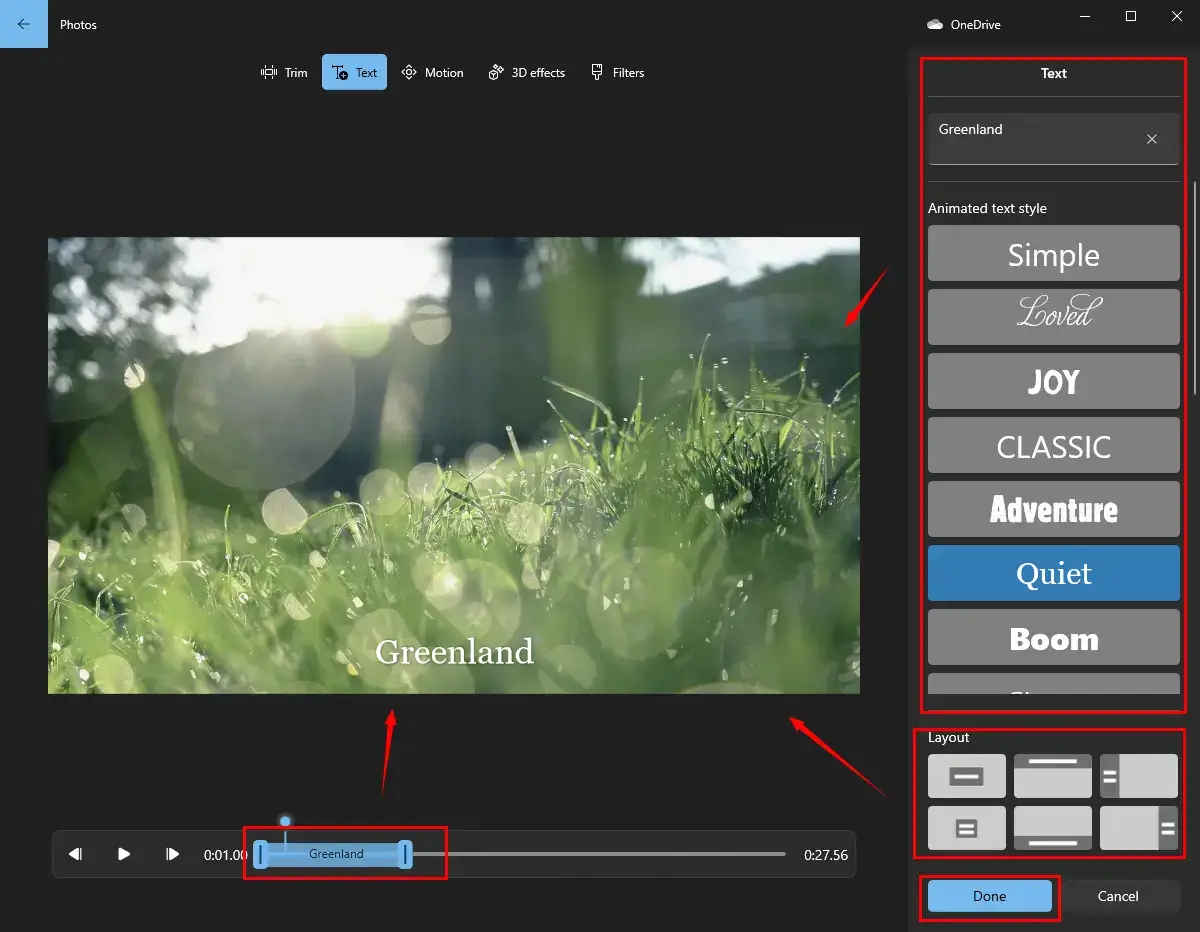
Step 4. Type your subtitles inside the Text column, select a style and layout and then drag the blue progress bar to decide on the subtitle duration.
Step 5. Then press Done.
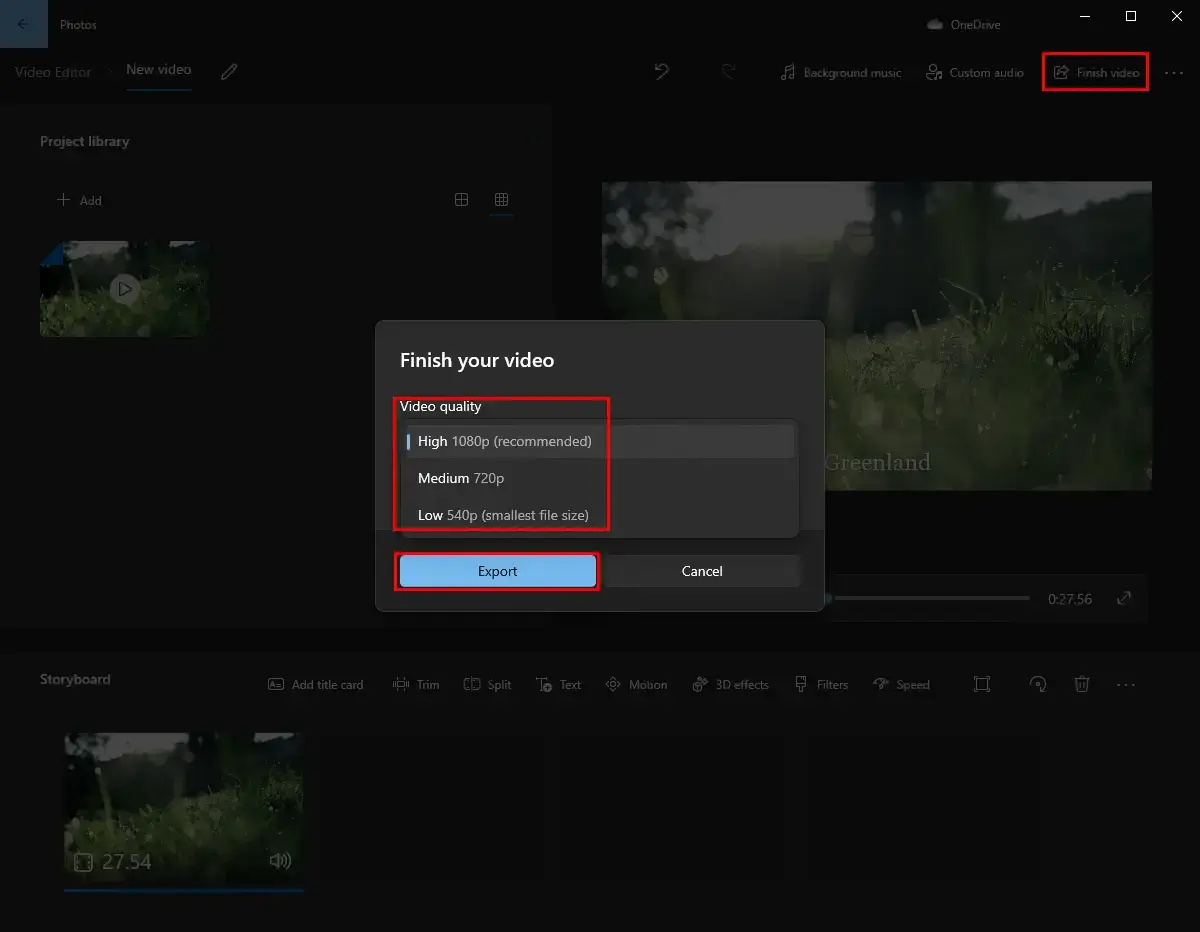
Step 6. Click Finish video, choose the video quality and then hit Export.
3️⃣How to Embed Subtitles into a Video for YouTube Online?
Intend to put subtitles into a video for YouTube without any software? That is also possible when you rely on an effective and free video editor online. To save your time, we will present you with a widely-recognized online tool–Clideo.
✅Clideo
Clideo is a globally renowned online solution to video editing. It is reputed for a variety of practical tools like video cutter, merger, looper and certainly subtitle adder. With its remarkable subtitle insertion tool, you can easily embed subtitles into your clip. Besides, it supports manual text and .srt files insertion. Moreover, Clideo can save your manually-typed subtitles as a .srt file. However, limitations apply to its free version, such as storage number limit and output watermark. You need to upgrade to a pro verison so as to remove them.
💡How to Use Clideo?
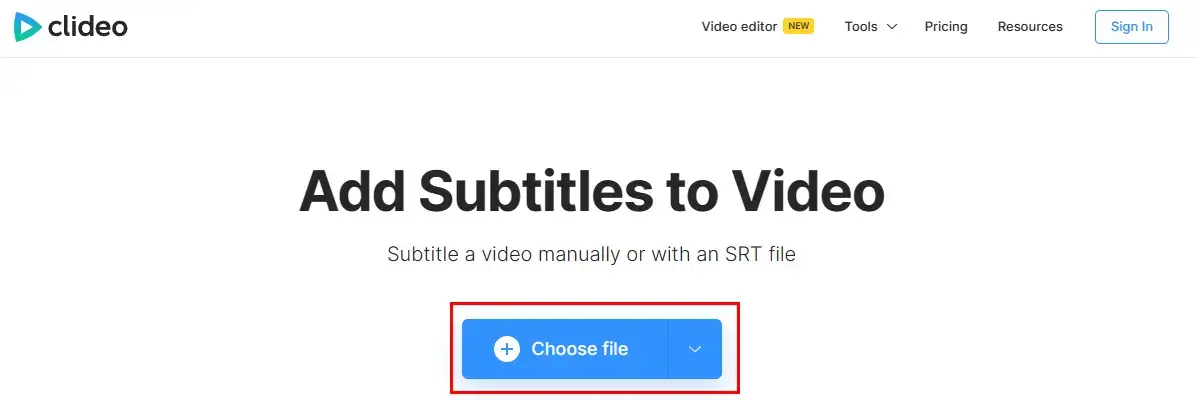
1). Open Clideo’s tool–Add Subtitles to Video and then click Choose file.
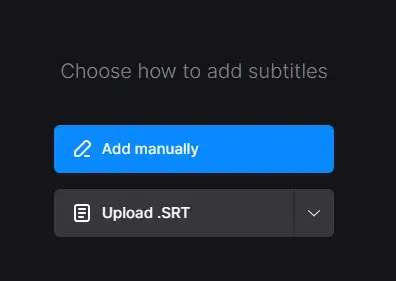
2). Choose a subtitle insertion mode.
(Here, Add manually is recommended.)
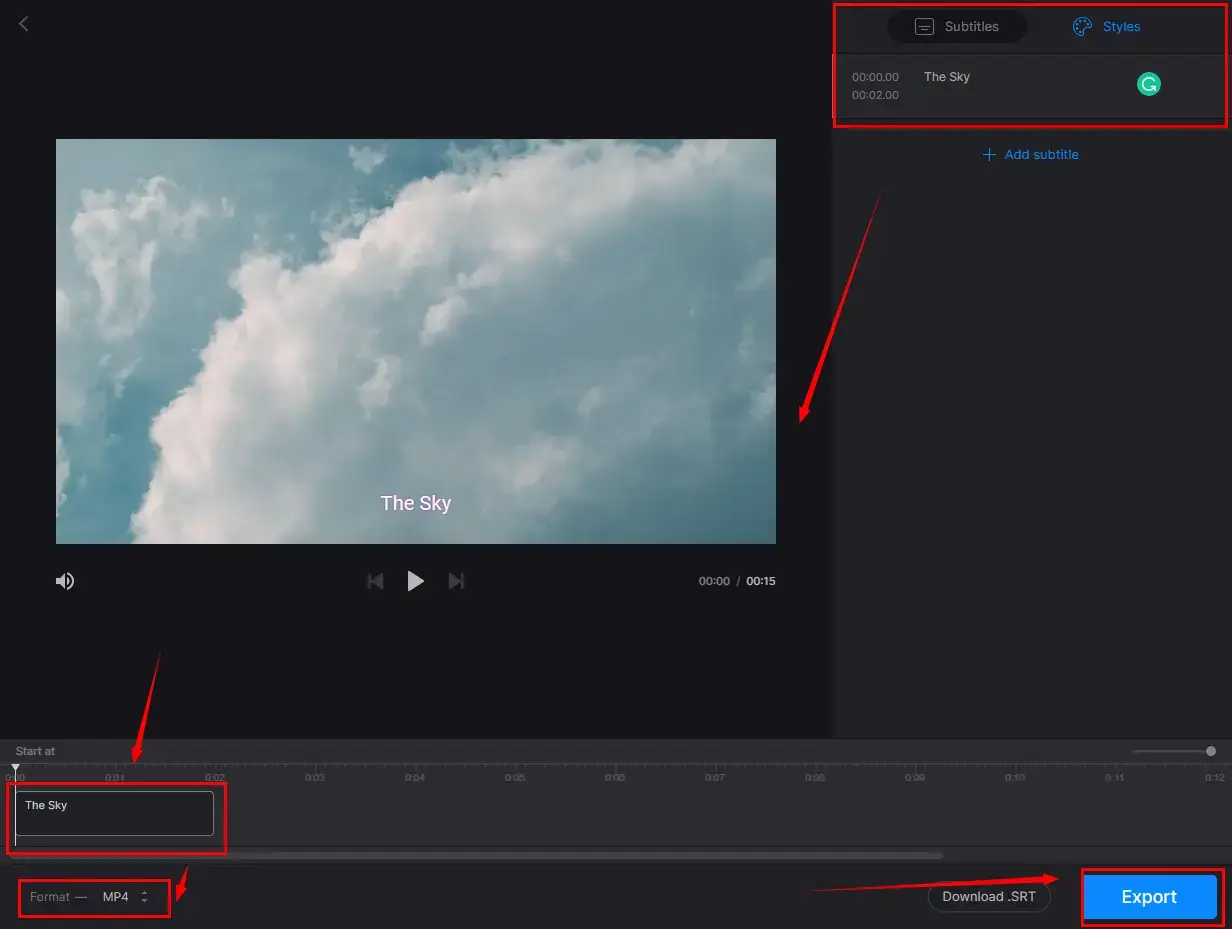
3). Type your subtitles, set the styles, drag the progress bar to determine the duration and then hit Export.
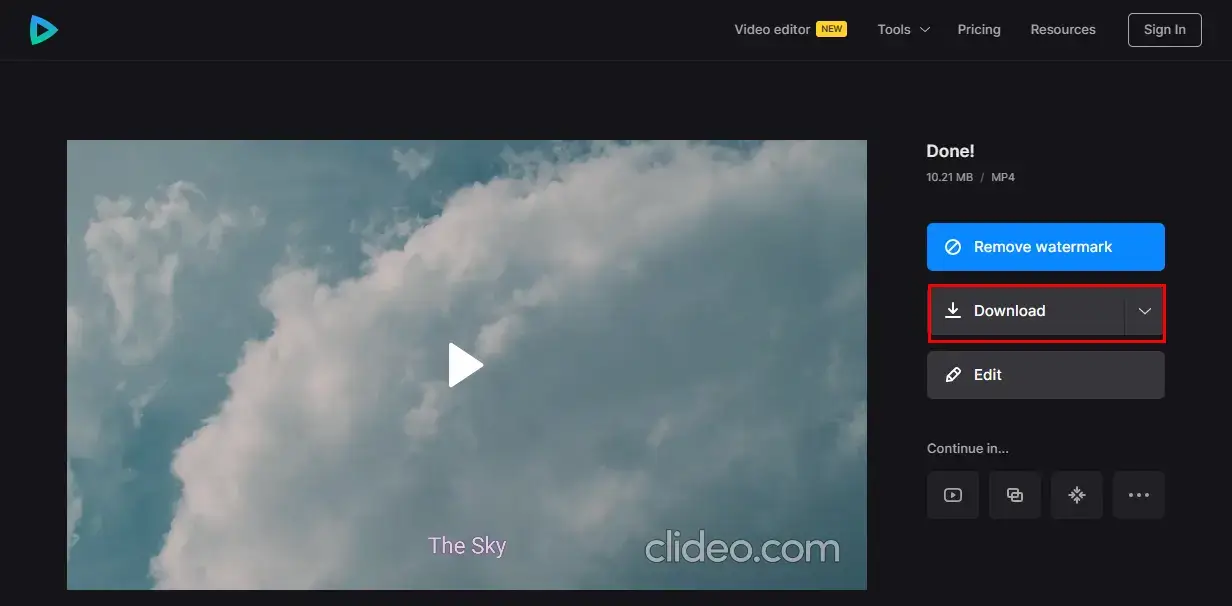
4). Then, click Download to export your new clip with subtitles.
How to Add Subtitles to a YouTube Video After Its Uploading?
What can you do if you have uploaded your video onto YouTube? It will absolutely be cumbersome to download and re-upload it after the subtitles are added. Here is a quick way to help you with this situation–YouTube Studio.
✅YouTube Studio
YouTube Studio is the official editing console for YouTubers. It makes basic video editing possible when your videos are uploaded onto this platform, including subtitle creation.
💡How to Use YouTube Studio?
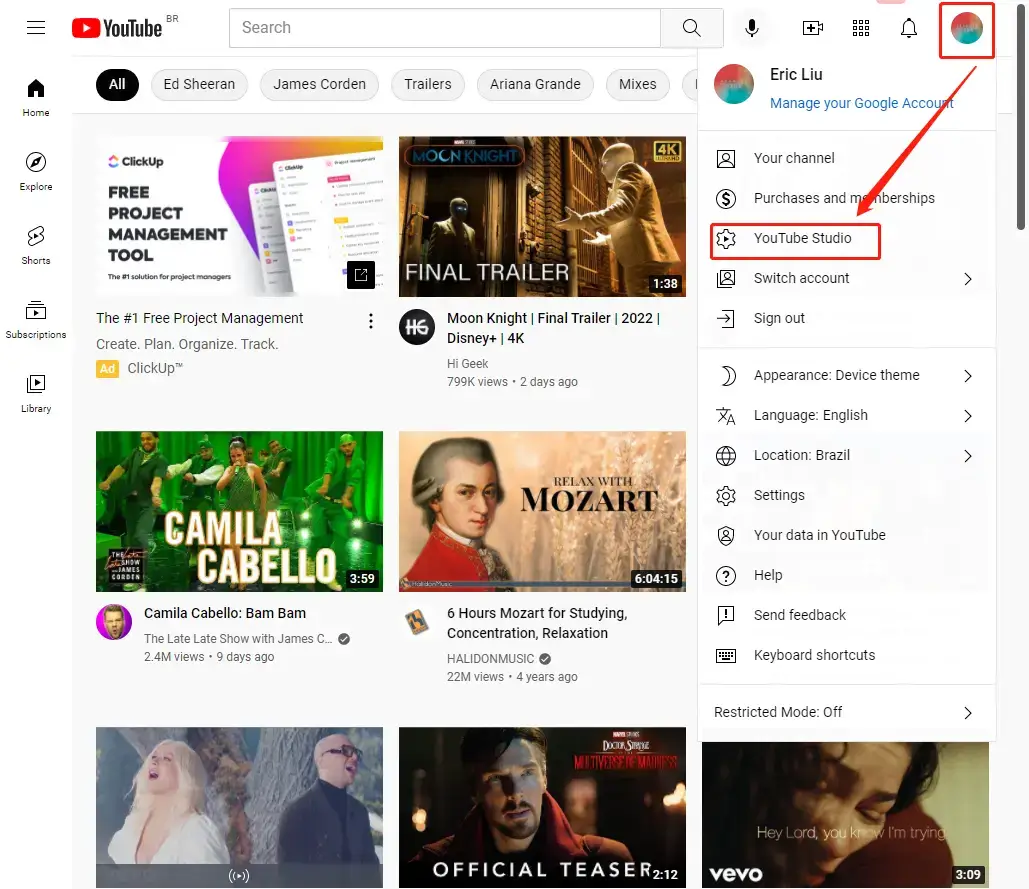
1. Open YouTube and click your account icon > YouTube Studio.
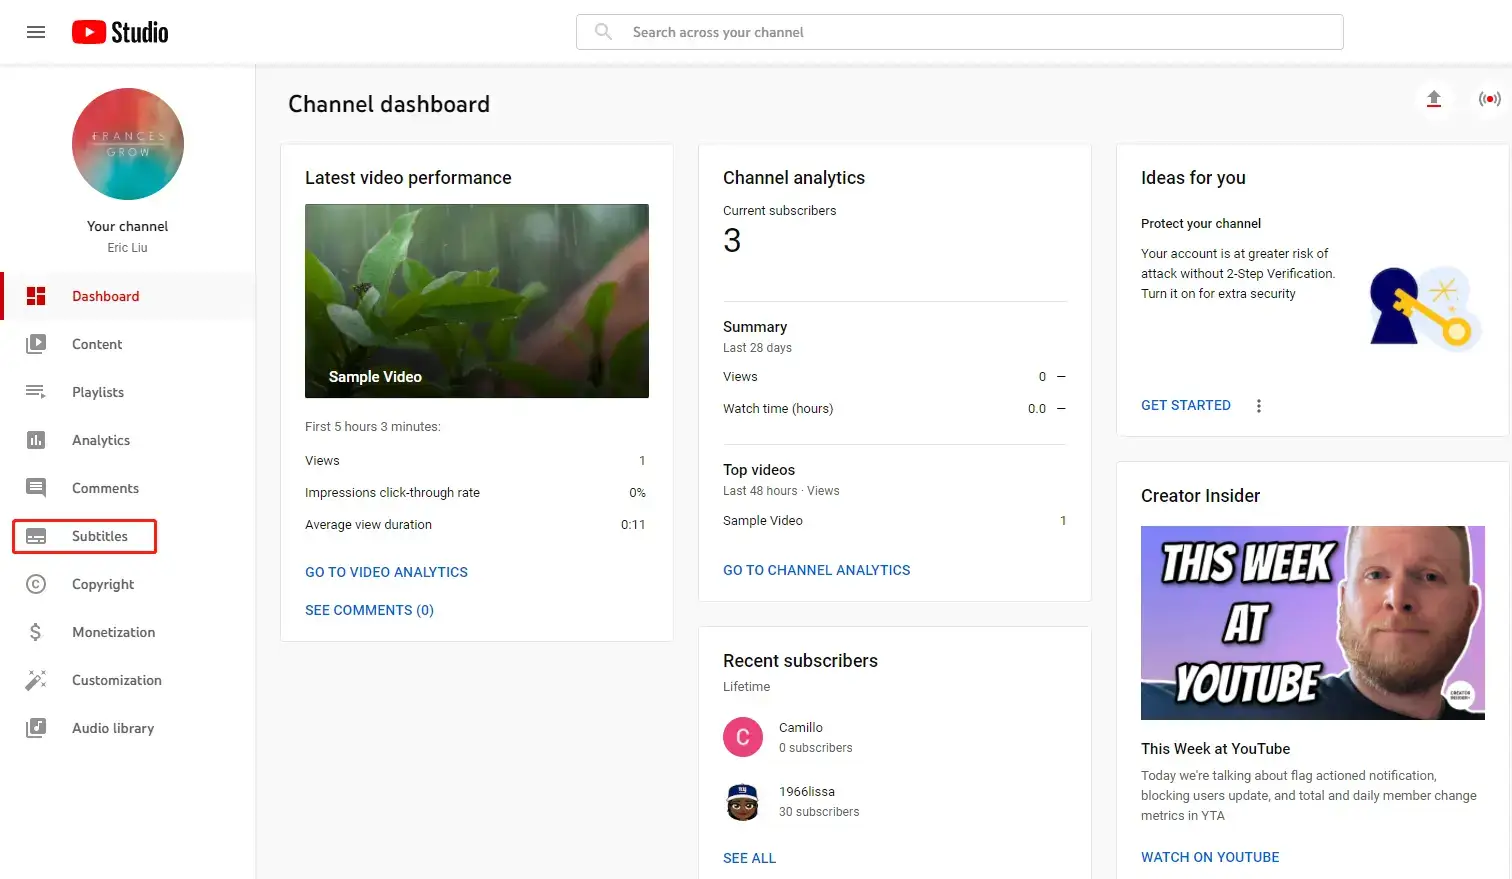
 2. Find Subtitles in the left toolbar.
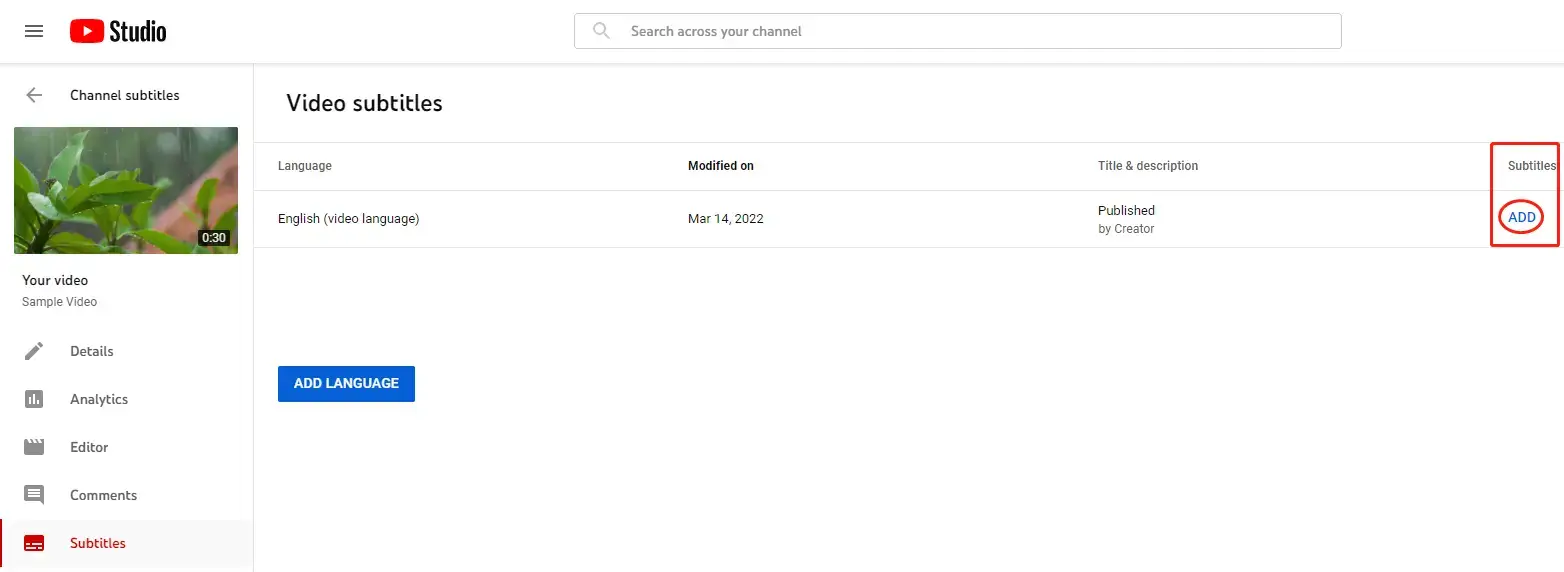
 3. Then, choose the video to add subtitles and then set the language.
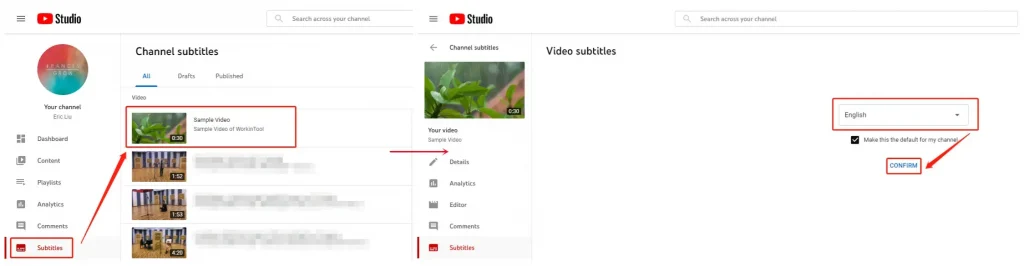
4. Click ADD below the Subtitles.
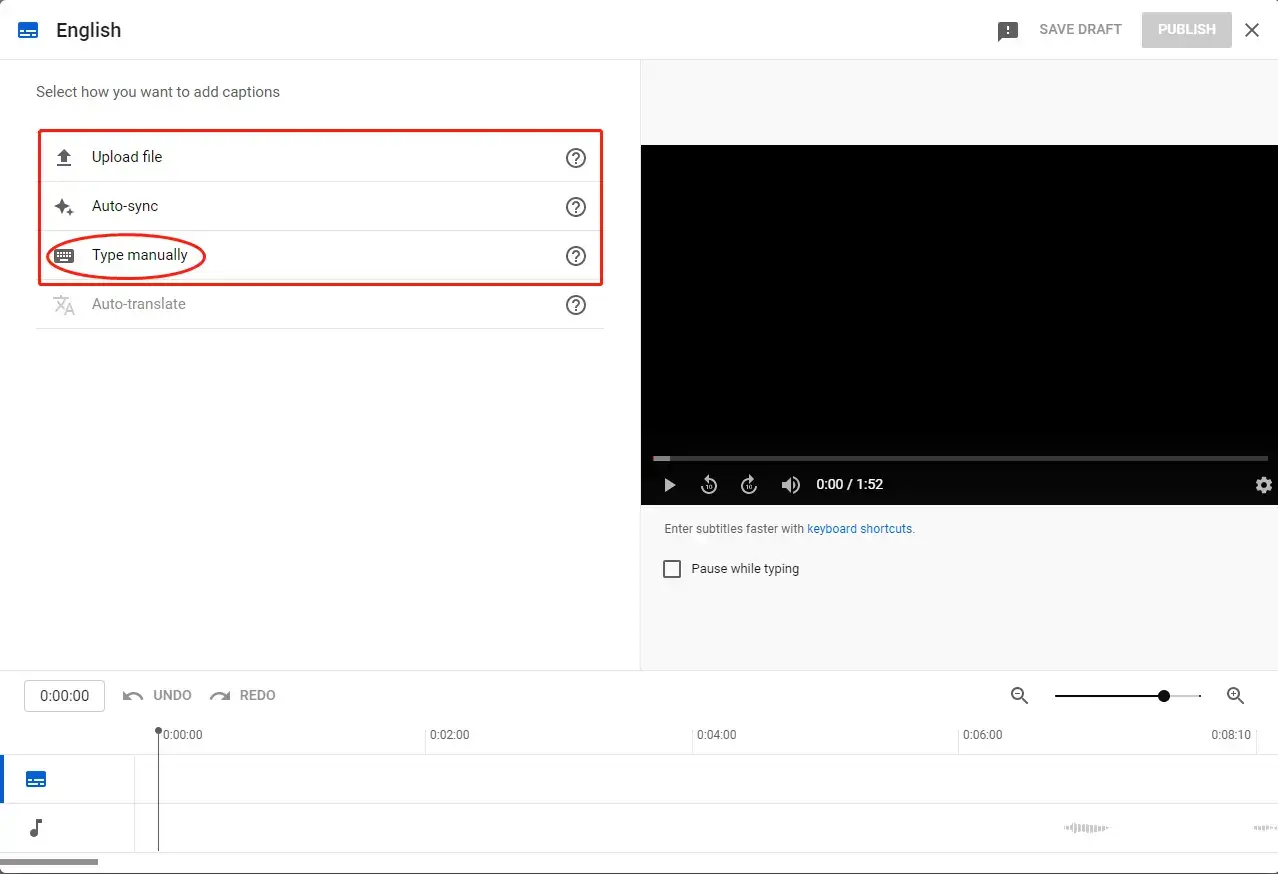 5. Then, choose one of the three ways to generate your subtitles.
(Taking Type Manually as an example)
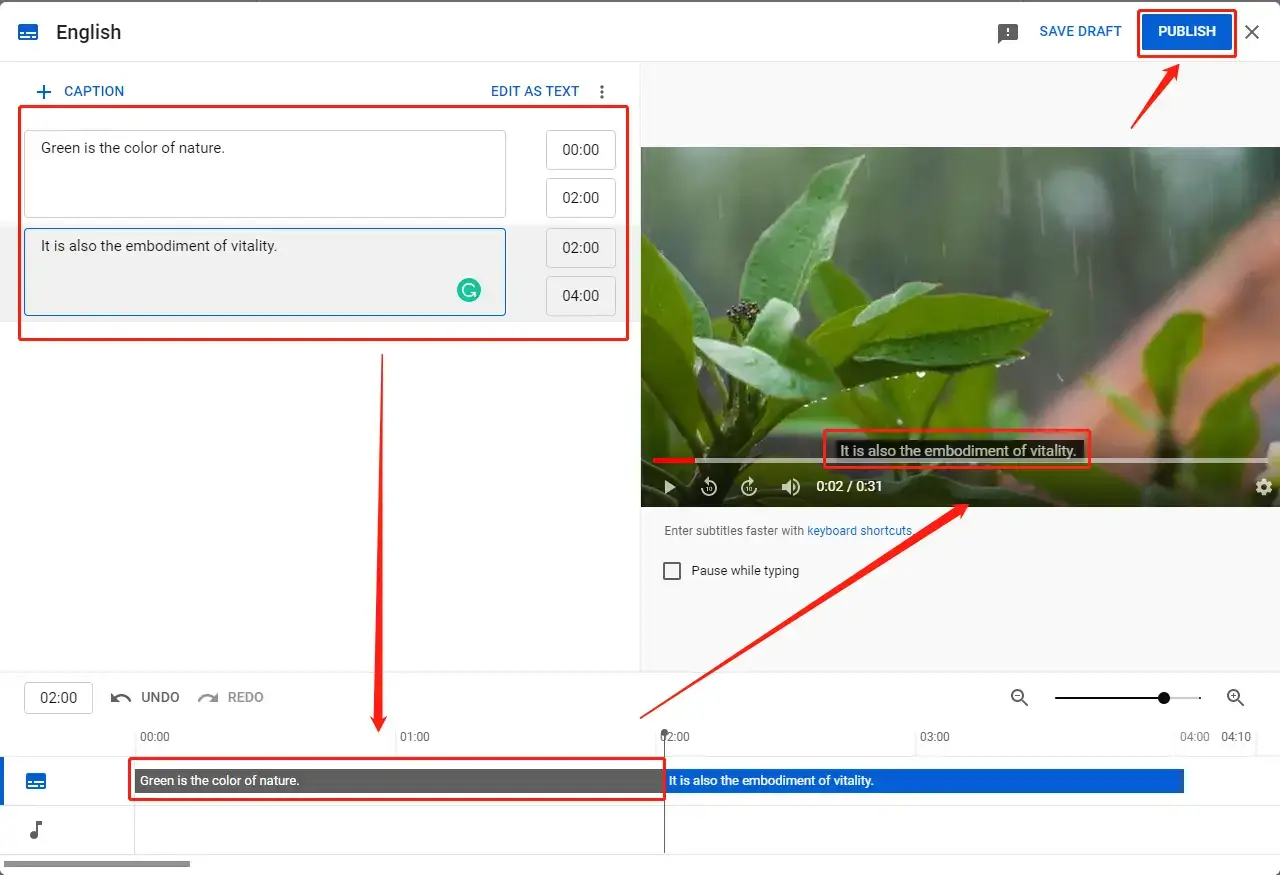
 6. Type your subtitles in the column, adjust the duration and then click PUBLISH.
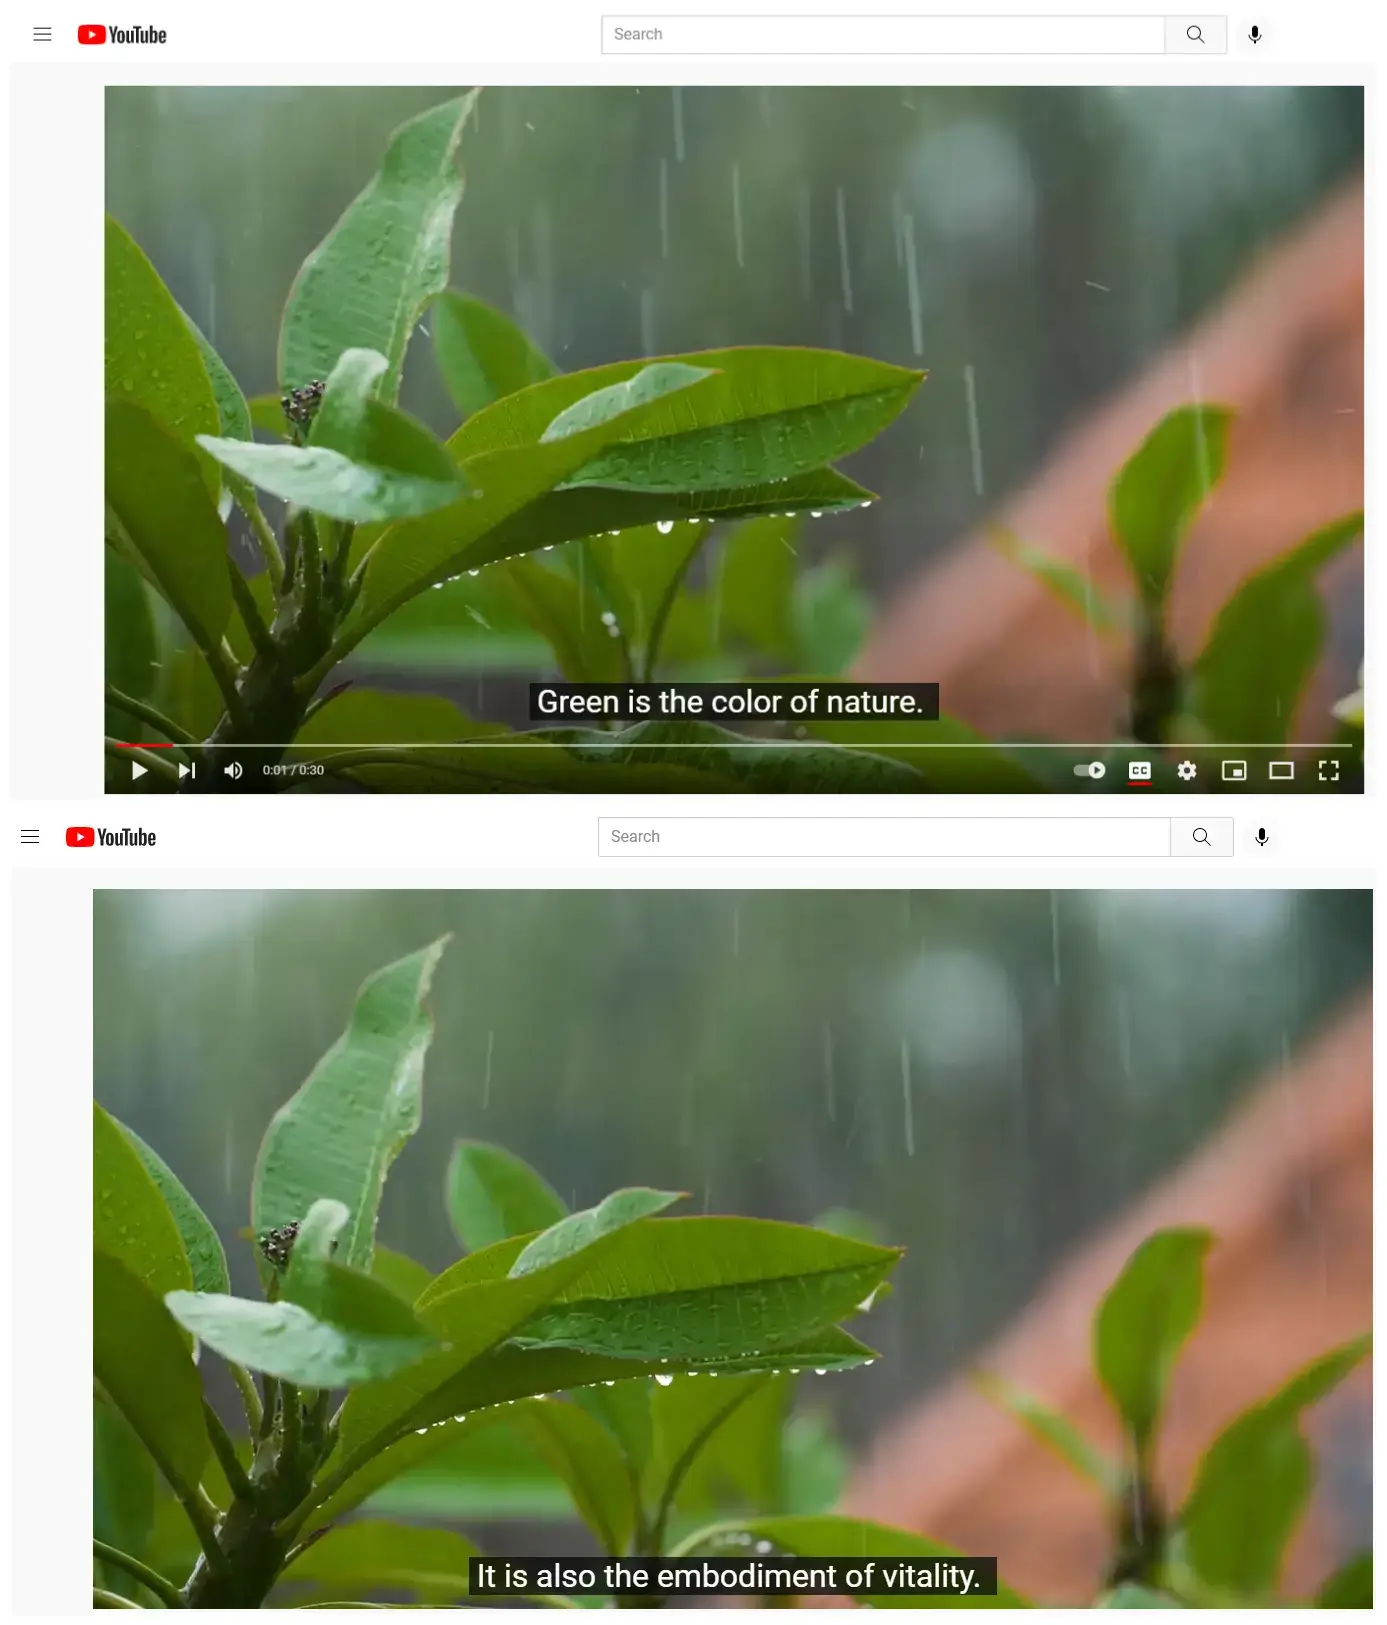
Please see the outcomes.
📣Notice:
1). Click + CAPTION to insert more subtitles.
2). There are three modes to add captions:
- Upload file: Choose this feature if you have made your captions in advance.
- Auto-sync: This function is suitable for a video with a speech in your set caption language. You won’t have to type every word manually as the transcript will be identified by YouTube, and all you need to do is to proofread it.
- Type Manually: You can create your content through this option by typing your words directly in the console.
3). You can either change the parameters beside each caption or drag the text progress bar to adjust its duration.
4). SAVE DRAFT is a valuable feature to keep your work safe from file loss.
Final Thought
Adding subtitles to your YouTube videos is a friendly action for your audience and subscribers as they will have a clearer and more precise understanding of your content. We sincerely hope you can find an ideal solution when you finish this article.
However, if you are a Windows user, it is strongly advisable to give WorkinTool VidClipper a try since it is user-friendly, easy to use and highly multi-functional to solve plenty of your problems.
Now, are you ready to insert subtitles into your YouTube videos?
![]()


Related Article
 How to Reverse a YouTube Video for Free on Windows and Online
  How to Make a GIF from a YouTube Video in Windows How to Add Text to a Video for FREE on Windows | 3 Ways