How to Reverse a YouTube Video for Free on Windows and Online
Want to play a YouTube video backward but can’t find a free and simple tool? No worries! This post offers two FREE YouTube video reversers that allow you to export a reversed video in the easiest way. Read on to learn what they are and how to reverse a YouTube video to add a funny and magical rewind effect to it! Both the desktop video editor and the online reverser are elaborated.
How to Reverse a YouTube Video for Free on Windows and Online
To make videos stand out from the masses, especially on YouTube, the biggest and most popular video-sharing platform, video creators spare no effort to learn and use diverse video editing techniques to make their work more creative and compelling.
Many YouTubers now add rewind effects to videos to make them more funny and magical. But still, lots of users don’t know have a clue on how to download YouTube videos and how to reverse a YouTube video after downloading. Now let’s read through this guide to learn how to play a YouTube video backward. You will get two free and practical YouTube video reversers, WorkinTool VidClipper and Clideo, enabling you to easily play a video in reverse.
How To Reverse a YouTube Video via Free Windows Video Editor
We put a desktop tool on top instead of online video reversers because you can make more creative effects using the desktop video editors’ versatile features. WorkinTool VidClipper is a video editor to easily customize your reversing videos.
This video editing software is free, with no ads, watermarks, license payments, or paid items. It differs from many desktop video editors that allow you to download free but ask for money when you put them into use. So you can stay relieved when leaving work for VidClipper. It just takes a few clicks to add a rewind effect to a YouTube video. Here are the detailed steps.
1. Add a YouTube video
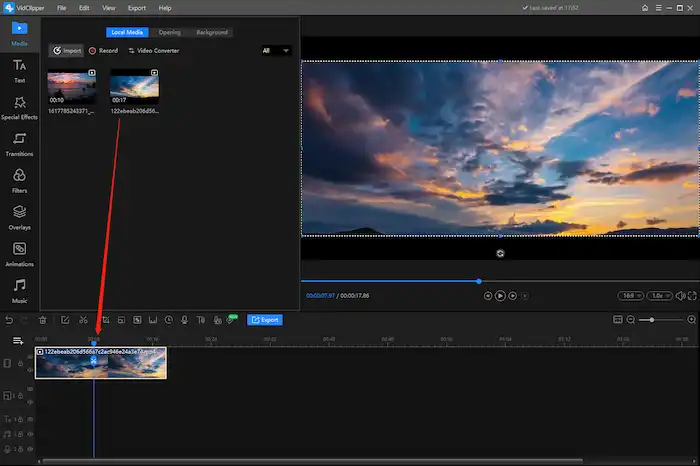
After downloading a YouTube video, launch WorkinTool VidClipper on your computer. You will see an interface presenting a New Project button. Click it, and you can open the editing panel. You can add the target YouTube video or clips to the media stock and drag the materials to the timeline to edit.
2. Reverse the video
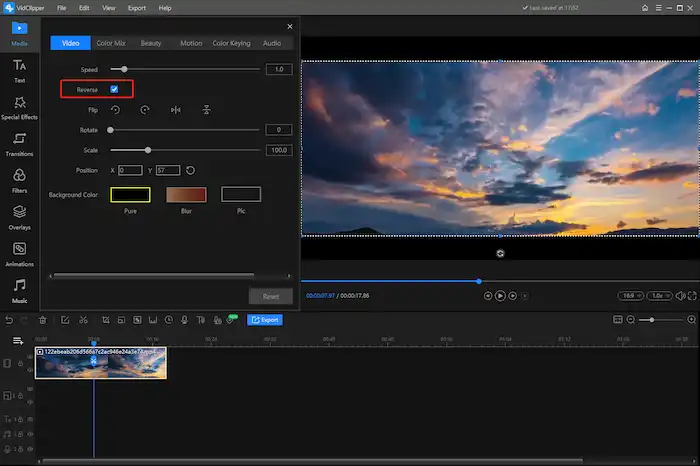
Once your video is added to the timeline, make sure you select the video, and you will see a quick edit pop-up menu. Tick the Reverse button, and you can easily add a rewind effect to it. If you wish to mute the video, right-click on it and select Mute in the pop-up menu. Apart from that, you can edit the playback speed as desired. The preview window on the right side of your screen will show the final effect when you press the Play icon. All features are straightforward.
3. Save and share
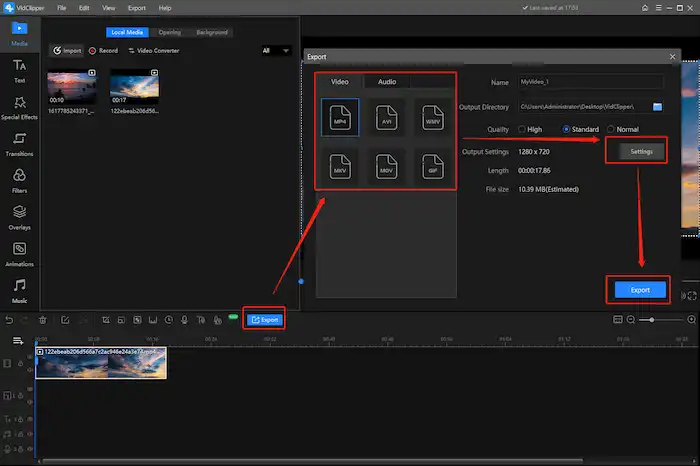
Once your reversed video has been well processed, you can click the blue Export button to download it. There are six different output formats, including MP4, AVI, MOV, MKV, WMV, and GIF. You can choose one according to your needs or media platforms’ standards. On the right side, you can easily configure the resolution, bitrate, and frame rate. When all is set, click Export to save your work.
Tips for Customizing the Reversed Video
WorkinTool VidClipper allows you to make more creative edits. Whether you want to replace the audio in a video, perfect the video with filters, transitions, and animations, remove background music, or do simple editing tricks like cropping, flipping, canvas changing, etc., you can do it in the easiest way.
Apart from that, VidClipper presents a wide range of material stocks, including music, filters, animations, overlays, and more. So don’t worry that you can’t make an eye-catching video using these tools.
Play a YouTube Video Backward Online
If you just want to reverse a clip for YouTube in the shortest time and do not need other advanced settings. Google extensions and online video tools can handle that. Comparably, online video editors like Clideo are much better because you can visit their home pages anywhere and anytime as long as you have a stable network. So you do not need to add an extension to your browser by performing complex operations to reverse YouTube videos on mobile.
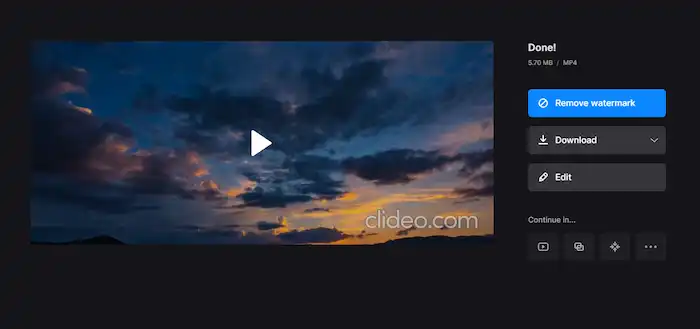
To make a start, Clideo allows you to play a video backward without buying or downloading expensive video editing software. But it does not support a watermark-free output. You may need to pay at least $6 per month to remove the watermark or use a watermark remover for postproduction.
Anyway, if you don’t mind the only shortcoming above, this video reverser will make you happy in the quickest method. Check a brief manual below to see how to reverse a YouTube video online using Clideo’s online video reverser.
1. Upload a video
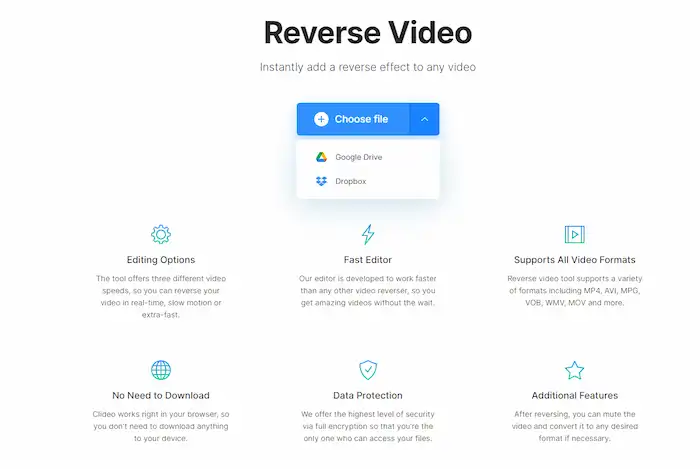
Head over to Clideo’s YouTube video reverser tool. You can import a YouTube video file from any device or choose one from your Google Drive or Dropbox.
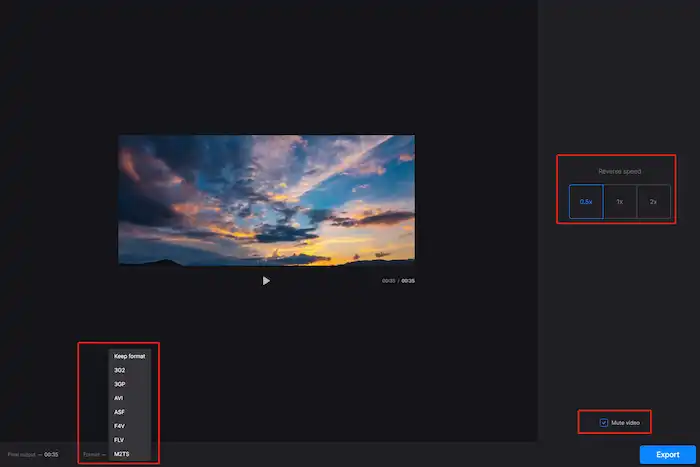
2. Add a rewind effect
You will see an editing panel once the video is imported. On the right side, you can control the reversing speed ranging from 0.5 to 2 times. Under this option, you can use the tick box to mute the video. And you can convert the video format on the bottom panel if you want to.
3. Download the video
After configuring all the settings, you can click the Reverse button to export the reversed YouTube video. It is up to you to save it to Google Drive, Dropbox, computer folders, or mobile.
Tips for Downloading YouTube Videos
Before learning how to reverse a YouTube video, it is necessary to download a YouTube video. However, saving a YouTube video is not straightforward if you are not the content creator or don’t buy YouTube Premium. In this case, YouTube downloaders come into being.
You can find various free video downloaders online, such as ssyoutube and BTCLOD. Or you can resort to a desktop YouTube downloader to do that. It offers two output formats, MP4 and MP3. As long as you type in a YouTube link, it will give you fast feedback.
In addition, WorkinYool VidClipper is designed with a screen recording feature. So you don’t need to download and trim a YouTube clip. Just record a clip, and you can put it in reverse without switching software! Convenient, isn’t it?
Wrapping up
Up to now, this post offers two free and practical YouTube video reversers and shares how to reverse a YouTube video creatively and quickly. WorkinTool is an all-in-one desktop video editor that allows you to easily screen record, trim, edit, and reverse a YouTube video. Clideo is quick enough to export a reversed video in the shortest time. Which one do you prefer?


Related Article
 Good MP3 Audio to Text Converter Online Free Share
  How to Convert Audio to Text Online Free | Show You Three Ways Effortless Transcription: Share Free Audio to Text Converter