How to Make a WAV File in Windows [FREE and Easy]
Do you know that you can make a WAV file from multiple sound sources like your PC and microphone? If you don’t, please read this article to learn how to make a WAV file from these sources in Windows. If you do, you will also find this post useful as it will introduce you to a new free way to realize this goal–WorkinTool Audio Recorder. It is easy, convenient, useful and FREE. Please start your reading now to know the specific guide.
How to Make a WAV File in Windows [A FREE and Easy Way]
Do you know that you can make a WAV file from multiple sound sources like your PC and microphone? If you don’t, please read this article to learn how to make a WAV file from these sources in Windows. If you do, you will also find this post useful as it will introduce you to a new free way to realize this goal.
Now, let’s begin our discussion.
Words Before Your WAV File Making
📌What is a WAV file?
WAV stands for Waveform Audio File Format with the extension of .wav or .wave. It was initially developed by Microsoft and IBM and has now been one of the standard PC audio file formats, widely used in modern society. Furthermore, WAV is a raw audio file that uses containers to store audio data, track numbers, sample rate and bit rate. Also, since it is uncompressed, it belongs to lossless audio. Hence, its quality will be pretty high, but it can be quite space-taking.
📌How to open a WAV file?
- Windows OS: As Microsoft is the co-creator of WAV, it can be easily opened by any media player in Windows. The default player for opening WAV is Windows Media Player.
- macOS: Even if you use Macbook, you can open it without difficulty by its built-in program without a third-party audio player. iTunes is the default player for WAV in macOS.
Therefore, WAV is an ideal audio format and it is essential to know how to make WAV files from social media. This article will discuss this theme on three topics: PC, microphone and both sound sources.
Now, please continue your reading to learn the specific guides.
How to Make WAV Files in Windows?
Based on our research, the easiest way to make a WAV file is to use an audio recorder. Today, we will present you with a powerful and helpful tool–WorkinTool Audio Recorder.
WorkinTool Audio Recorder is a piece of practical audio recording software. Its interface is exceptionally lightweight and simple, so you don’t have to be tech-savvy to use it. With its help, you can record any audio or voice inside and outside your PC. Furthermore, its various settings will help you export custom WAV files based on your needs.
More importantly, WorkinTool Audio Recorder is now entirely FREE for users. Hence, all its features are accessible without any license payment and compulsory email registration. Meanwhile, much as it is free, it is a green tool as no ads will appear in your recording.
Now, let’s move to the main point.
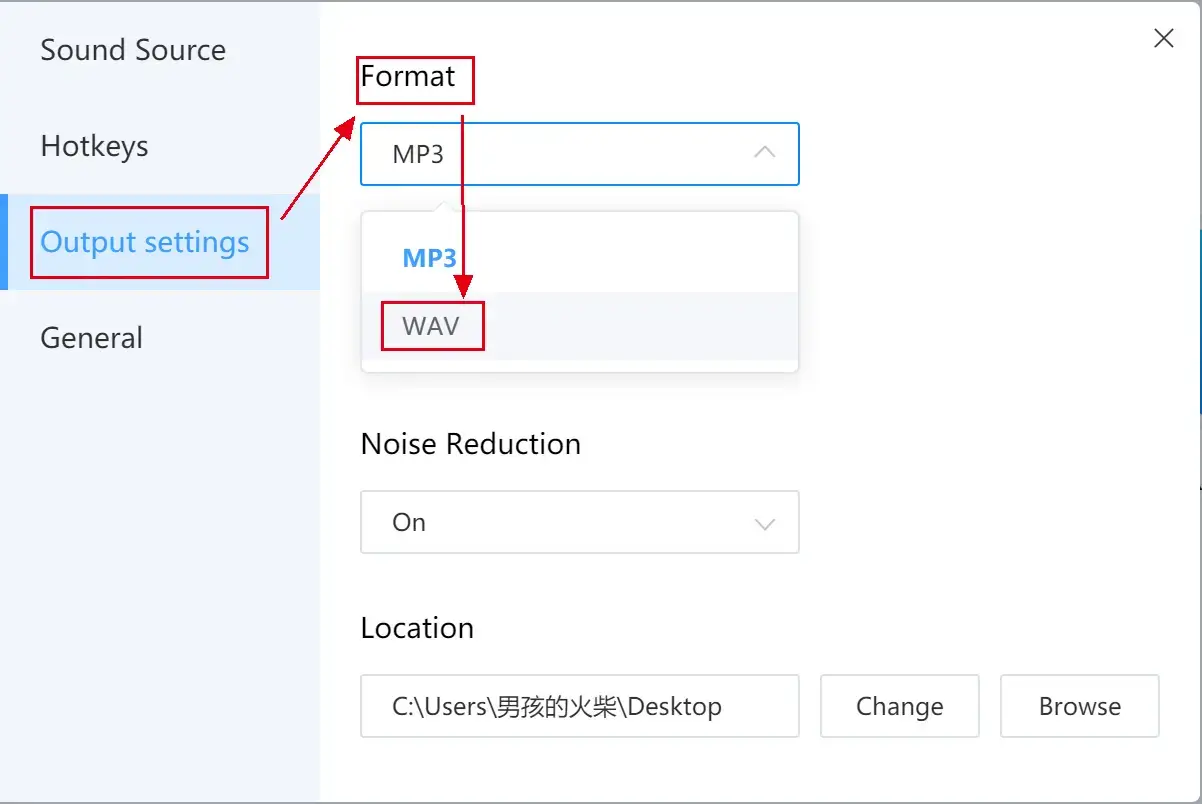
To make WAV files by WorkinTool Audio Recorder, you follow these steps to set WAV as the primary format first.
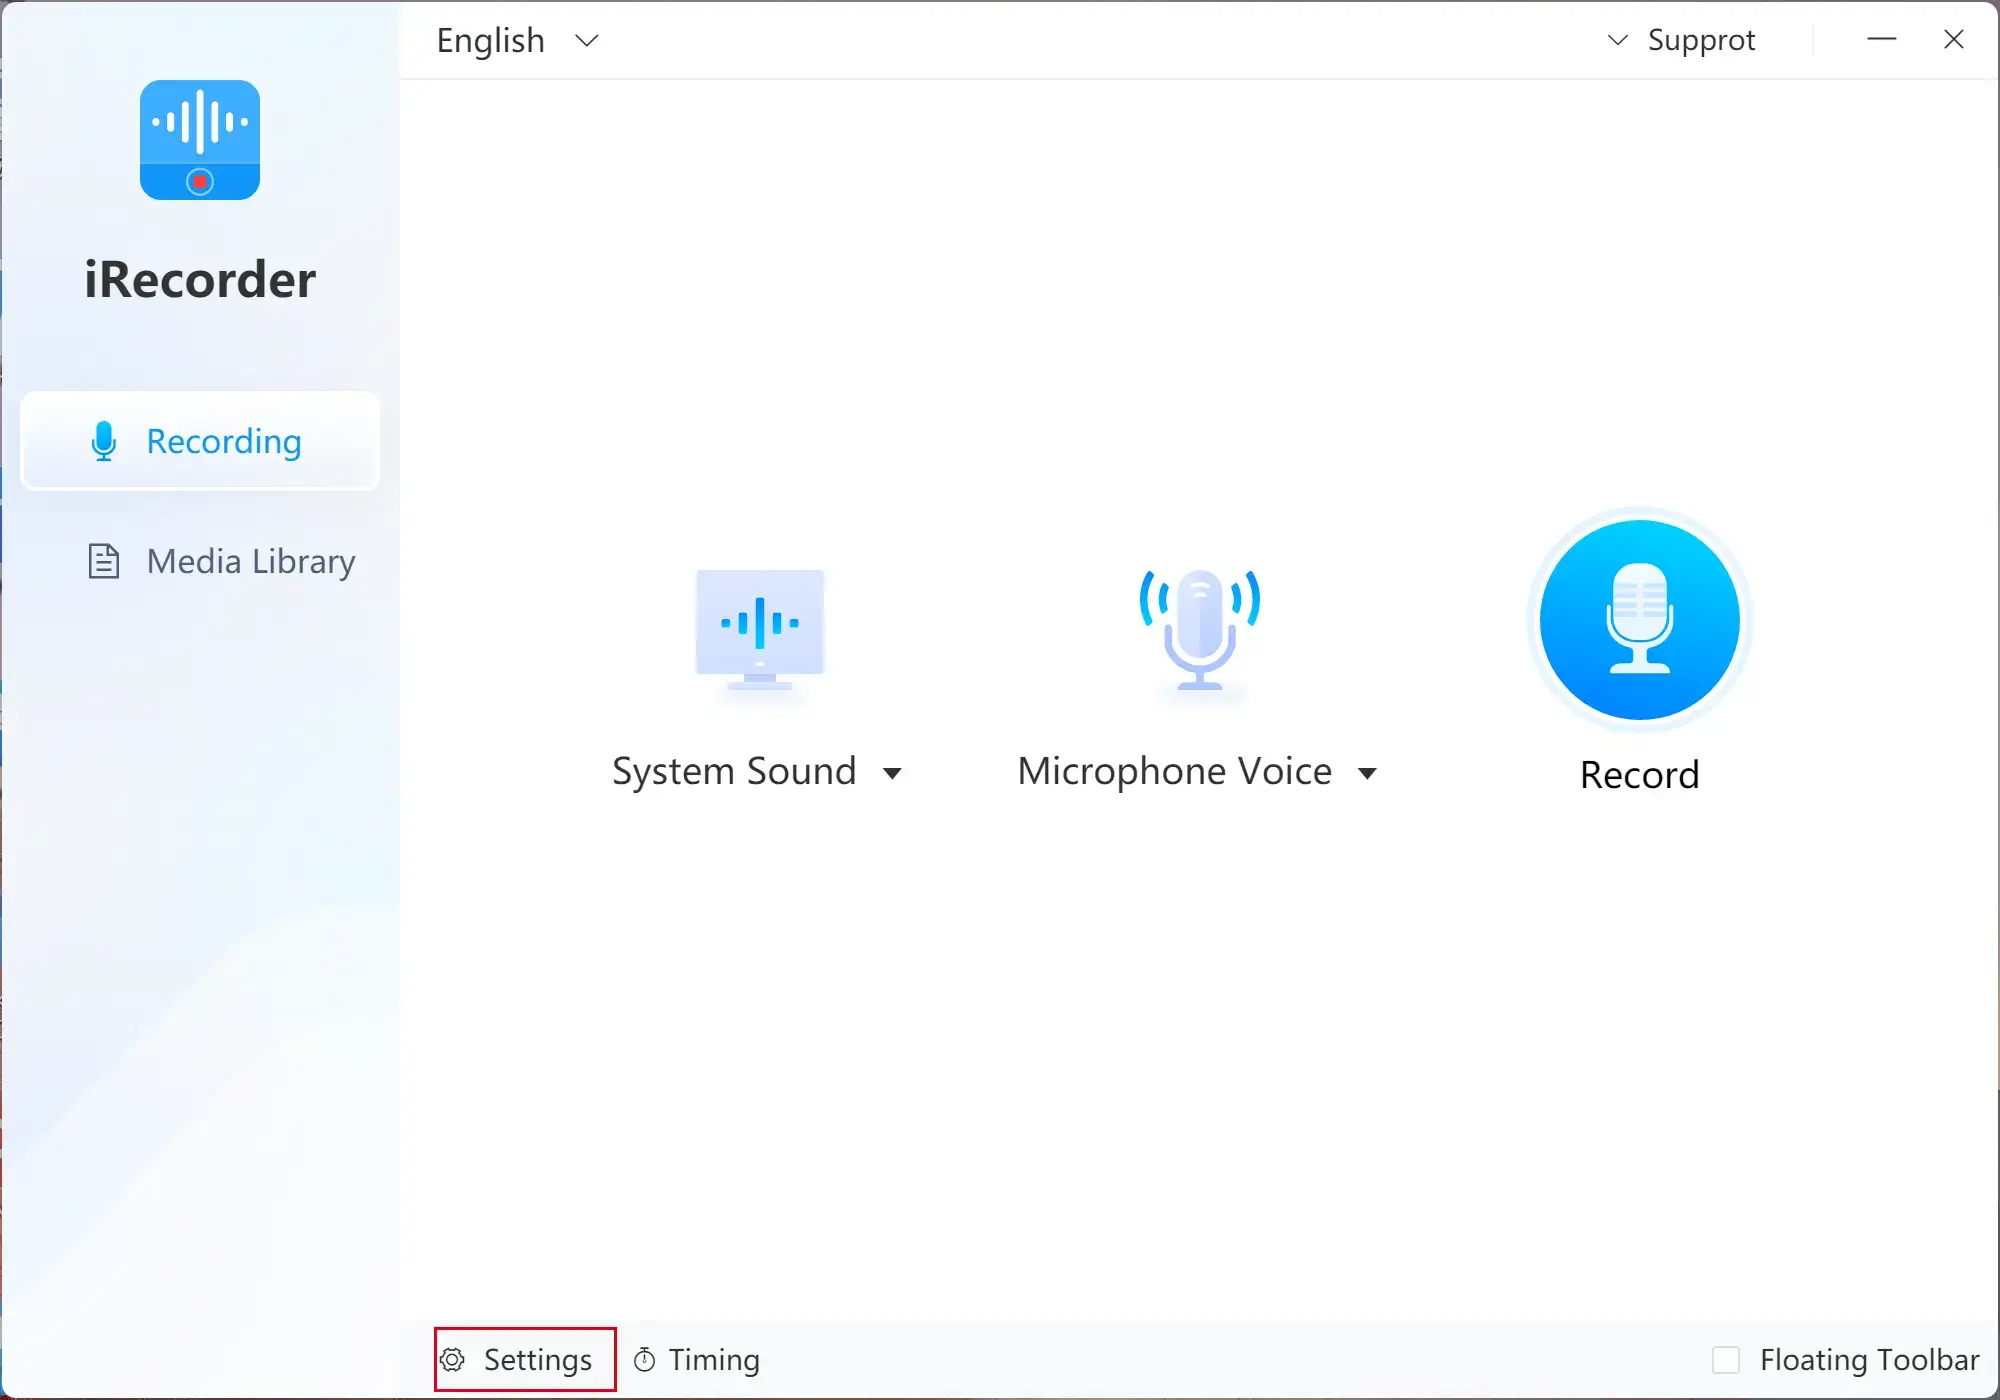
1). Click Settings.
2). Find Output settings > Format and choose WAV in the drop-down box.
Then, you can start recording a WAV file.
How to make a WAV file from PC?
(through WorkinTool Audio Recorder)
You can use WorkinTool Audio Recorder to record your computer audio (sound within the PC) only and export it to a .wav file. Here is the tutorial:
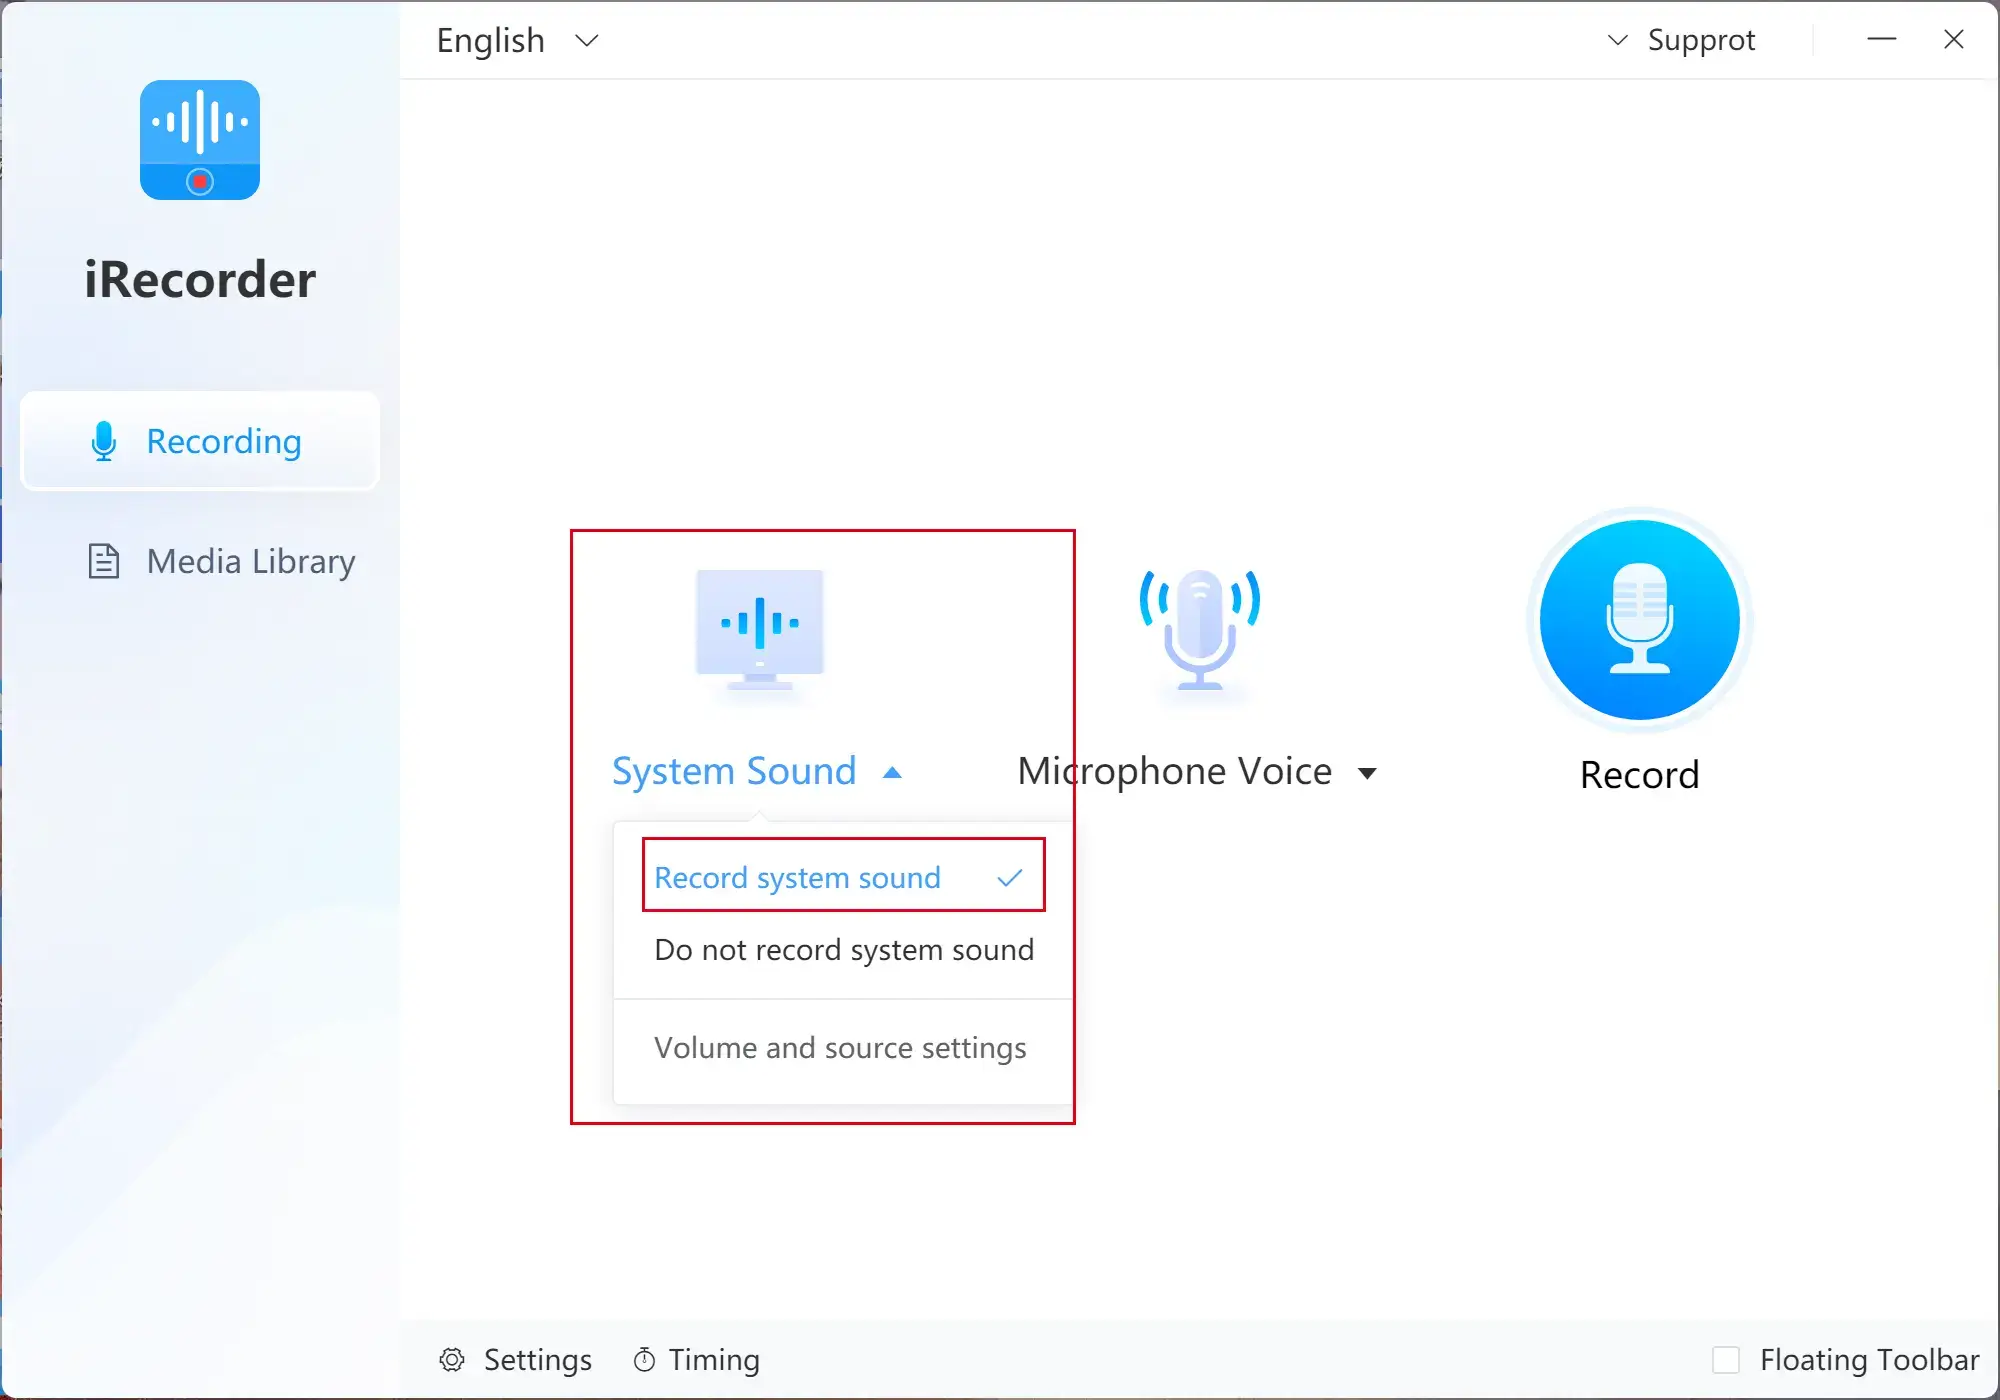
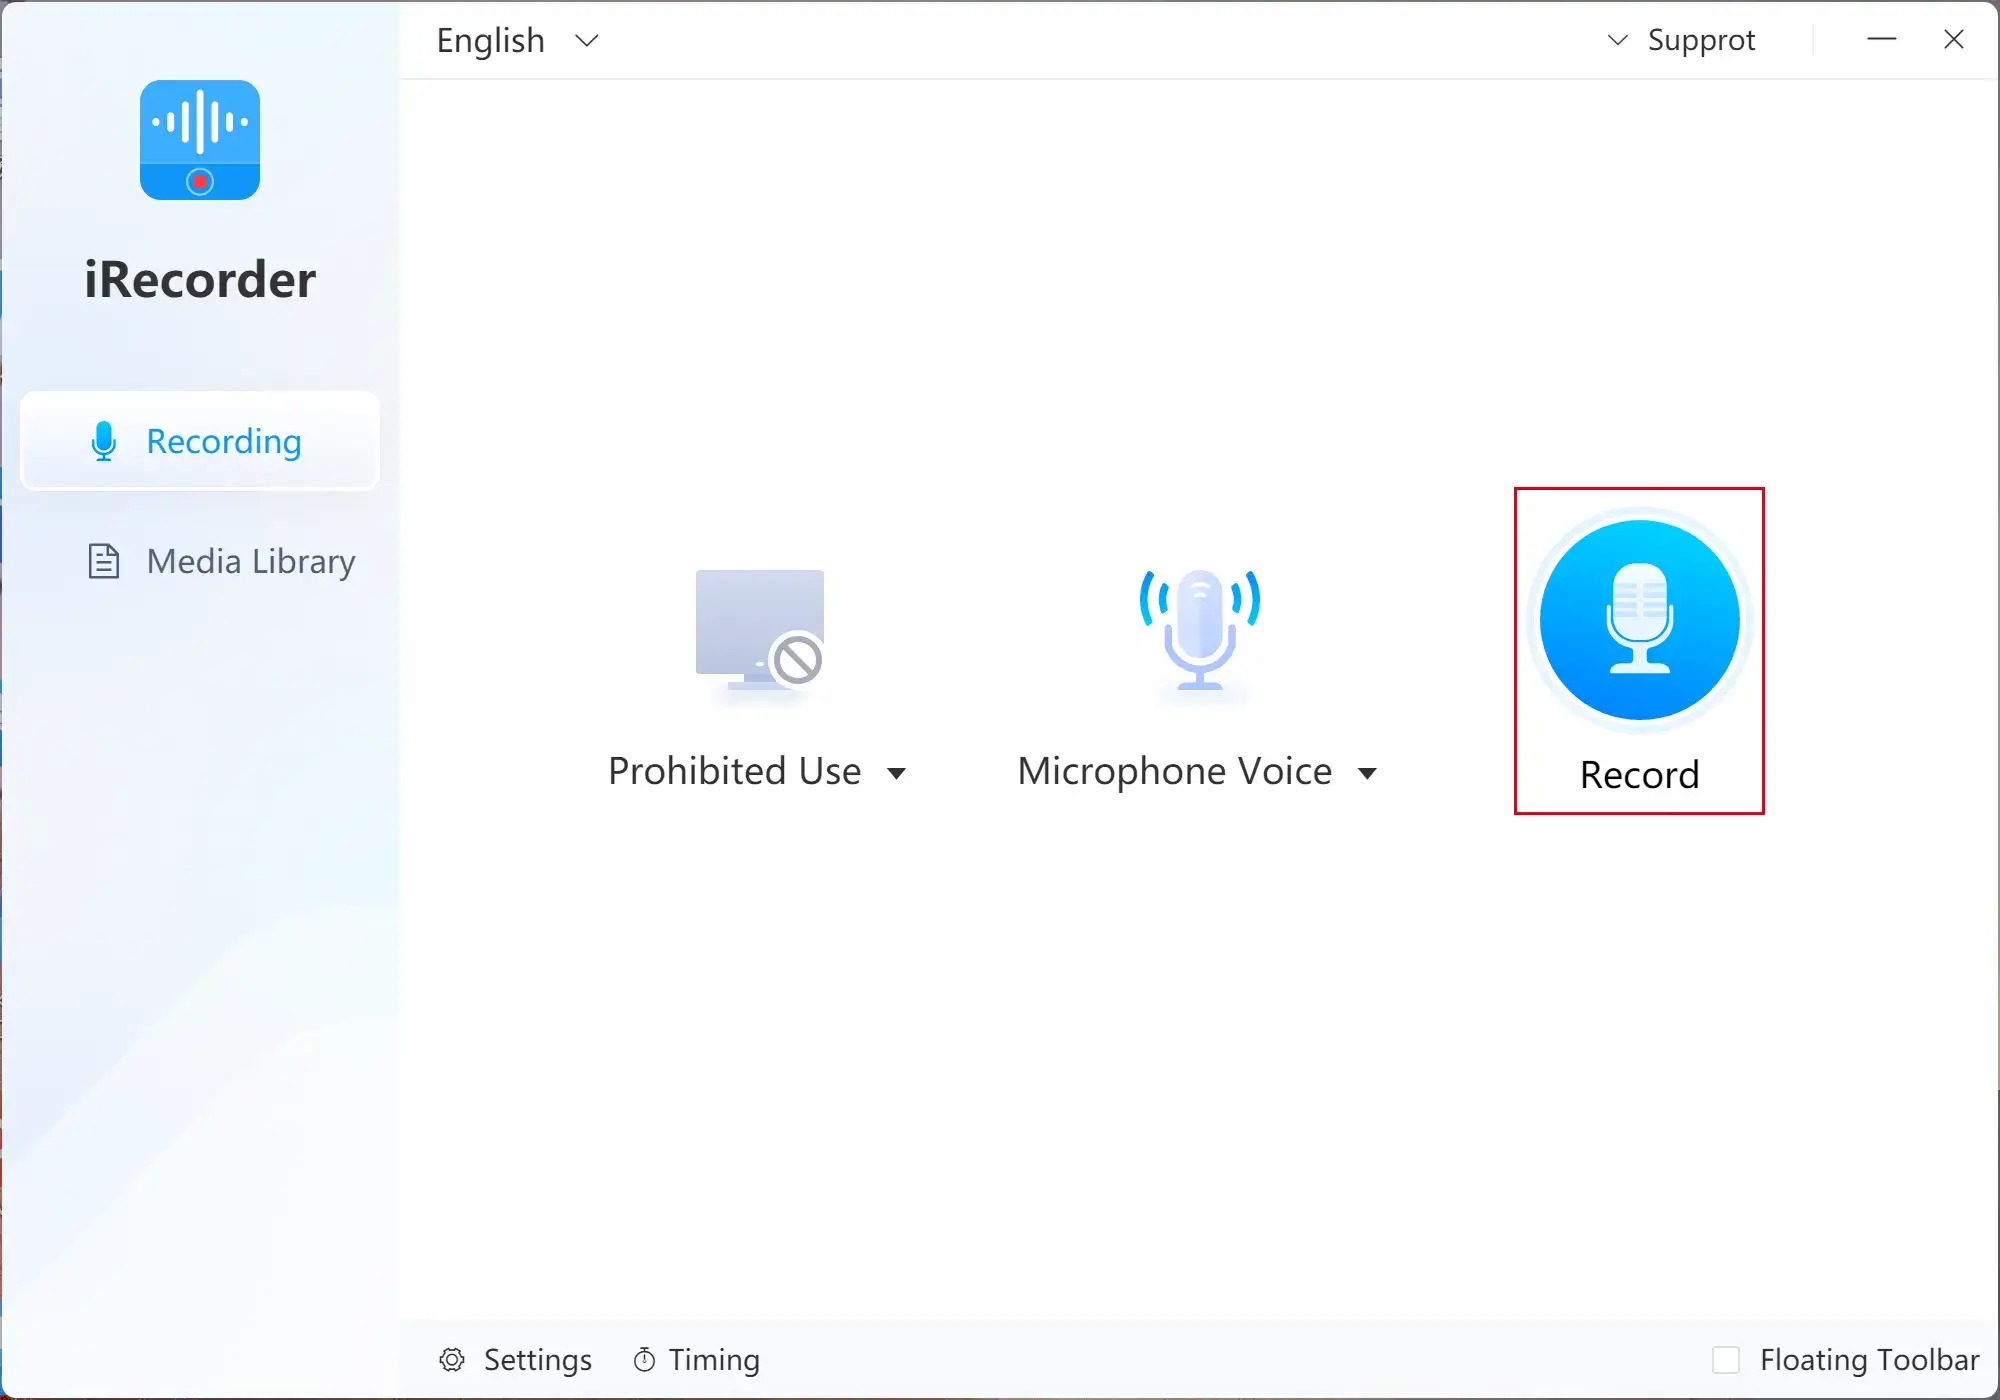
1. Open the tool and click open System Sound and choose Record system sound.
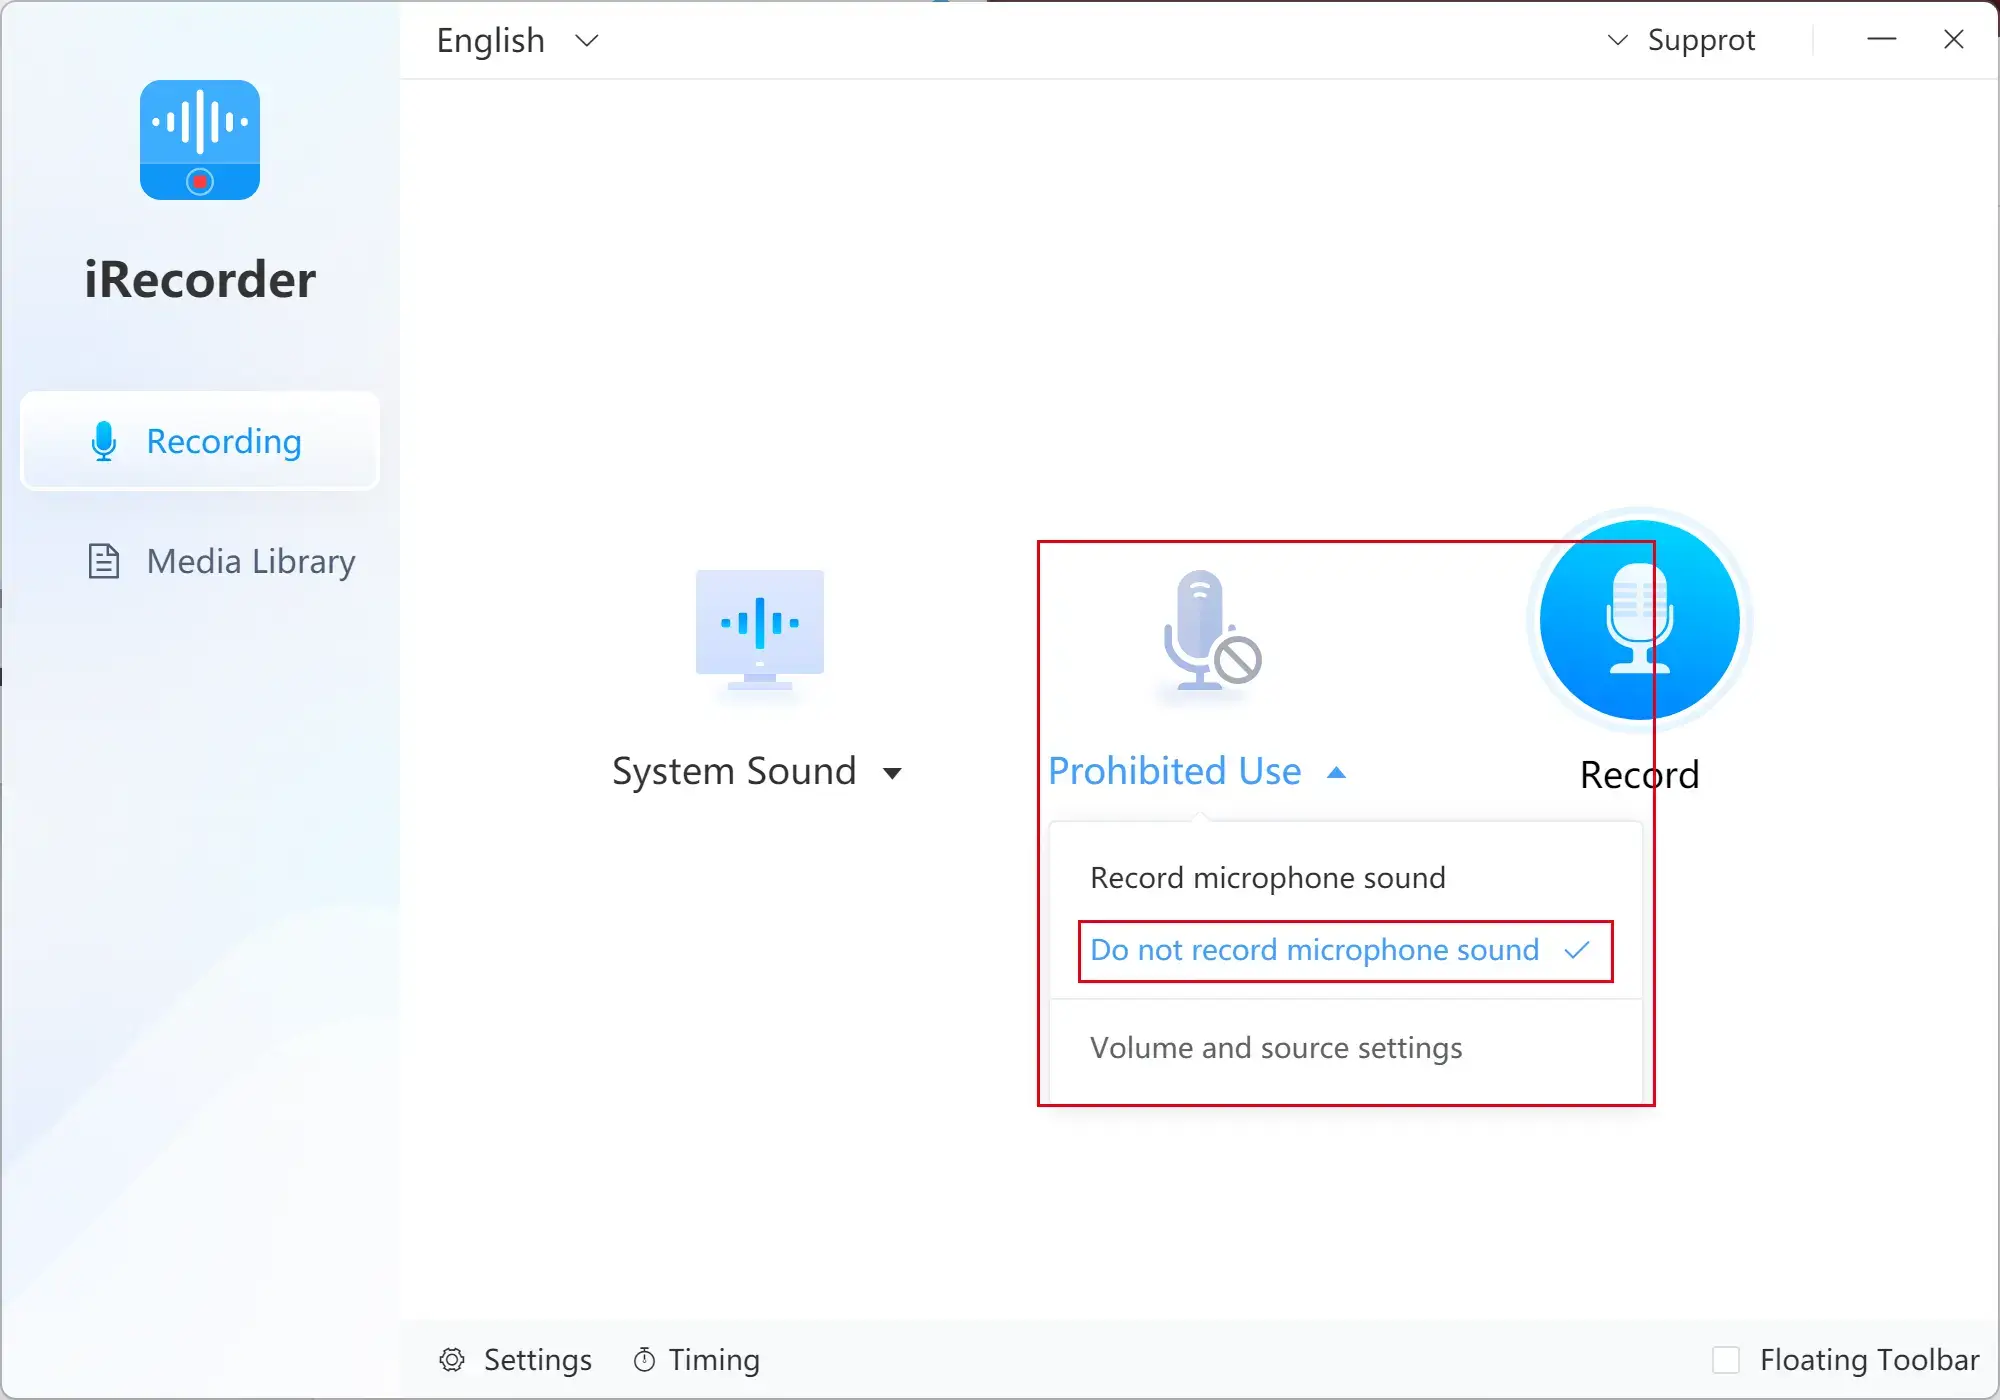
2. Hit Microphone sound and select Do not record microphone sound.
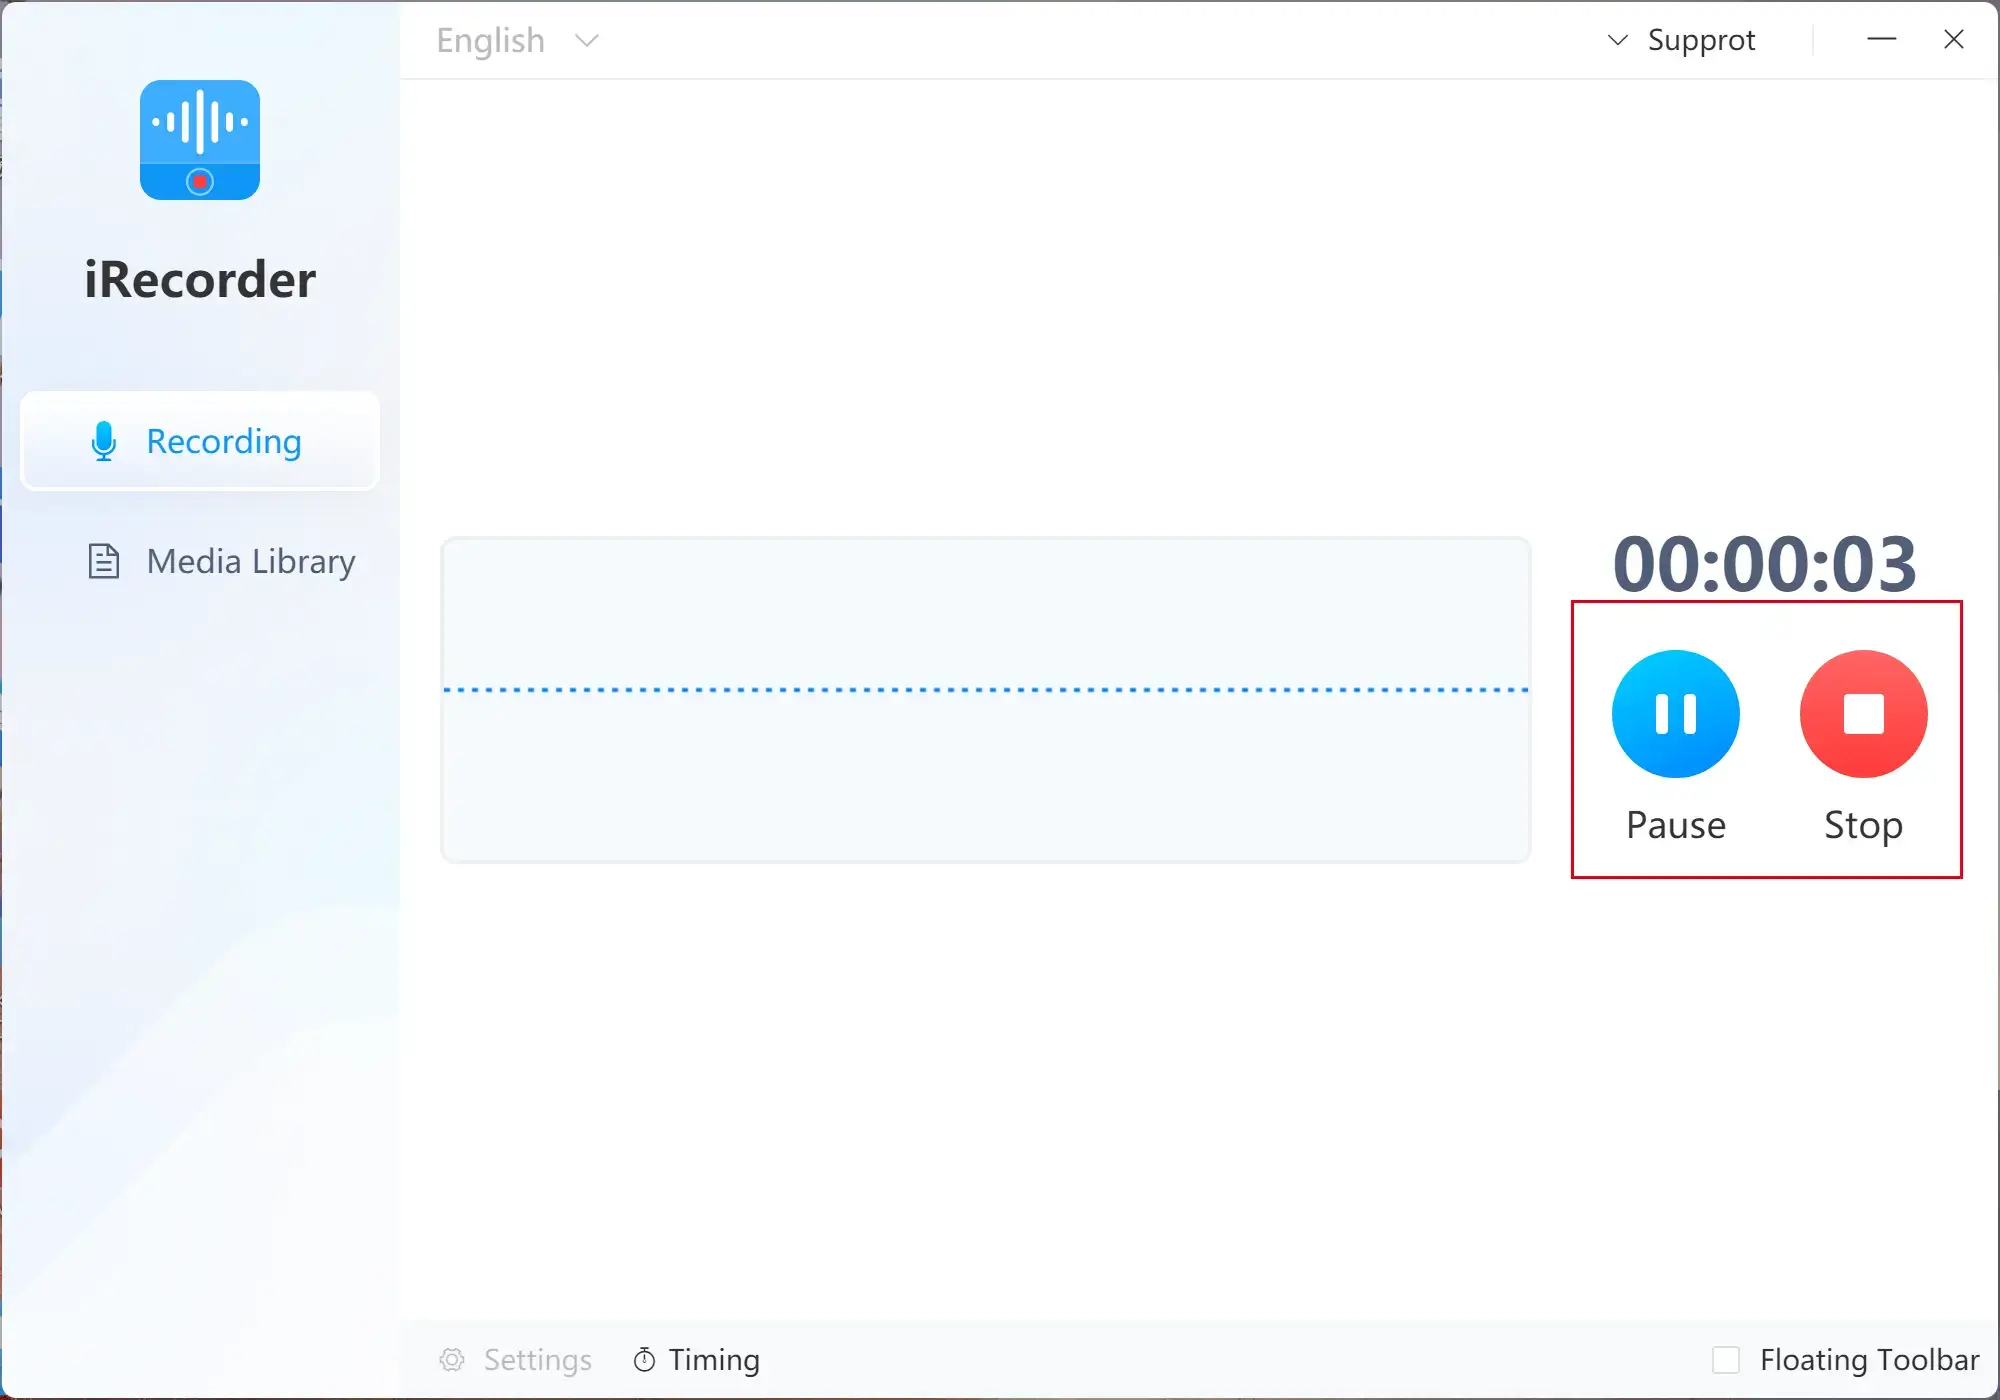
3. Press the Recording tab to start your recording.

4. Click the Stop icon to end and save your recording.
(Hit the Pause icon to temporarily stop the recording without saving.)
This mode is suitable for converting YouTube to WAV, recording audio from TikTok and recording streaming audio as .wav file.
How to Make a WAV File from Microphone?
(via WorkinTool Audio Recorder)
The sound from your microphone is effortlessly recordable with the assistance of WorkinTool Audio Recorder. Please refer to the information below:
1. Activate WorkinTool and find Microphone > tick Record microphone sound.

2. Click open System sound and select Do not record system sound.

3. Follow the third and fourth steps above.
You can resort to this feature to record your voice or other sources outside your PC, such as a narration for a video uploaded to YouTube, Facebook, Instagram story or TikTok.
How to Make a WAV File from Both Sound Sources?
(with WorkinTool Audio Recorder)
Feel free to try WorkinTool Audio Recorder to record the sound from your PC and microphone and make the recording into a WAV file. Please follow the instruction below:
1. Launch WorkinTool and find System sound > tick Record system sound.
2. Click open Microphone sound > choose Record Microphone sound.
3. Do as the third and fourth steps instructed above.

This mode enables you to record online meetings, such as Google Meet meetings and Skype audio.
💡Summary
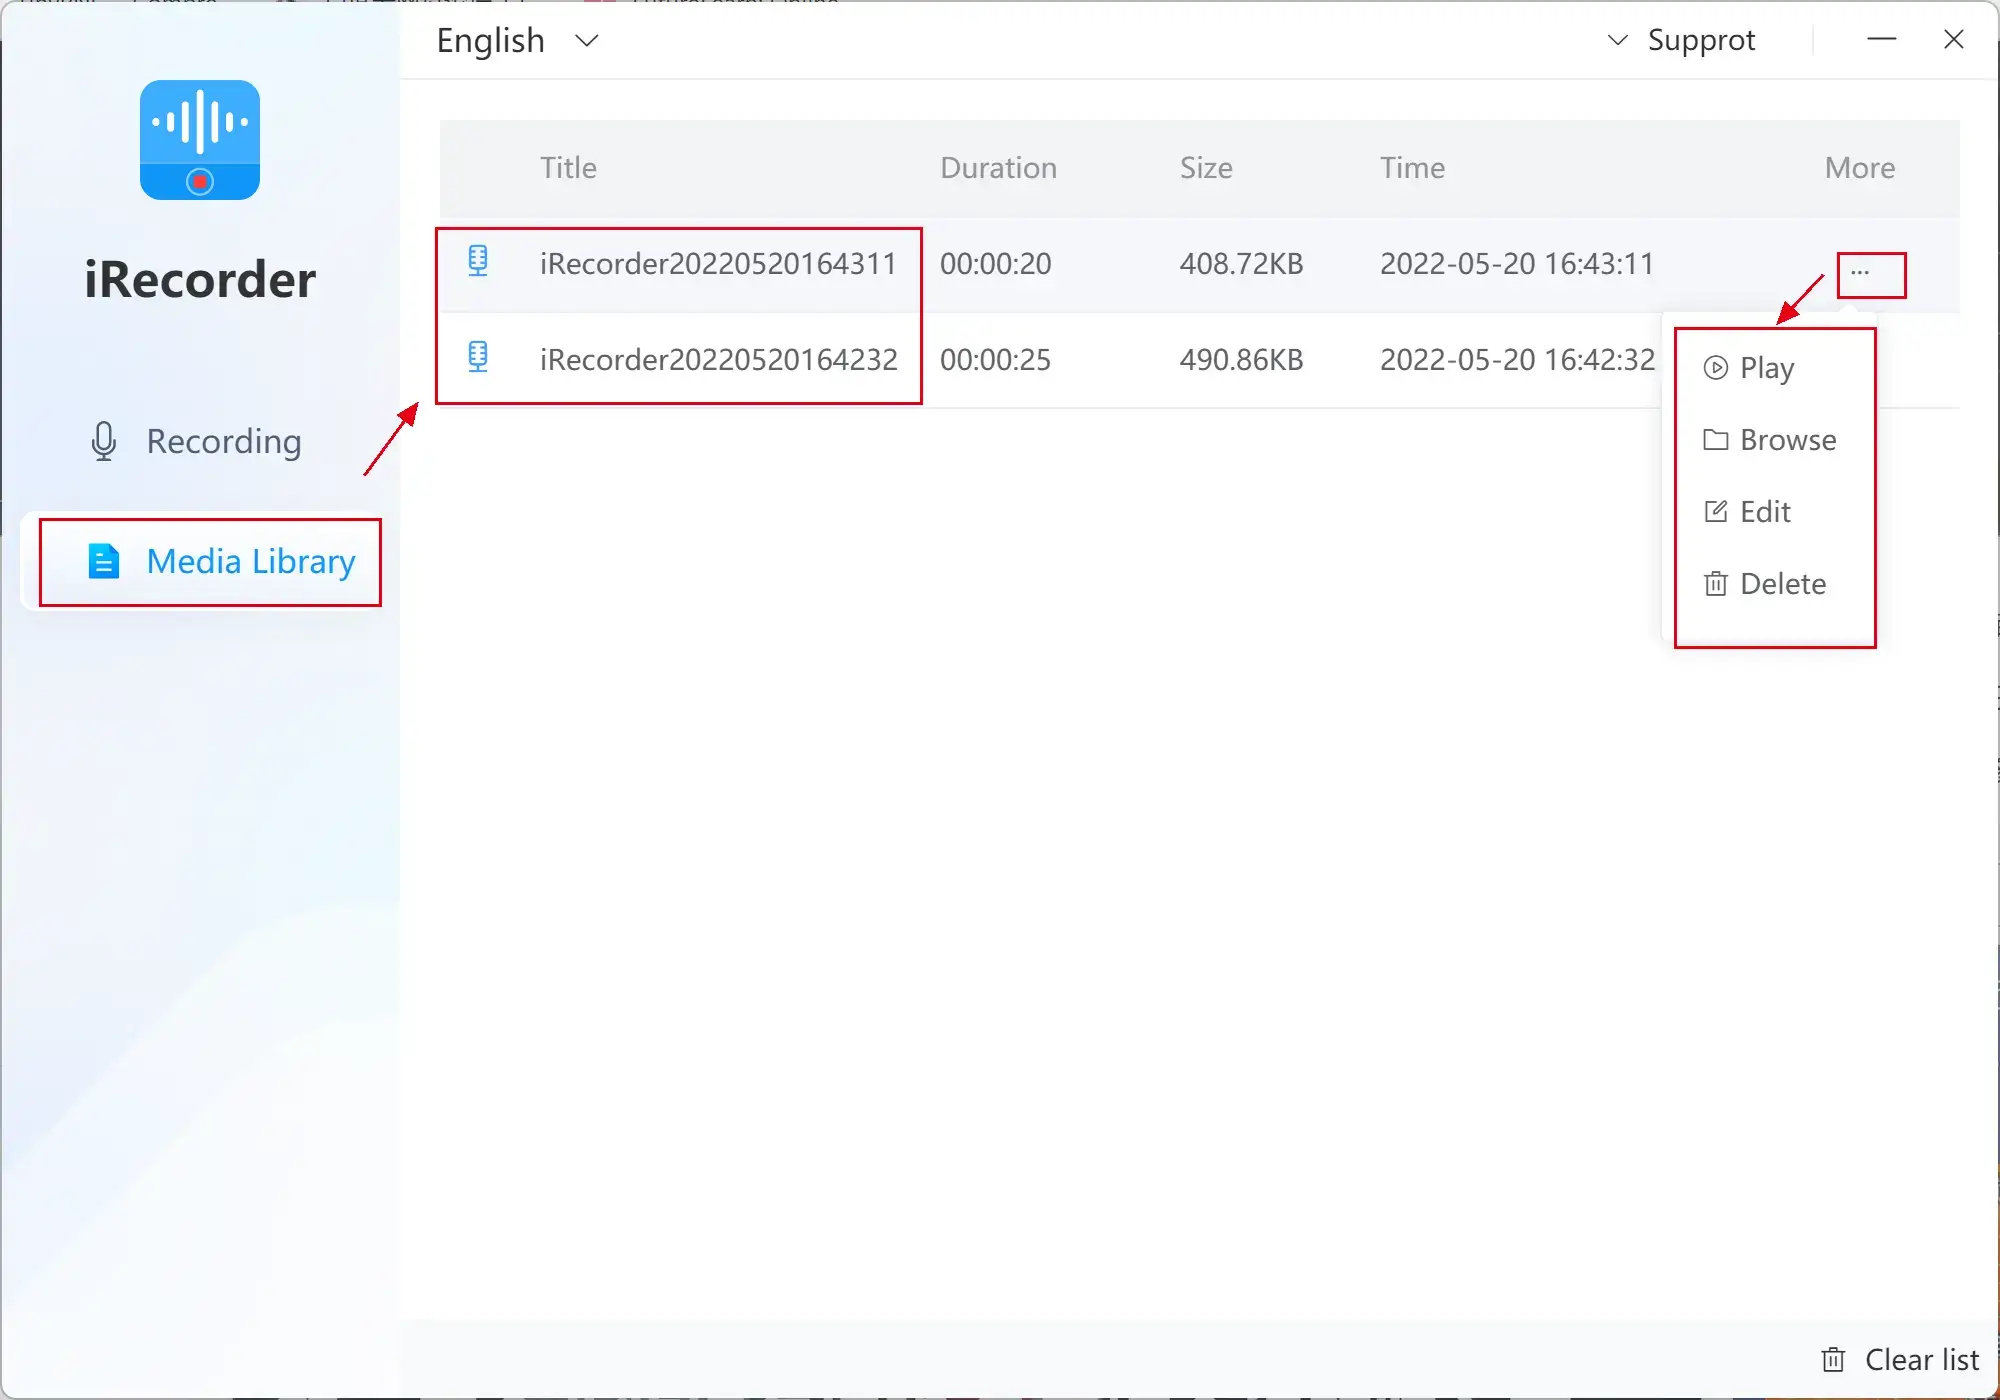
1). All the recorded WAV files can be retrieved in the Media Library section.
2). Click the ellipsis icon (…) below More to make further operations, such as Play, Browse, Edit, and Delete.
Something More to Say
📌What makes WorkinTool Audio Recorder stand out?
💡Multiple Sound Sources
You can make a WAV file from your PC, microphone and both sources easily and instantly.
💡Free Recording Information Editing
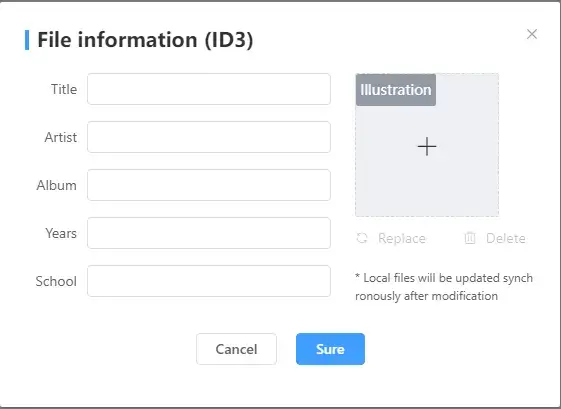
You can edit the detailed information of your recording free of charge, from artist and album to year and school. Even an image is addable there.
💡Time Settings for Automatic Operation
This is a unique setting in WorkinTool Audio Recorder to enable you to start and end your recording automatically once or repeatedly at the designated time. You can set up the following options:
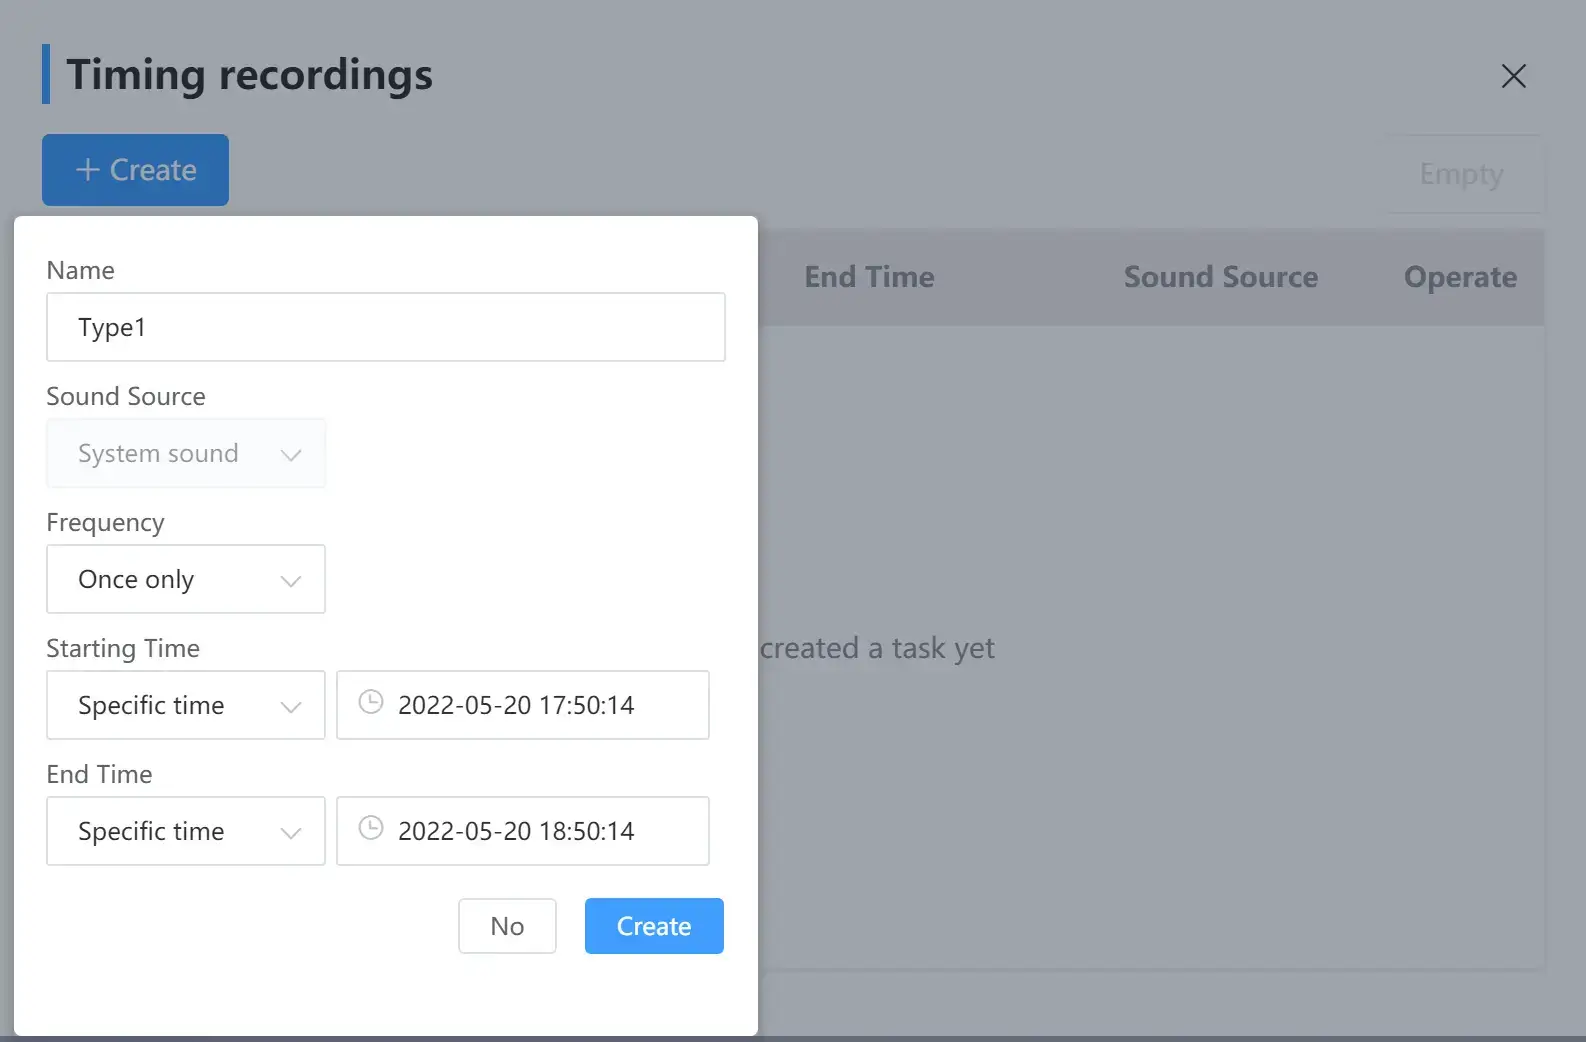
- Sources Source: System sound, microphone sound and both sounds
- Frequency: once only, every day and weekly
- Starting Time: You can set up a specific time to record the sound source automatically or choose Start manually to begin your recording.
- End Time: A specific time setting is here to end your recording automatically or you can end it manually.
💡Various Custom Settings
A more custom outcome can be exported with the help of WorkinTool’s useful settings:
| Hotkeys | You can customize your shortcut keys to start, pause, resume and stop the recording. |
| Audio Quality | High, Standard, Low and Custom (you can adjust vocal tract, sampling rate and bit rate.) |
| Noise Reduction | Click it open to lower the noise in your recording. |
💡Auto Save File
It enables you to automatically save your recording based on time or MB size. You don’t have to worry that the software keeps recording even after the original sound source terminates.
| Auto Start-up | You can tick this option so that WorkinTool Audio Recorder will automatically activate after you start your computer. |
| Auto Operation When Closing The Panel | Exit Program: The software will close when you click the X icon. |
| Hide to The Taskbar Without Exiting The Program: The software will hide only and not close itself when you close the panel. |
Final Thought
This is our discussion on how to make a WAV file in Windows. We sincerely hope you can find it useful to solve your problem and give WorkinTool Audio Recorder a try.
Now, are you ready to use WorkinTool Audio Recorder to make a WAV file?

