How to Sharpen an Image With or Without Photoshop
Blurry and unfocused images can be irritating to look at and disappointing when they don’t turn out as intended. Unsure of how to sharpen your photos and make them look crisp and polished? Worry not. You can revive dull photos with the right tools and techniques and bring out stunning details. Check out this post for the best solutions to do it with Photoshop and the exceptional alternative tool: WorkinTool Image Converter. Download now and learn to sharpen your images right away.
😍 1. Up to FREE 5 image batch conversions and compression try-out.
🤩 3. Easy interface for users to edit with THREE STEPS.
😎 4. Support more than 100 different image formats to operate.
🥳 5. Cover all the features that you can on the market and interesting filters.
😊 6. Available for image conversion, compression, matting, watermark, and more.
How to Sharpen an Image With or Without Photoshop
When it comes to photography, having sharp images is really important for the quality of the final image effect. However, there are times when our photos may not be as sharp as we would like them to be. Many times when you capture a great moment, but due to problems like camera settings or movement, it just ruins. But don’t worry. You can fix it. Plenty of tools, like Photoshop and WorkinTool, can help us sharpen our images and bring out more detail. So, in this article, we’ll be looking at different ways you can enhance the sharpness of your photos, whether you have access to Photoshop or not. Let’s get to the point of how to sharpen an image right now.
Understanding Image Sharpness
To start off our discussion on how to sharpen images, it’s essential first to understand what we mean by “sharpness.” When we talk about sharpness, we’re really talking about how clear and detailed an image looks, and the contrast between the pixels in the picture primarily influences this. Increasing this contrast can make the image look sharper and more defined. However, it’s essential to be careful not to overdo it since too much sharpening can actually end up creating unwanted visual distortions or noise in the image.
How to Sharpen an Image With Photoshop
No doubt that Adobe Photoshop is the first industry-standard software for image editing. It can provide various tools and techniques to users to sharpen images. Here, we will cover three popular methods that you can use to sharpen an image and make it look better with Photoshop: Smart Sharpen, High Pass Filter, and Unsharp Mask.
#1: Smart Sharpen
Smart Sharpen is a powerful and easy-to-use tool in Photoshop that allows you to apply targeted sharpening to your images. Now, follow these steps to make blurry content clear again:
- First, open your image in Photoshop.
- Right-click on the layer and select ‘Convert to Smart Object.‘
- Then, go to ‘Filter‘ > ‘Sharpen‘ > ‘Smart Sharpen‘.
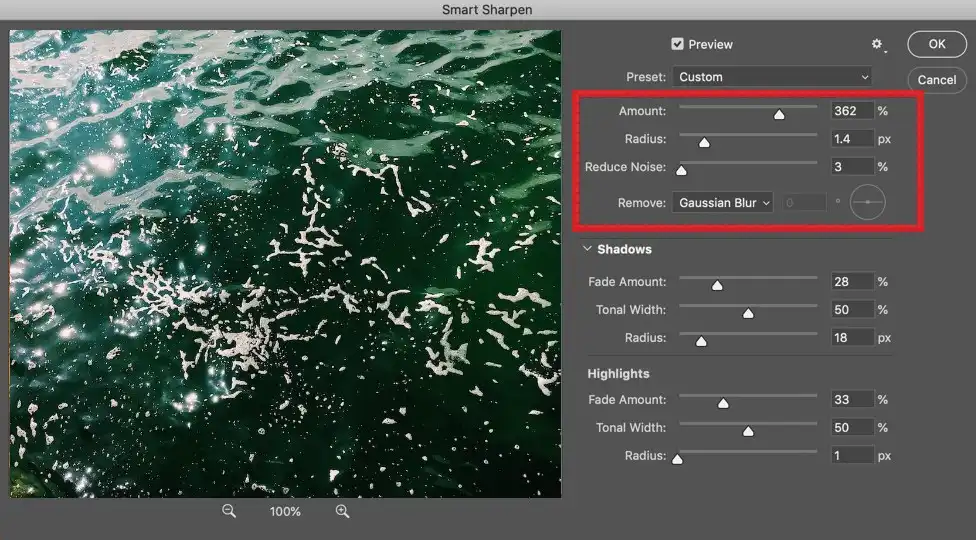
- Make sure Remove is set to Lens Blur in this dialog box. Then you can adjust the Amount and Radius sliders to achieve the desired level of sharpness. The Amount controls the intensity of the sharpening effect, while the Radius determines the width of the edge contrast.
- Lastly, click OK to apply the sharpening effect.
#2:High Pass Filter
The High Pass Filter is another method to try to sharpen Photoshop images. Here’s how you should do this:
- Open your image, right-click on the layer, and select ‘Convert to Smart Object.‘
- Choose ‘Filter‘> ‘Other‘> ‘High Pass.’
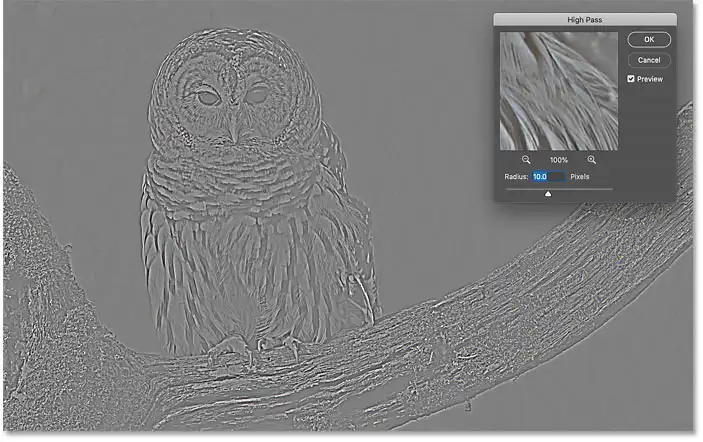
- Then, you will see the picture turn gray. Continue to set the Radius value. A lower value will result in a subtler effect, while a higher value will produce more pronounced sharpening.
- Change the blend mode to Overlay, Soft Light, or Hard Light, depending on the desired intensity of the sharpening effect.
- Click OK to apply the High Pass filter.
#3:Unsharp Mask
Unsharp Mask is a classic tool to sharpen images. It allows you to control three parameters: Amount, Radius, and Threshold. The Amount controls how much contrast is added at the edges. Radius controls how far away from an edge the tool will apply to sharpen. And Threshold controls how subtle shades are sharpened. Check out how to use Unsharp Mask to bring out details and make an image appear crisper:
- Same as before, open the image and right-click to select ‘Convert to Smart Object.‘
- Go to ‘Filter‘> ‘Sharpen‘> ‘Unsharp Mask.‘
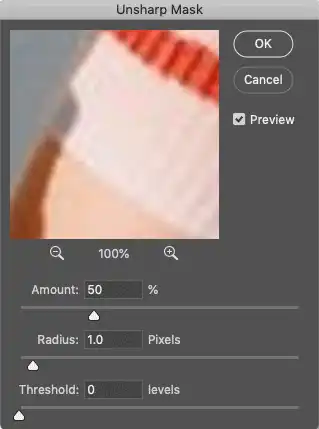
- Adjust the Amount, Radius, and Threshold sliders to fine-tune the sharpening effect in the Unsharp Mask dialog box. The Amount controls the intensity, the Radius determines the width of the edge contrast, and the Threshold helps to prevent noise and artifacts by excluding low-contrast areas from the sharpening process.
- Last, click ‘OK‘ to apply the ‘Unsharp Mask.‘
How to Sharpen an Image Without Photoshop
However, you don’t need to use Photoshop. There are numerous other image editing tools on the market. If you don’t know what you should use, we recommend that you try WorkinTool Image Converter. It can be an outstanding alternative available that you can use for sharpening images. And also it can help you solve other annoying problems once and for all.
WorkinTool Image Converter


WorkinTool Image Converter is one of the top image editing tools, perfect for sharpening and polishing your photos. It is an AI-powered, all-in-one photo editor that allows you to enhance your images like a pro. WorkinTool Image Converter empowers you to sharpen details and bring out textures in your photos. You can boost clarity and define edges with just one clicks. Adjust sliders to refine contours and smooth skin tones until your subjects look remarkably refined.
But sharpening and enhancing are just the start. You can also edit photos and convert over 100 different image formats, simultaneously applying edits to multiple photos. Whether you’re a photography enthusiast or just getting into editing, WorkinTool Image Converter provides an easy yet powerful experience. WorkinTool Image Converter, tapping into your creative potential is simpler than ever.
- 100 +image formats conversion available
- Customize to enlarge or compress images
- Add or remove photo watermarks
- Change or remove the image background
- More than 65 image filters to apply
How to use it:
1. Open WorkinTool Image Converter and navigate to the Photo Restoration option.

2. Choose ‘Fix facial blur’ and add your blurry image.
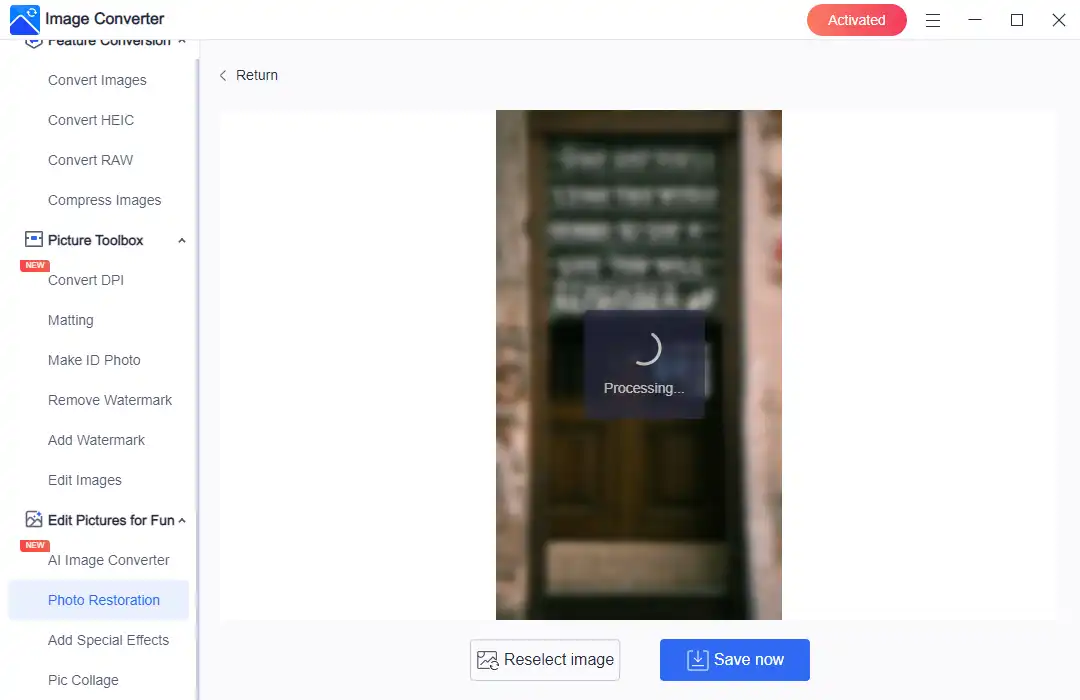
3. Then, wait for the AI algorithm to process your image. It should be within 5 seconds.
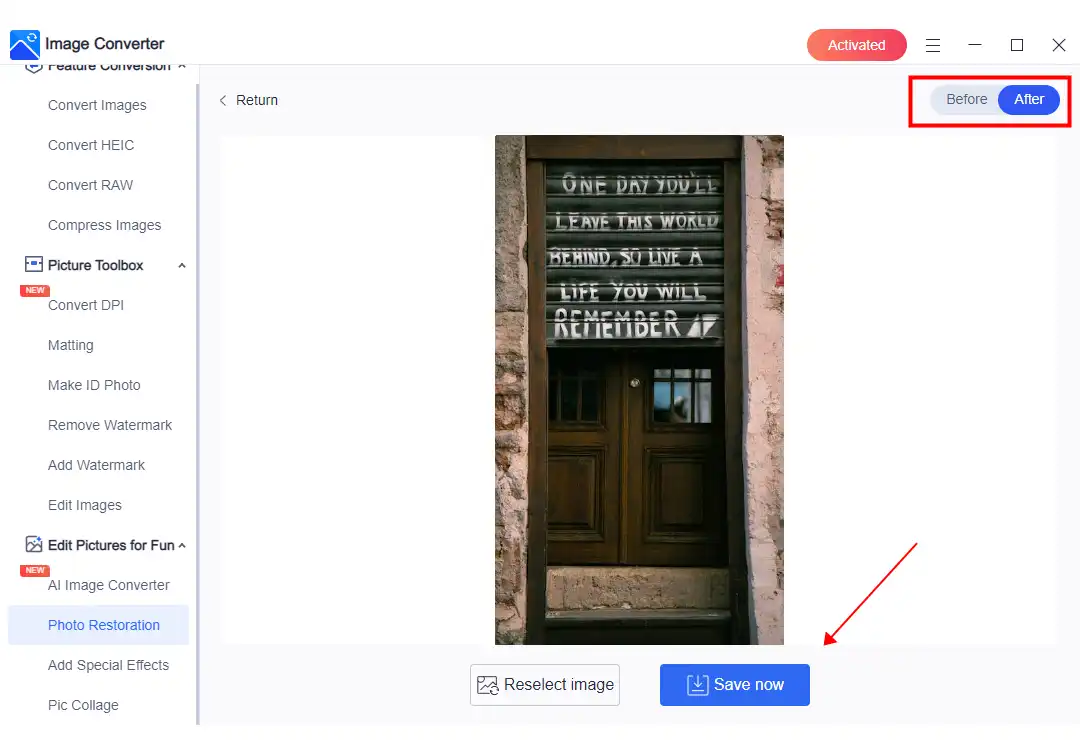
4. After it is finished, check out the result on the canvas. Switch the Before/After button to see the contrast. If it is satisfactory, click Save Now.
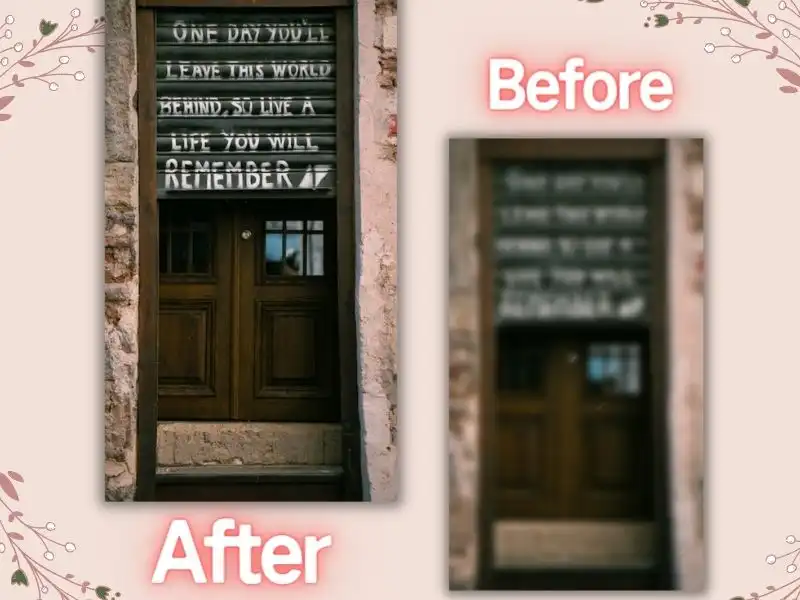
As you can see from this comparison, the blurred words in the image have been restored to their original appearance. Even the reflection in the mirror is polished. And all of this can be had with a single click using WorkinTool Image Converter. From now on, you can say goodbye to the complicated operation of Photoshop.
🎉 More Helpful Tutorials for WorkinTool Image Converter 🎉
Online Tool to Sharpen an Image
Except for desktop tools like Photoshop and WorkinTool, there are also several online tools available that you can use to sharpen images. By using them, you will be able to enhance your photos without installing any software. Here will list some practical online image editing platforms that offer sharpening tools include:
It is ok if you don’t want to download any desktop tool because WorkinTool and Adobe both have the online service to sharpen an image as well. To sharpen an image using one of these online tools, upload your image, select the sharpening tool, and adjust the settings as needed. Then download the edited image to your computer.
Conclusion
Getting clear, sharp, and stunning pictures is crucial to photography and editing photos. Whether you prefer using Photoshop or WorkinTool or exploring other desktop tools and online services, plenty of tricks are available to help make your photos look brilliant. Once you learn a few of these techniques, you’ll be able to guarantee that your photos always seem their finest and stand out from the crowd.
Getting the details crisp and distinct allows photos to really pop. Edges become more defined. Textures become more vivid, and eyes can see deeper into the subject. Little details that might otherwise go unnoticed come alive when photos are tack-sharp. Subjects that are in focus grab attention and draw the viewer in.


Related Article
 How to Convert PSD to PDF Without Photoshop [FREE]
  Best AI Image Generator Free - WorkinTool Image Converter Review How to Generate Image from Text – AI Image to Text Generator 2024