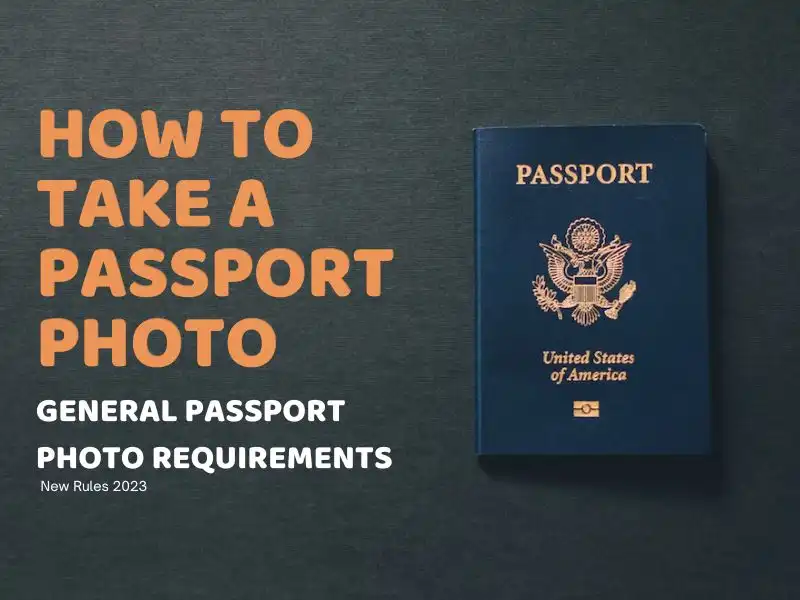
How to Take a Passport Photo: General Passport Photo Requirements
Taking a passport photo at home can be a simple and cost-effective way to obtain the necessary documentation for international travel. To ensure that your photo meets the required standards, check out this post for all the requirements you should note and a practical tool that you can use to help you edit the passport photo to meet those rules. Try WorkinTool Image Converter now and get your perfect passport photo in seconds.
😍 1. FREE to enjoy all the picture editing features right now.
🤩 3. Easy interface for users to edit with THREE STEPS.
😎 4. Support more than 100 different image formats to operate.
🥳 5. Cover all the features that you can on the market and interesting filters.
😊 6. Available for image conversion, compression, matting, watermark, and more.
How to Take a Passport Photo: General Passport Photo Requirements
As you may know, passport photos are vital to any application. They must meet a series of specific requirements to be qualified and accepted. For example, a passport photo can only be one color, taken in the last six months, without any filters… Of course, The Official would advise you to take the picture at a service facility like Walgreens, CVS, or Target to save the trouble. However, they may charge you $15 or more. You can save this expense by doing it yourself. This comprehensive guide will help you learn the general passport photo requirements and how to take a passport photo by yourself. Our tips and guidelines can bring you closer to a successful passport application process.
How to Take a Passport Photo: Basic Passport Photo Requirements
If you want to take a good passport photo as quickly as possible, you will definitely need to understand the basic requirements first. Since the U.S. Department of State has a stringent policy for passport photos, their approval rate will be low. The process of submitting images, however, is quite time-consuming. If your photos are rejected, whether you re-submit or update them, it may affect your schedule later. To avoid those necessary troubles, please note the following specifications:
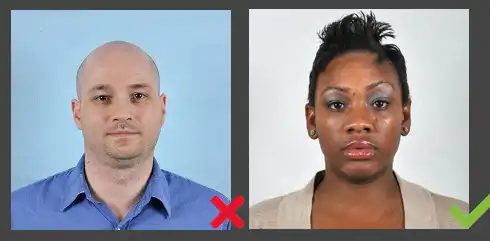
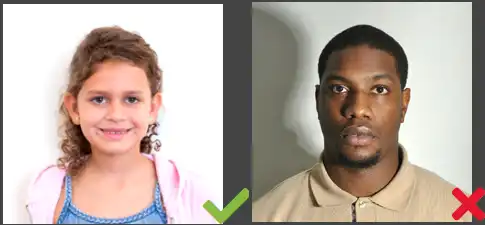
#1 Background:
Note: The background of your passport photo should be white or off-white without shadows and plain without texture and lines. If you cannot find a white wall, use a white blanket or sheet to cover the wall. Pay attention to the wrinkles. Another one to be aware of, no other person should be in your passport photo. If you take a passport photo of your kid, try placing the child on a white blanket.
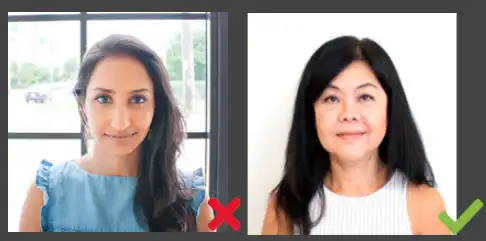
#2 Shadow and Lighting:
When taking the photo, be sure that the picture is clear and in color. And the light can show your tone color accurately. There should be no problems like overexposed or underexposed light. You should adjust the exposure first and use extra lighting if necessary. Suppose you are taking a photo at night with house lighting. Use uniform illumination in case of shadows on your face and background. Also, your photo should be taken within the past six months.
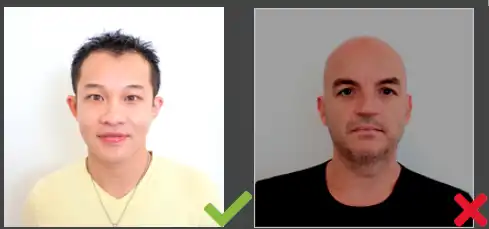
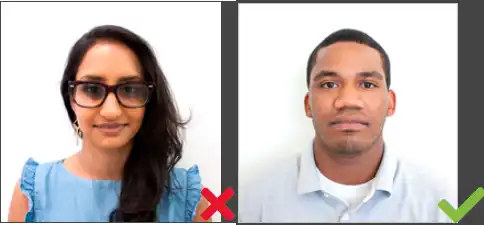
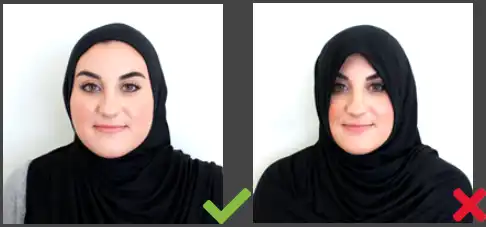
#3 Accessories and Hair:
Remember to adjust or remove all your attire, hair, or accessories that may cover your face when taking the passport photo. Wearing hats or head coverings is forbidden except for religious or medical purposes. However, showing your entire face is visible and free of shadows doesn’t affect you. If you need to wear a head covering due to special reasons, remember to submit a signed statement with your application in person. You needn’t upload a signed statement again if you only need to renew your photo online.
#4 Size and Format:
When it comes to photo size and format, you will consider the actual situation. If you want to apply in person or by mail, the passport picture should be 51 × 51 mm with your head centered and sized between 25 and 35 mm. If you try to renew your profile online, you need to take a passport photo with extra space for the automatic cropping. Also, the digital image needs to be in JPG or JPEG format at least 600 × 600 pixels.
How to Take a Passport Photo: A Simple Tool to Fit Requirements
As you can see from the above, there are so many details you should know when you plan to take this photo at home. If you need help handling the background thing as well as the photo size and format, we can offer you an efficient image editor that can help you make the passport photo that fits all the strict requirements. And its name is WorkinTool Image Converter. Try it and thank me later.


WorkinTool Image Converter is a professional image processing software that helps users work with all image problems. The most-featured image format conversion function can convert images with 100 formats in batches for FREE. As for the needed ID photo-making feature, it offers the best service to replace the background with a white color automatically. Then, you can directly adjust the size to the request. Other than that, there are also features for you to adjust the image details to increase the approval possibilities. Best of all, a simple image tool like this one doesn’t require you with any editing experience. You can finish making a passport photo within a second. And also, it saves you the $15 you will spend.
- 100 image formats conversion available
- Customize to enlarge or compress images
- Add or remove photo watermarks
- Change or remove the image background
- More than 65 image filters to apply
Tutorial on making passport photos at home
1. Open the tool, find the Make ID Photo, and upload the photo you just took.
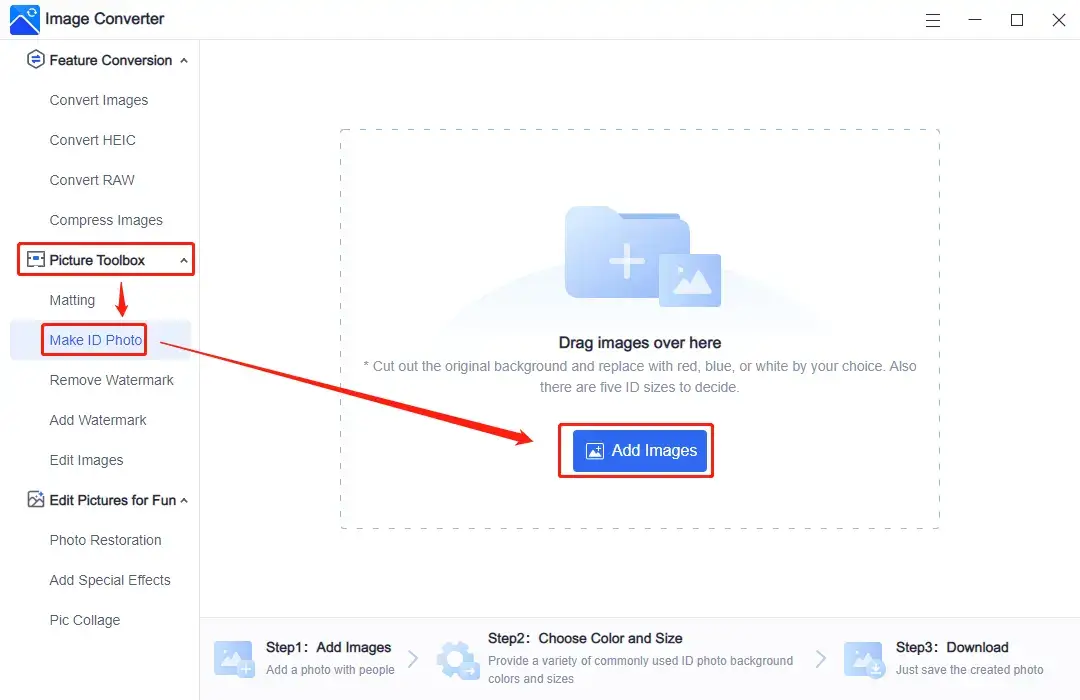
2. Select White color as the background. Don’t worry about the retouching tool. It won’t alter the outline of your head, neck, or other parts that make it look weird.
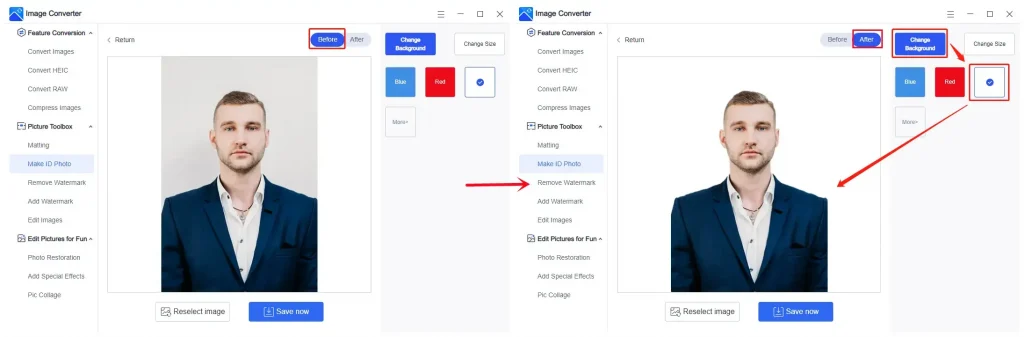
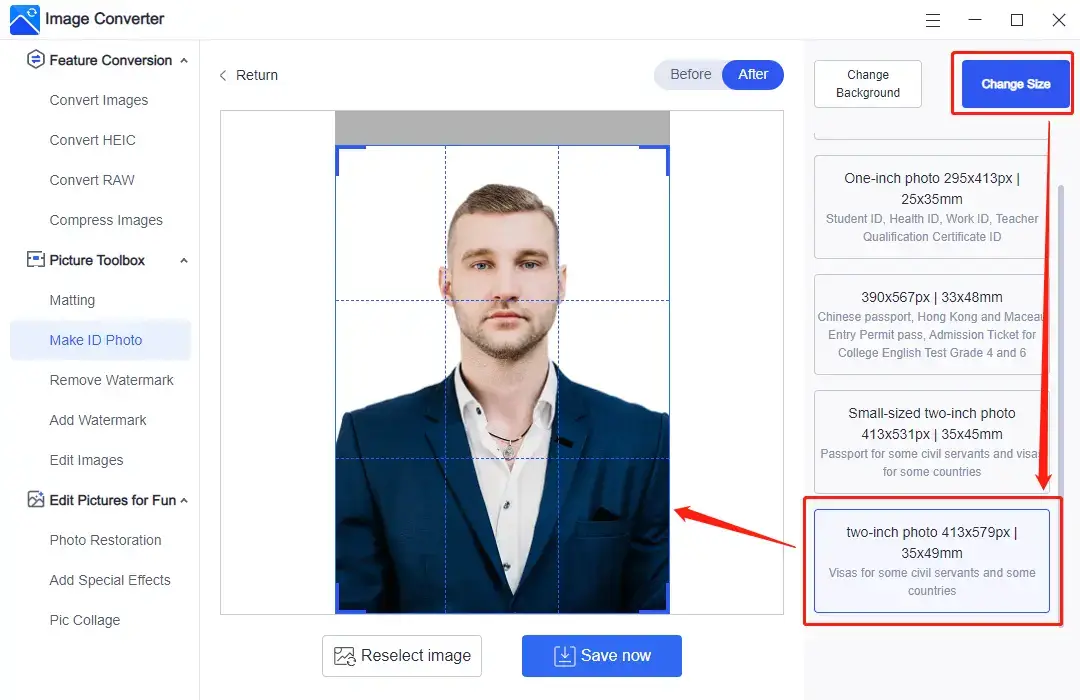
3. Then, go to the Change Size option and tap the two-inch photo.
4. Finally, click Save now to check this passport photo on your local computer.
Something to Note:
After you choose the two-inch photo option, you will find out that it is 35 × 49 mm, different from the required size of 51 × 51 mm. So, in order to raise your approval chances, there is also another method for you to get this right:
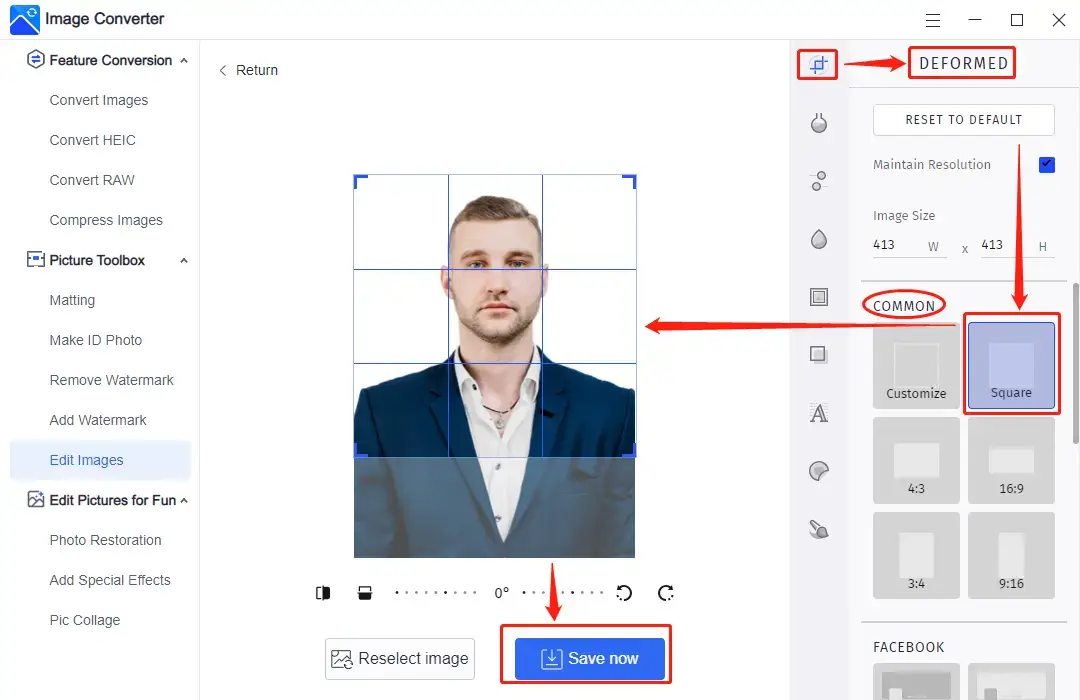
- First, you still need to get a white-background photo. Use the ID photo maker to get it.
- Then, click Edit Images and input this photo.
- Go DEFORMED > COMMON > SQUARE.
- Box your photo and click Save Now to close the deal.
💖 Additional WorkinTool Image Features 💖
Tips for How to Take a Passport Photo
Taking a passport photo at home can be a convenient and cost-effective way to obtain the necessary photo for your passport application. To ensure your photo meets the required specifications, here are some extra tips to follow:
| Camera: | Use a high-resolution digital camera or smartphone with at least 5 megapixels. Make sure it’s positioned at eye level and at least 4 feet (1.2 meters) away from you to avoid distortion. |
| Position and expression: | Stand or sit up straight, directly facing the camera. Keep your head level and maintain a neutral facial expression with your mouth closed and eyes open. |
| Clothing: | Wear clothing that contrasts with the background, avoiding white or very light colors. Do not wear uniforms, hats, or head coverings unless required for religious reasons. Also, no glasses. |
| Editing: | Keep editing to a minimum. Do not apply filters, remove blemishes, or alter your appearance in any way. They wouldn’t get you a pass if there were any facial or skin color discrepancies. |
Final Thoughts
A passport photo meeting general requirements is essential for a successful application. Following these guidelines and taking the passport photo properly ensures your picture is compliant and avoids application delays or rejections.
Remember that passport photos represent your identity and should accurately depict your appearance. Investing time and effort into getting a high-quality photo will help your application process go smoothly and prevent any issues while traveling. So, do not apply filters or try to beautify this photo. Even if you get a pass for a passport, there are still chances of getting you trouble during your flight and travel.
Now that you know how to take a passport photo that meets general requirements, you’re one step closer to your next adventure. It is time to make a move.


Related Article
 How to Take Amazon Product Photography at Home (E-commerce Tips) How to Resize a Photo on Windows, Mac, and Online 2024 How to Crop a Photo on iPhone, Android, Windows, and Mac