How to Enlarge a Picture without Losing Quality
Do you know how to enlarge a picture without losing quality? If you ever tried to enlarge photo size for printing, tracing, or displaying on web pages, you may find some pictures are too small to create a clear effect. In order to avoid blurry images with low resolution or pixelation, this article explains three simple solutions to make pictures bigger without compromising quality. Free approaches are also included.
😍 1. Change DPI from 72 to 1000 as you desire.
🤩 3. Enlarge images 2X to 4X with AI technology.
😎 4. Support up to four images to change DPI together.
🥳 5. Cover all the features that you can on the market and interesting filters.
😊 6. Available for image conversion, compression, matting, watermark, and more.
How to Enlarge a Picture without Losing Quality
Look, whether you’re a professional photographer or a user casually taking photos, there will be times when you need to enlarge a picture for various purposes. It could be for printing a wedding ceremony, advertising board, or other occasions that need to display photos in a large frame. However, if you have tried the conventional resizing methods, you should know that they can only lead to a loss of image quality, leaving you with pixelated or blurry results. To avoid this situation, using the right approach and tools to maintain image quality when enlarging your pictures is essential. So, this article will explain the resolution, tips for Image Enlargement, and, most importantly, how to enlarge a picture without losing quality. Now, let’s get to it.

👓 Understand PPI, DPI, and Resolution
Before we dive into the real methods and tools for enlarging pictures, it’s vital to understand the factors of image resolution. Well, resolution usually refers to the number of pixels that make up an image. It is typically represented by the width and height in pixels like 1920×1080. As you should know, image quality is directly related to resolution, which means that the more pixels in an image, the better the detail and quality.

- Pixels per inch (PPI) refers to the measure of resolution on the computer screen, TV screen, or any other on-screen display device. It is a term that is often used in web pages, the photography industry, cameras, and digital images. The more pixels in an image, the higher the resolution and the larger the picture size.
- Dots per inch (DPI) is typically used to refer to the number of dots that can be placed in a line within one inch. It is widely used in the printing industry to describe printed documents. In general, the higher the dots’ intensity, the higher the resolution, and the better quality of the prints. That is why although many images digital devices show are in 72 DPI, they will not make pictures blurry when we see them on computer or phone screens.
When you enlarge a picture, you’re essentially stretching these pixels, which can result in pixelation and loss of quality. Adding more pixels is the key to blowing up an image without losing quality. Now that you know what really affects the image quality, let’s explore the best methods for enlarging pictures without losing quality.
How to Enlarge a Picture on Windows
When questions come to how to enlarge a picture for printing and displaying without losing quality, it usually means how to add more DPI and PPI so that we can print documents and display digital images without sacrificing the resolution. This chapter elaborates on how to upscale a picture for printing, tracing, and displaying in three easy and attainable photo editing software. Head further to learn more.
#1: WorkinTool Image Converter
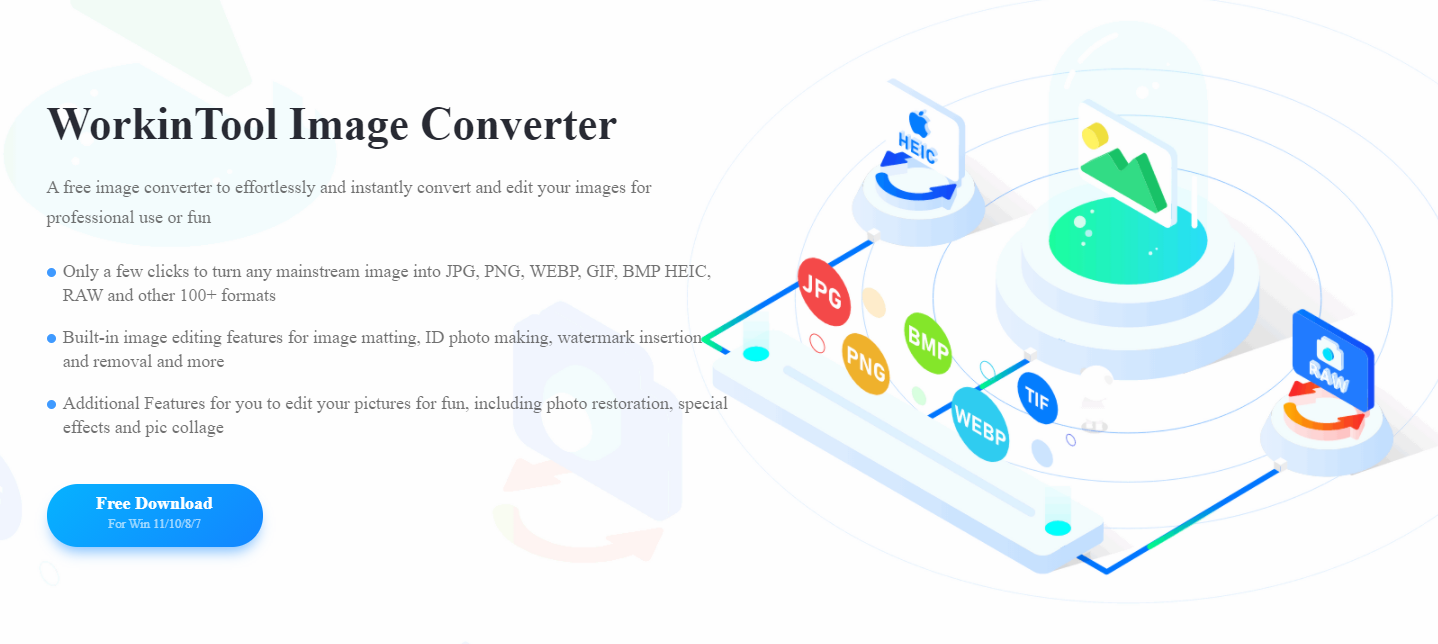

WorkinTool Image Converter is an easy-to-use and practical photo editing tool that is based on Windows computers. But there are many helpful image enlargers and photo editors in the market. Its AI enhancer makes it stand out from other similar offerings. Its AI technology can help you to blow up pictures with a matching resolution with the most appropriate PPI and DPI automatically, which saves your workload to a large extent. It also offers a feature for users to change image DPI for printing manually.
In addition, this is also a versatile program that allows users to edit image details, convert image formats, crop images, compress image size, remove watermarks from photos, restore old photos, and more. All these features are easy and free to use. Users don’t even need to register an account or pay for an expensive subscription service.
- 100 image formats conversion available
- Customize to enlarge or compress images
- Add or remove photo watermarks
- Change or remove the image background
- More than 65 image filters to apply
Here is how to blow up a picture using the WorkinTool image enlarger tool.
- Open this tool and follow Edit Pictures for Fun> Photo Restoration > Enlarge image size to upload a picture (The picture you add should be with a size larger than 32×32 pixels but smaller than 1920×1080 pixels).

- Wait for processing and save it to your computer. It only needs one second to enlarge a photo.
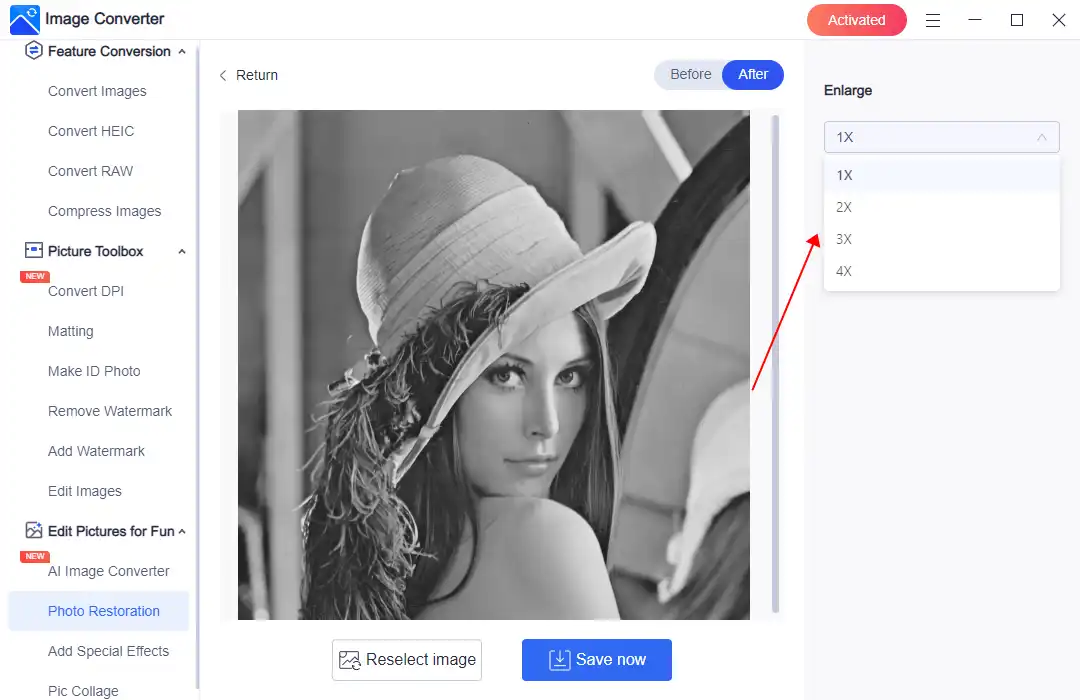
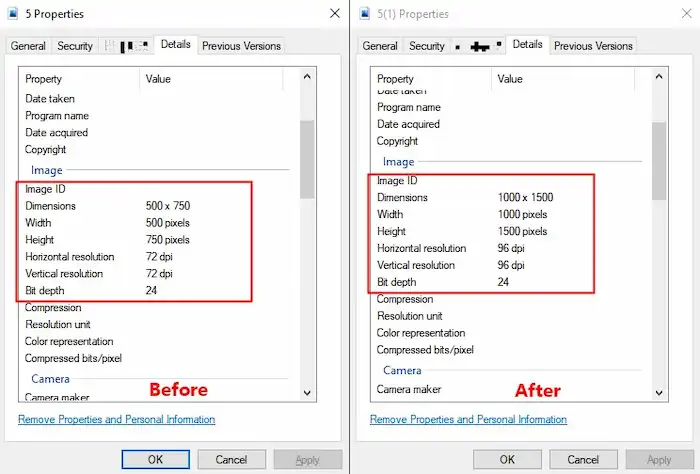
After you add an image to this software, it will expand the image two times larger. You can also manually adjust it to three times or four times as desired. What’s more, the processing panel will show the original resolution, the enlarged size, and the Before & After comparison to you, making things easier. Here I uploaded a JPEG picture, and this is the final work.
Before and After Comparison
(We can see that both PPI and DPI increase in values.)
How to increase image DPI
1. Select the Convert DPI option to add the image you like.
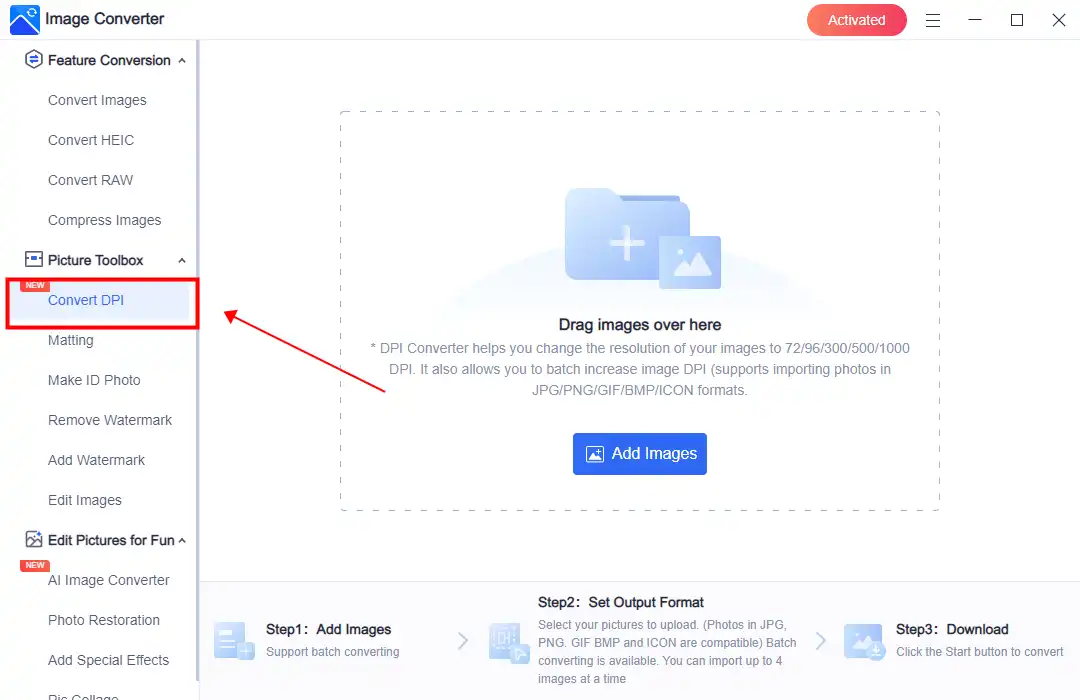
2. Upload up to four pictures at a time if you need them. Then, select the changed DPI from the right menu.
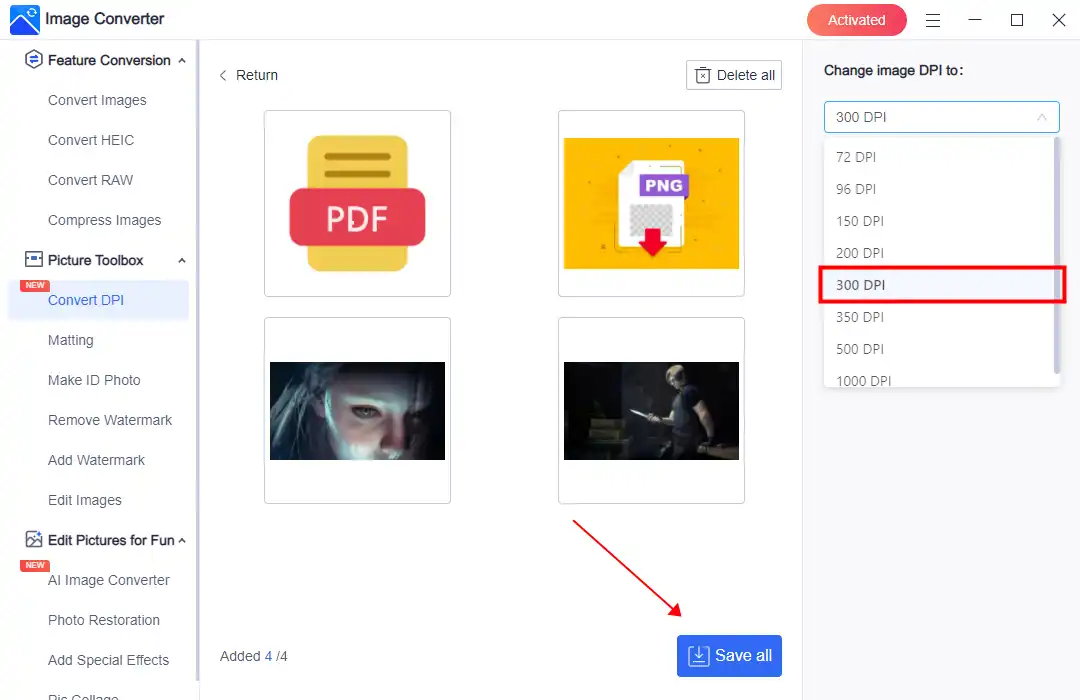
3. Finally, click Save All and save all your pictures in the designated folder.
💖 More Additional Features for WorkinTool Image Converter 💖
#2: Blow up a Picture in Paint
You can also enlarge a picture without losing quality on Windows without third-party software assistance. That is to use the built-in tool: The Paint app. It allows you to resize an image based on percentage or pixels. It is easy to operate as well. However, it can only adjust PPI instead of DPI. And the DPI value will not change when you save the enlarged images. Therefore, this method is only available when adjusting the resolution of digital images that are showing on electronic screens. If you want to expand a picture to poster size and printing, it is better to choose WorkinTool Image Converter as your first choice.
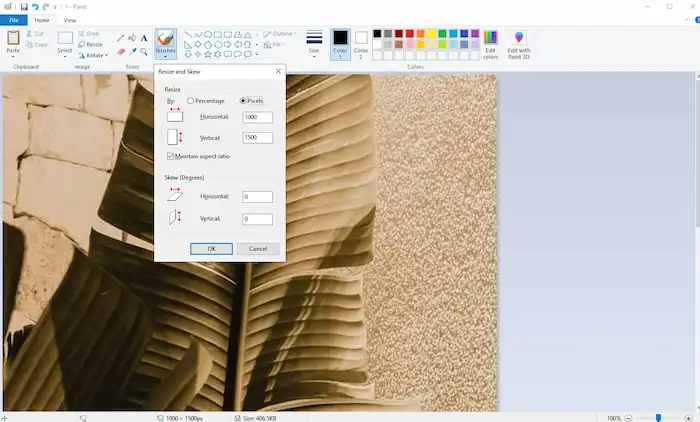
Here is how to enlarge a picture in Paint.
- Right-click your image and open it with Paint.
- Find Resize in the upper toolbar, click on Pixels, and change the Horizontal and Vertical parameters as desired (Remember, don’t go beyond two times the original pixels, or it may influence the image quality).
- Click OK to apply the change.
- Find File> Save as, and save a copy of the original image.
How to Enlarge a Picture in Photoshop
When we talk about image editors, the first image tool that comes to mind is definitely Photoshop for most people. Surely, after a long time of development, it has gained quite popularity among people. If you have already subscribed to Photoshop, it will be an alternative way to blow up a picture without pixelation. It can also upscale an image without losing quality by advanced settings such as Resampling and Smart Objects that need to be configured manually. Photoshop helps a lot to avoid pixelated and blurry images when resizing a picture for printing and displaying. However, compared with WorkinTool Image Converter, Photoshop will require more knowledge and skills to upsize pictures. It means this tool has a higher bar for users. Also, it costs more for the subscription.

Here is the guide for photo enlargements.
- Open an image in Adobe Photoshop.
- Click Image and find the Image Size dialog.
- Tick Resample and select Preserve Details in the drop-down menu.
- Set the resolution as 300 Pixels/Inch and change the width and height as desired.
- After configuring, click OK and save the enlarged image to your computer.
How to Enlarge a Picture Online
In addition to the ways mentioned above to increase image size with various desktop software, you can actually use online software to deal with this problem. The online approach is more convenient to use when you are away from home without a PC. Even though Photoshop has an online image enlarger, it also requires a login membership. Here we recommend you use the second free online enlarger tool: Photoenlarger.
It is totally free without any user login. The only limitation is the input picture size: (larger than 32×32 pixels but smaller than 1920×1080 pixels).
However, it is still an online tool. Please always review online tools’ privacy policy before uploading your images, as some may store your data.
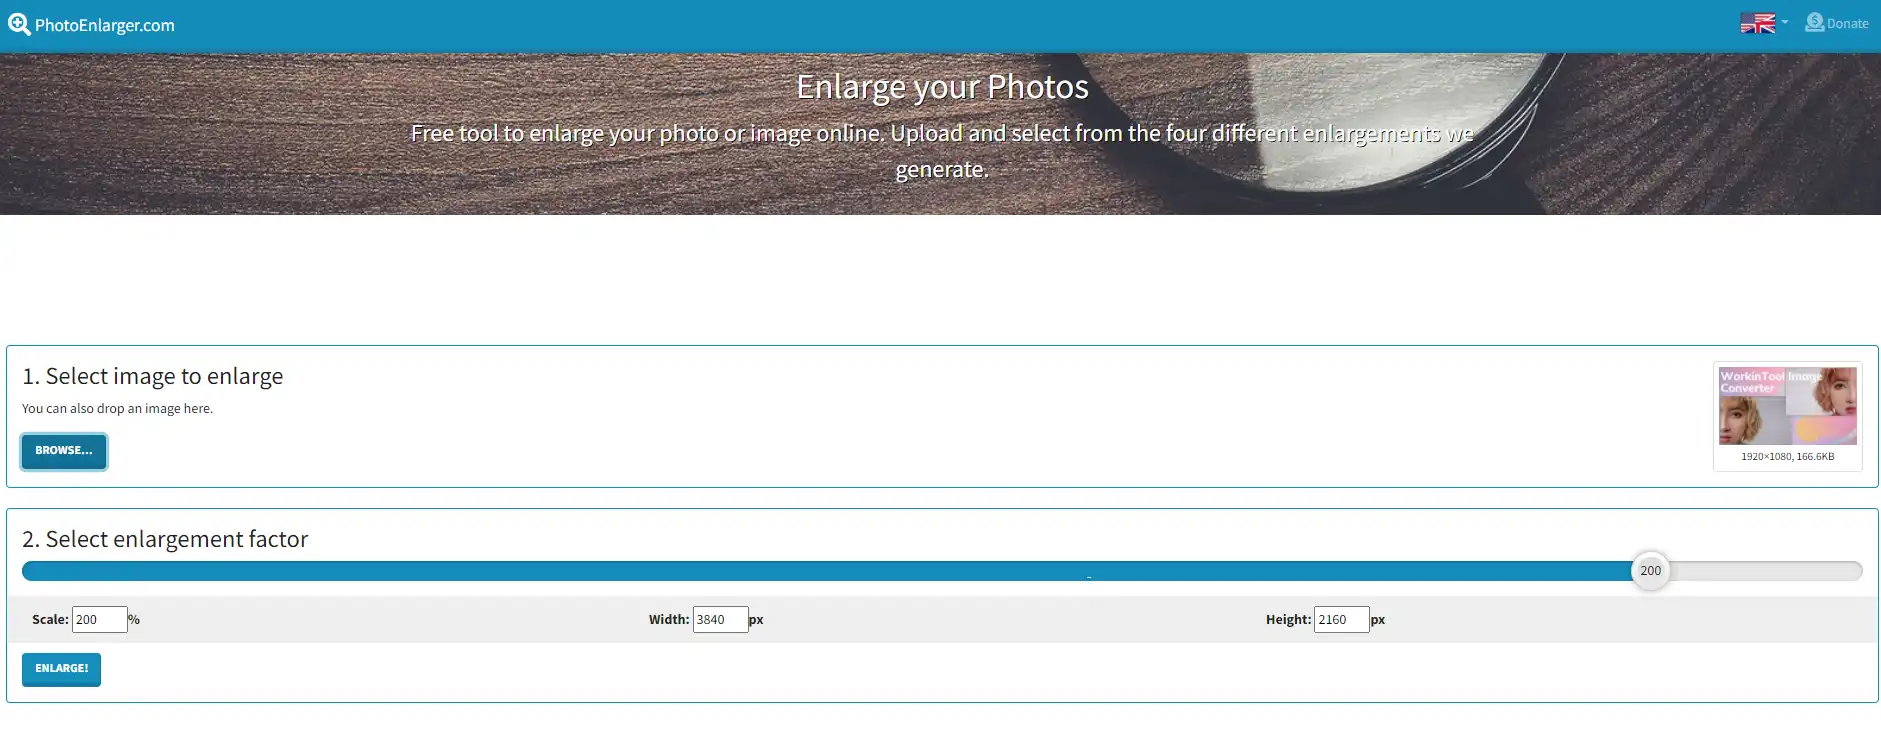
1. Navigate your browser to this Photoenlarge page.
2. Input your image and adjust the enlargement scale, width, and height settings.
3. click the Enlarge button to download this processed image to your local computer.
Essential Tips for Image Enlargement
In order to get the best results when blowing up pictures without losing quality, maybe you should consider the following tips:
| Start with a high-resolution image: | The higher the resolution of your original image, the better the results you get after the process. Try to use the highest-resolution picture possible. |
| Pick the lossless format: | Use lossless formats like PNG or TIFF when saving your enlarged image to avoid compression artifacts. |
| Don’t over-enlarge the image: | If you enlarge an image too much. It can still result in a loss of quality. So, aim for a reasonable enlargement factor, like two times or three times the original size. |
| Check the print size: | If you enlarge a picture for printing, please ensure the final size meets the print resolution requirements (usually 300 DPI). |
| Optimize for the web: | If you plan to use an enlarged picture on an online website, optimize it by compressing it without losing noticeable quality. WorkinTool Image Converter can also do it. |
| Test and iterate: | Always review your enlarged image at 100% zoom to check for any issues, such as pixelation or artifacts. Experiment with different interpolation methods and tools to find the best results for your specific image. |
Conclusion
After reading this article, you already know how to enlarge a picture without quality. Whether you want to blow up a picture for printing, tracing, making a poster, displaying it on a webpage, or restoring old photos, you can find an ideal solution in this article. Among the three photo editing software, WorkinTool Image Converter is the most convenient one, which can enlarge your images while maintaining the resolution with AI technology. Why not give it a try?