How to Add Keyframes in Premiere Pro, After Effects, and WorkinTool VidClipper
Learning how to add keyframes to videos will optimize your work to a large extent. Keyframe is a critical element for animation and filmmaking. Adding properties like rotation, position, anchor point, opacity, and scale makes videos more vibrant. This article explains how to add a keyframe in Premiere Pro and After Effects. Other than that, a bonus tip is offered in support of video editing beginners. Eager to know how to create keyframes? Read on to learn more!
How to Add Keyframes in Premiere Pro, After Effects, and WorkinTool VidClipper
What is a Keyframe?
A keyframe, as the starting point or the ending point of a variation, determines certain attributes and changes the parameter values of a clip in your video project. The clips will automatically animate between those two points. This could be the clip’s position, scale, rotation, or opacity. It is widely used in animation and filmmaking.
Whether you’re creating a sequence of keyframes with various moving parts, or you’re just inserting a transition or small element into a clip, keyframes can add a lot of custom properties and depth to your edit, making it look more vibrant and smooth. Do you know how to add keyframes to video clips?
Keyframing may seem complex, but they are far from the most complicated thing you’ll do in video editing. It’s a basic concept combined into something that can completely change the content you make and add a lot of vibrancy to your edits. Curious to know how to add a keyframe in Premiere Pro and After Effects? Head further into this article and explore how to add keyframes efficiently. (Free Bonus tips are also listed)
Bonus tip—How to Add Keyframes in WorkinTool VidClipper
This part is suitable for those who think Adobe After Effects and Adobe Premiere Pro are too difficult to learn, or are not willing to buy an expensive plan to enjoy video editing features. If you’ve already installed After Effects or Premiere Pro on your computer, and are with a certain level of video editing skill, skip this part and scroll down to learn how to add keyframes in After Effects and Premiere Pro.
WorkinTool VidClipper is an all-in-one video editing program that you can use for FREE. Using VidClipper to make a keyframe is much easier than doing it with AE and PR. Whether you are a beginner or a professional, you can get satisfying work from VidClipper with a few clicks.
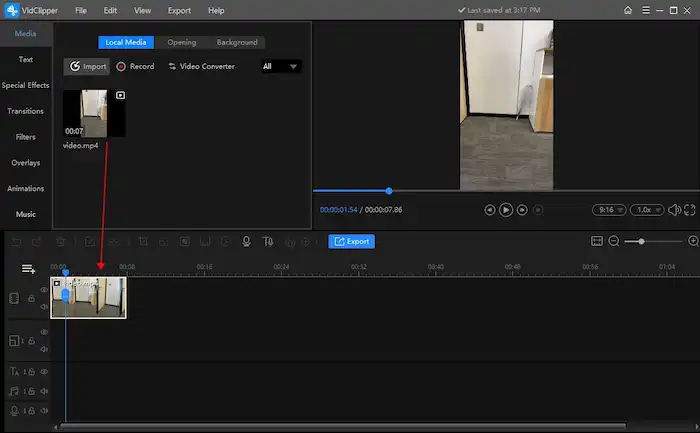
- Firstly, create a new project and drag the video to the timeline.
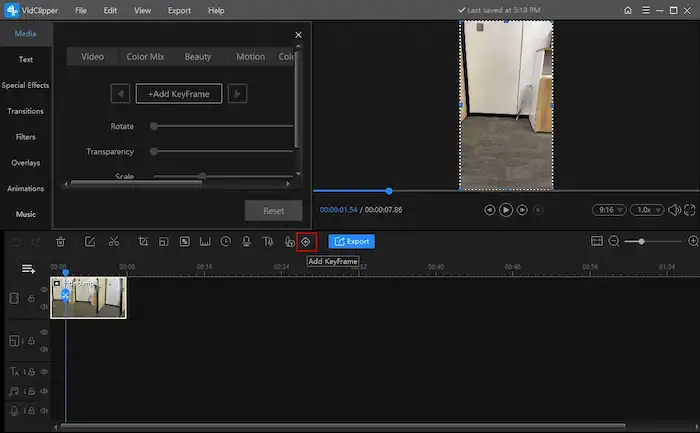
- Secondly, drag the playhead to where you want to begin the animation and hit the Add KeyFrame button. Move the playhead and press the KeyFrame button again to end the property.
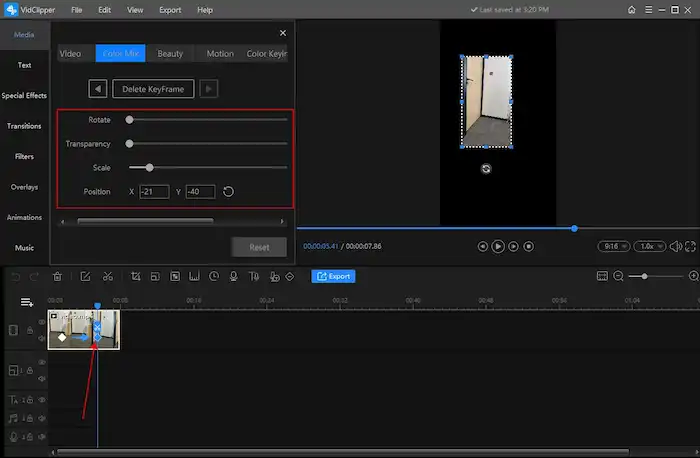
- Finally, adjust the rotation, transparency, scale, and position manually. (After adjusting, a blue arrow will appear between the two points in the video clip, showing you’ve added a keyframe successfully.)
Key Features
| Video Conversion | Screen Recording | Video Edits |
| Convert M4V to MP4 | Record a Teams meeting | Add overlays for edits |
| Transform AVI to MP4 | Record YouTube videos | Convert text to speech |
| Change WMV to MP4 | Screen record on Lenovo laptop | Add transitions, effects, and animations |
How to Add Keyframes in After Effects
After Effects is the industry standard for graphics and video design. This chapter explains how to add a keyframe in AE and how to use the shortcuts for keyframing in this software.
Firstly, create or import a layer
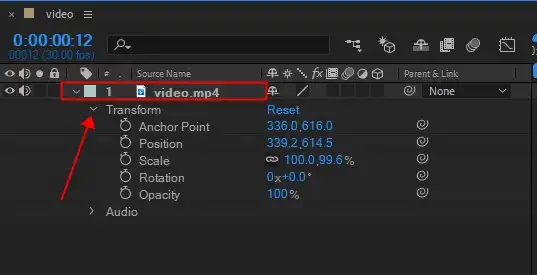
Open Adobe After Effects and select the layer you’d like to animate. Open the layer dropdown menu to show all of its properties by clicking on the arrow icon next to the layer name. Then click on Transform, and you’ll see the keyframes menu where you change the anchor point, position, scale, rotation, and opacity of a video clip.
Secondly, add a starting keyframe
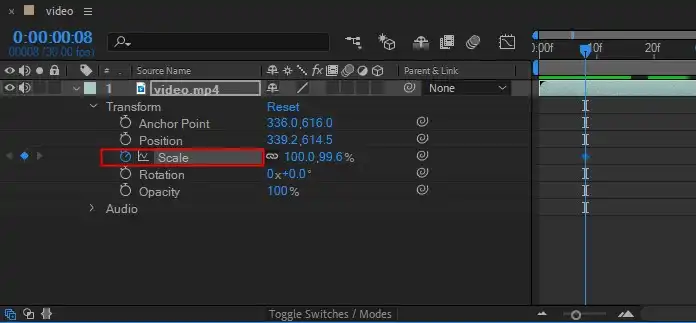
To get your first keyframe, move the playhead to the point where you want the animation to start. Click on the stopwatch icon next to the property name, and you’ll see a diamond-shaped icon appear on the timeline. If you don’t like where you’ve set a keyframe, you can simply select it and drag it around the timeline.
Finally, create an ending keyframe
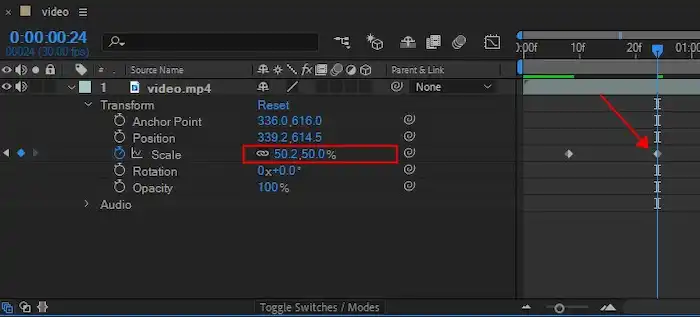
Move the playhead to where you want to end the keyframe property. Any value changes to the keyframe property will automatically generate a new keyframe. See, we move forward and scale down the video, a new keyframe indicator automatically appears at that point.
Keyframe Shortcuts
Tedious routines may slow down your workflow. However, After Effects hotkeys can help you work faster to optimize your work. How to add keyframes with shortcuts? Just remember the five letters: APSRT.
A stands for Anchor Point, P for Position, S for Scale, R for Rotation, and T for opacity. If you are a Mac user, adjust the Transform properties by Opt + A, P, S, R, T. Use Alt + Shift + A, P, S, R, T on Windows.
How to Add Keyframes in Premiere Pro
Similar to After Effects, Premiere Pro is the leading software for video editing. I believe it is needless to say how popular it is. Let’s see how to use a keyframe in PR.
Firstly, prepare to add keyframes
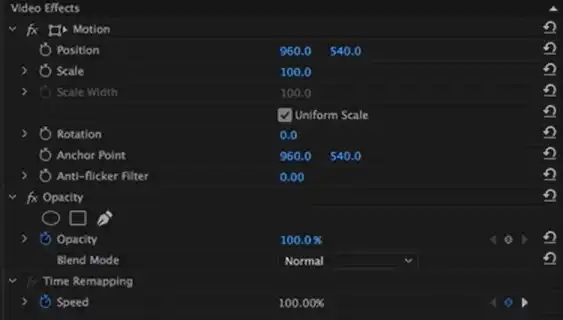
Open Adobe Premiere Pro and click on Editing at the top menu. Upload the video you want to add keyframes to Source, then drag the video to the timeline. Open the Effect Controls panel next to the Source panel. When you click on the video clip in the timeline, a dropdown will appear to show the Video Effects. To the right of the list, there is a mini timeline to show the keyframes you add later.
Secondly, create keyframes
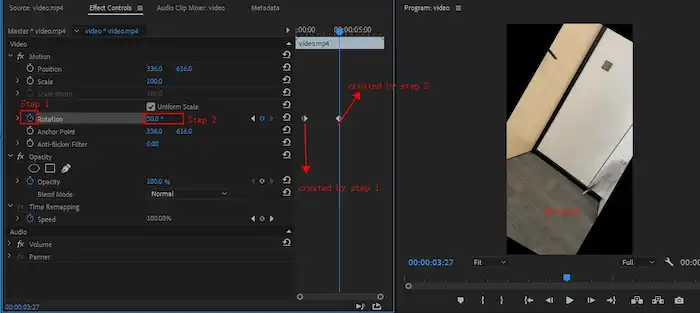
What attributes do you want to add to your video clips? As the video effects show, you can adjust the position, scale, rotation, anchor point, opacity, and so on to animate a video. You can choose one keyframe or add multiple keyframe properties to your video. Drag the playhead to where you want the property to begin, then click on the stopwatch icon (Toggle Animation) next to the property name. A blue diamond-shaped icon will show you’ve added a keyframe successfully. Then move the playhead to where you want to place an end to the property and manually change the property values. After typing a value, an ending keyframe will automatically show on the timeline.
Conclusion
Here comes the end of this article. I believe you already know how to add keyframes in Adobe After Effects, Adobe Premiere Pro, and free WorkinTool VidClipper. To summarize, if you are a skilled video editor, AE and PR would be better to create a personalized video. If you are not familiar enough with video editing, try WorkinTool VidClipper first. I believe it will meet much of your needs and will help to enhance your editing skills.
The possibility of adding keyframes to videos is endless. It’s really one of the basic foundational building blocks of video editing.