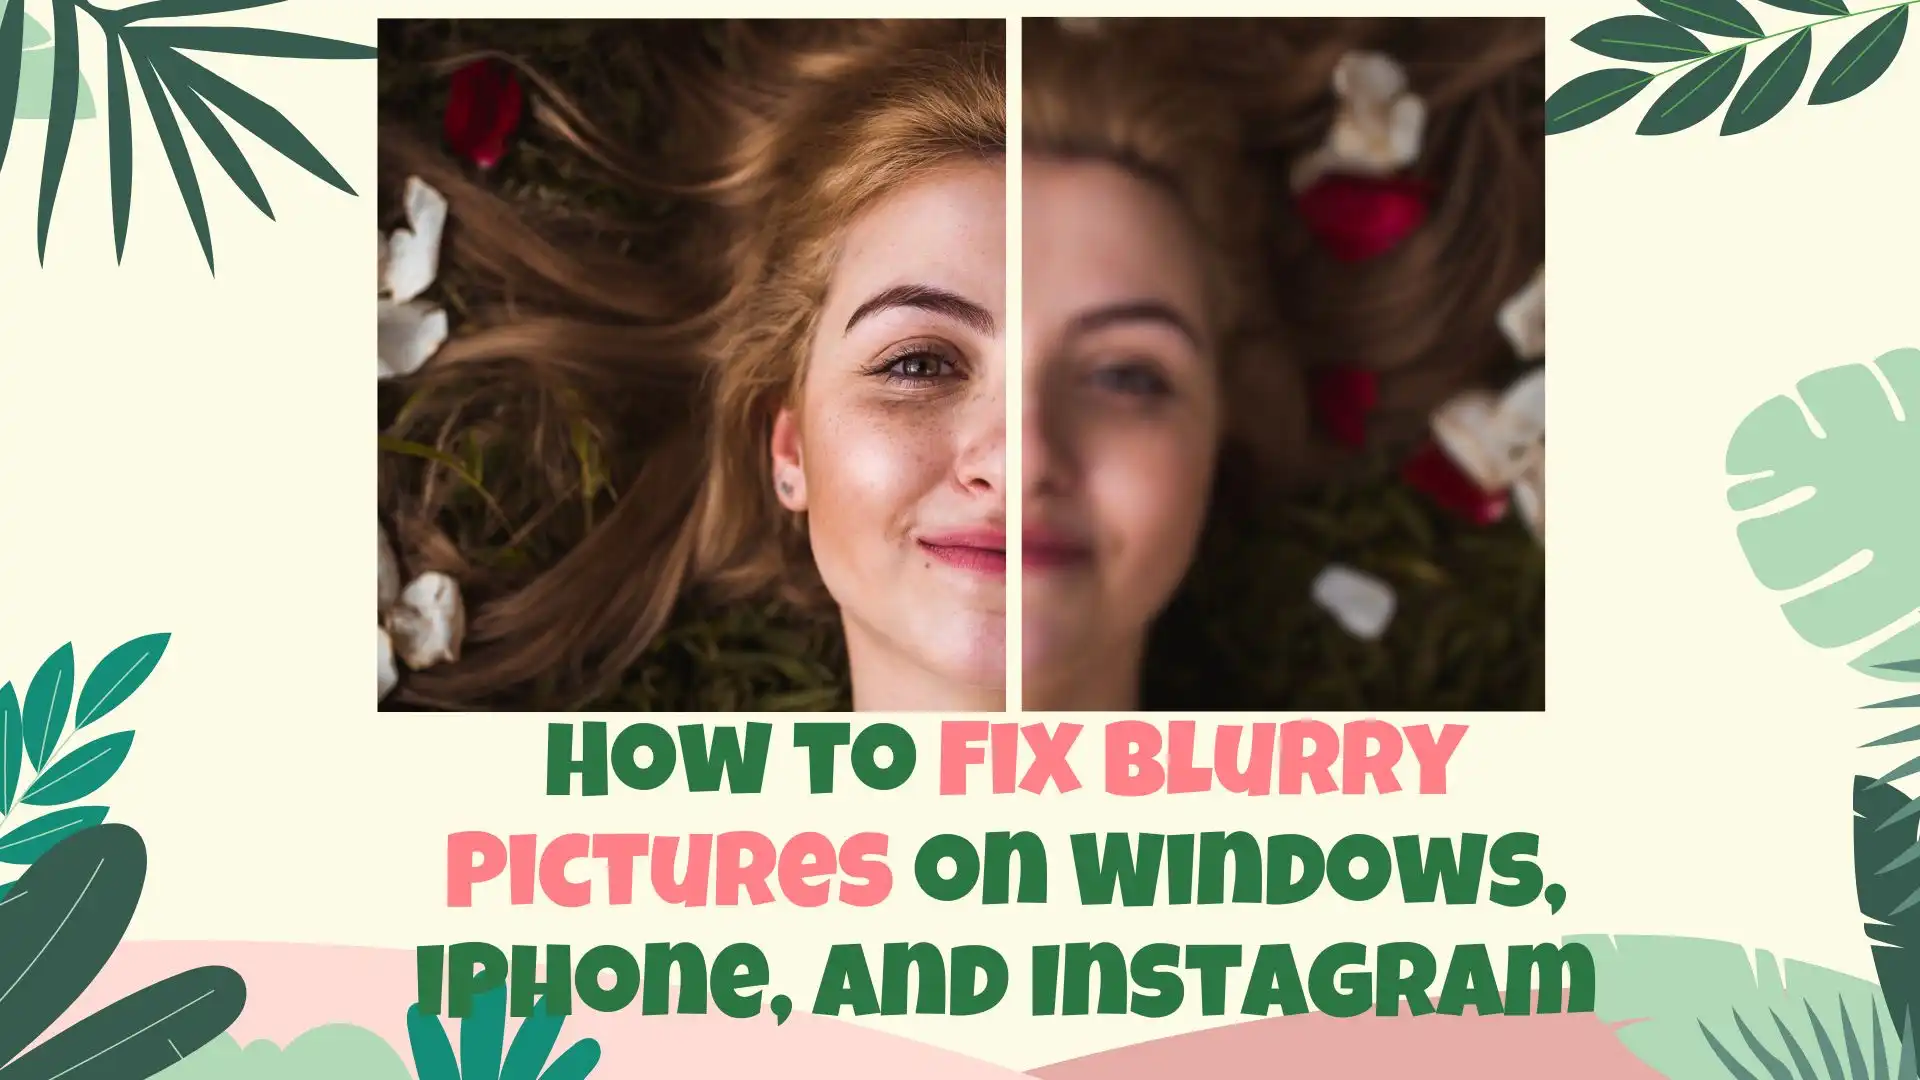
How to Fix Blurry Pictures on Windows, iPhone, and Instagram
If there are no special circumstances we take photos to strive for the clearest picture effect. But sometimes the pictures are really blurry. So how do we fix this ourselves? Don’t worry, the article below details how to fix blurry pictures on your desktop, cell phone, Facebook, and Instagram. Among them all, the best effect to sharpen your pictures is to use the desktop software – WorkinTool Image Converter. It has all the image editing features on the market and all of them are free. Don’t wait and come to explore yourself right now.
How to Fix Blurry Pictures on Windows, iPhone, and Instagram
We live in a digital era in which photos play a vital role. Whether we take pictures to preserve memories, market products, or tell stories, the common aim is to make high-quality shots. Blurriness can degrade the quality, making it less engaging. In particular, the blurry defect is unacceptable for photos taken to be posted on Instagram or Facebook. Therefore, knowing the tricks of how to fix blurry pictures is something you should master.
Typical in the case of the old days, as unprofessional photographers, when we take unclear photos, we choose to retake the pictures or find experts to fix the blurry part. However, it is time that technology has taken off. Tons of software and apps can help you do the job yourself. Here in the post, we will conclude what causes the blurring issue and how to fix blurry pictures ourselves. Now, let’s take a look together.
Factors to Affect Blurry Photos
Back in the day, people had to carry cameras whenever they wanted to capture moments outdoors. However, things have drastically changed with the advent of smartphones equipped with two-way cameras. Convenience has become the ruling factor in this new era. Alongside the surge of social media networks, individuals have grown accustomed to snapping photos or recording videos and sharing them on various online platforms. Unfortunately, this trend has brought about a host of issues, and one of them is the annoyance of blurry photos. Let’s delve into the consequences when your cherished memories turn out fuzzy.
| Motion Blur | It happens when you fast-move objects and create a distinct blur of drag marks in a static scene. |
| Wrong Focus | The main object didn’t get the camera’s proper focus, leading to a blurry effect. |
| Incorrect Position | Unprofessional camera holding can also cause low-quality photos to be taken. |
| Zoom Problem | If you constantly zoom in and out without Focus, it may also cause blurriness in your photos. |
How to Fix Blurry Pictures on Windows
If you care more about the picture’s blurring and the effect after removing it, I strongly suggest using a professional image editor – WorkinTool Image Converter.


WorkinTool offers a comprehensive suite of image editing tools. It may require an extra step to transfer the image to your computer for processing, but overall the effect is the most practical and visible of several recommended methods. This photo editing tool combines a wide range of features available in the market, including format conversion, image compression, editing capabilities, and picture collages. It also provides users with exciting photo effects like aging the photo, cartoonizing themselves, and swapping genders.
All these helpful and fun functions are provided with WorkinTool Image Converter for free, including the one you need to fix blurring pictures. It uses AI technology to edit the parameters of a photo and speed up the whole workflow of processing an image.
Here’s what you need to do:
1. Open WorkinTool Image Converter and click Edit Image to input your target photo.
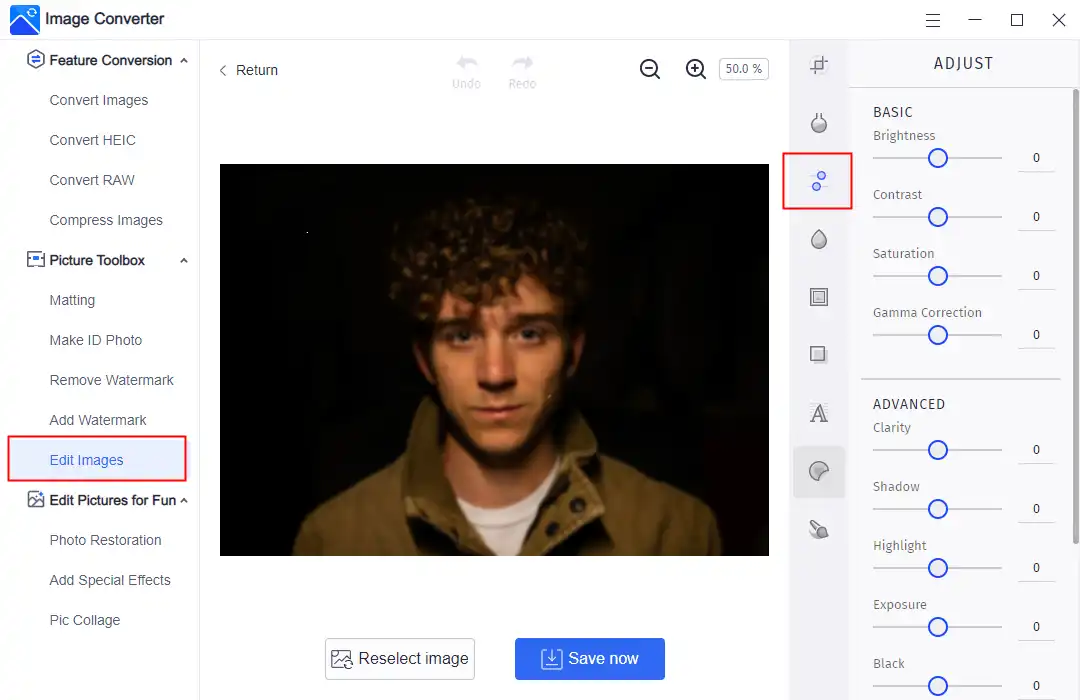
2. On the right side toolbar, select the third option to adjust the parameters.
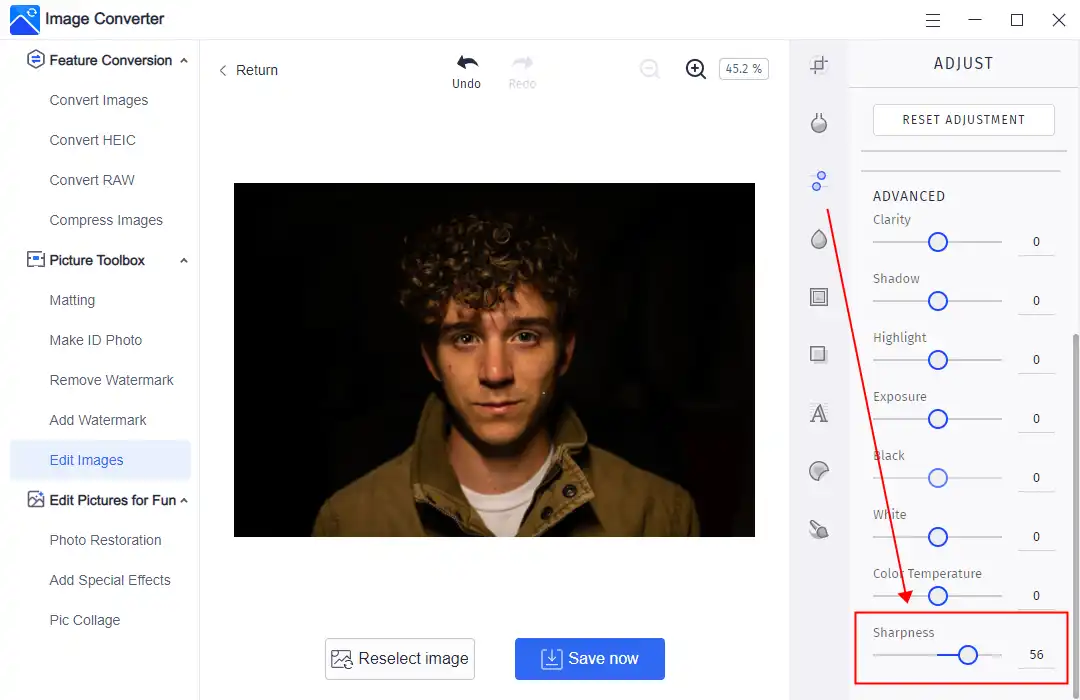
3. If you only want to fix the blurry area in your photo, scroll down to the last option: Sharpness, and adjust it until you can see this image clearly.
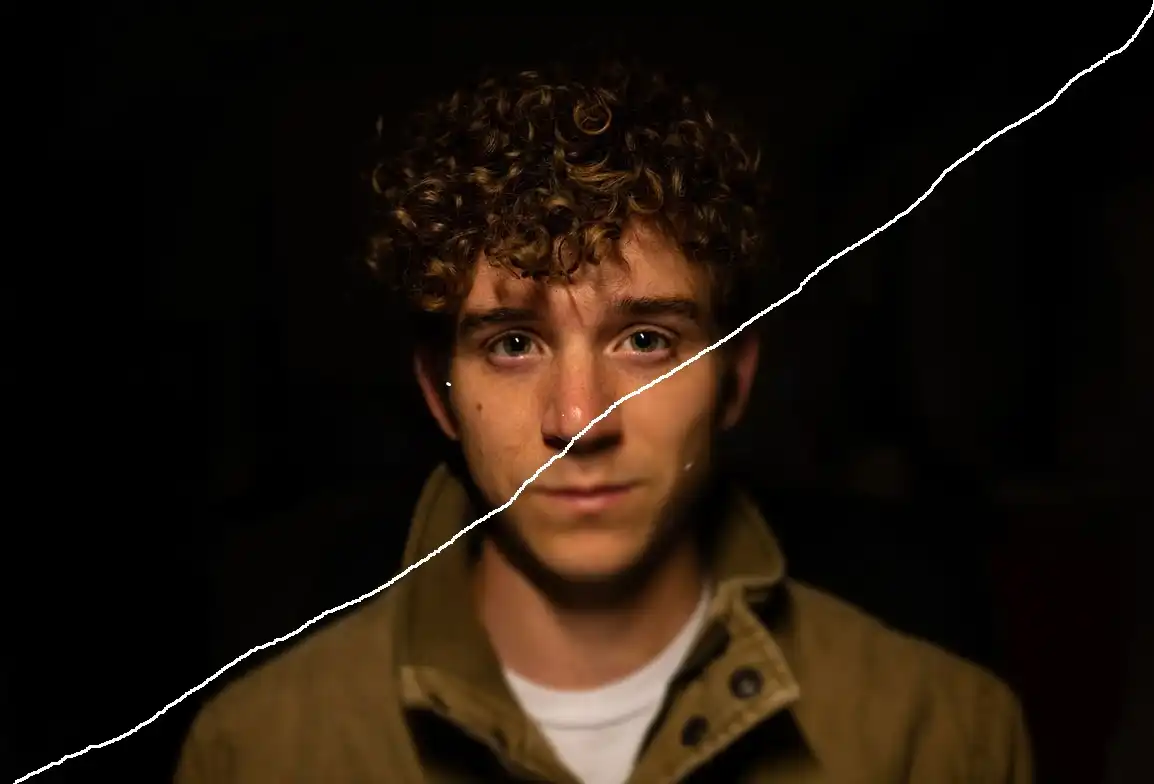
Here is the contrast picture before and after fixing the blurriness. As you can see, the effect is absolutely outstanding. What was fuzzy is now clearly visible. Smallpox mark, red nose, the details in the picture can be shown entirely now. If you want better image quality, continue to adjust the other parameters until you are satisfied.
💖 Additional WorkinTool Image features 💖
Methods to Fix Blurry Pictures on Phones
Of course, if you do not want to use the desktop product, one step to take it all from shooting to uploading, then the mobile feature is also possible if you can deal with the lower effect to remove blurriness. Since the main instructions are similar in Android and iPhone, I will use the Android system, for example.
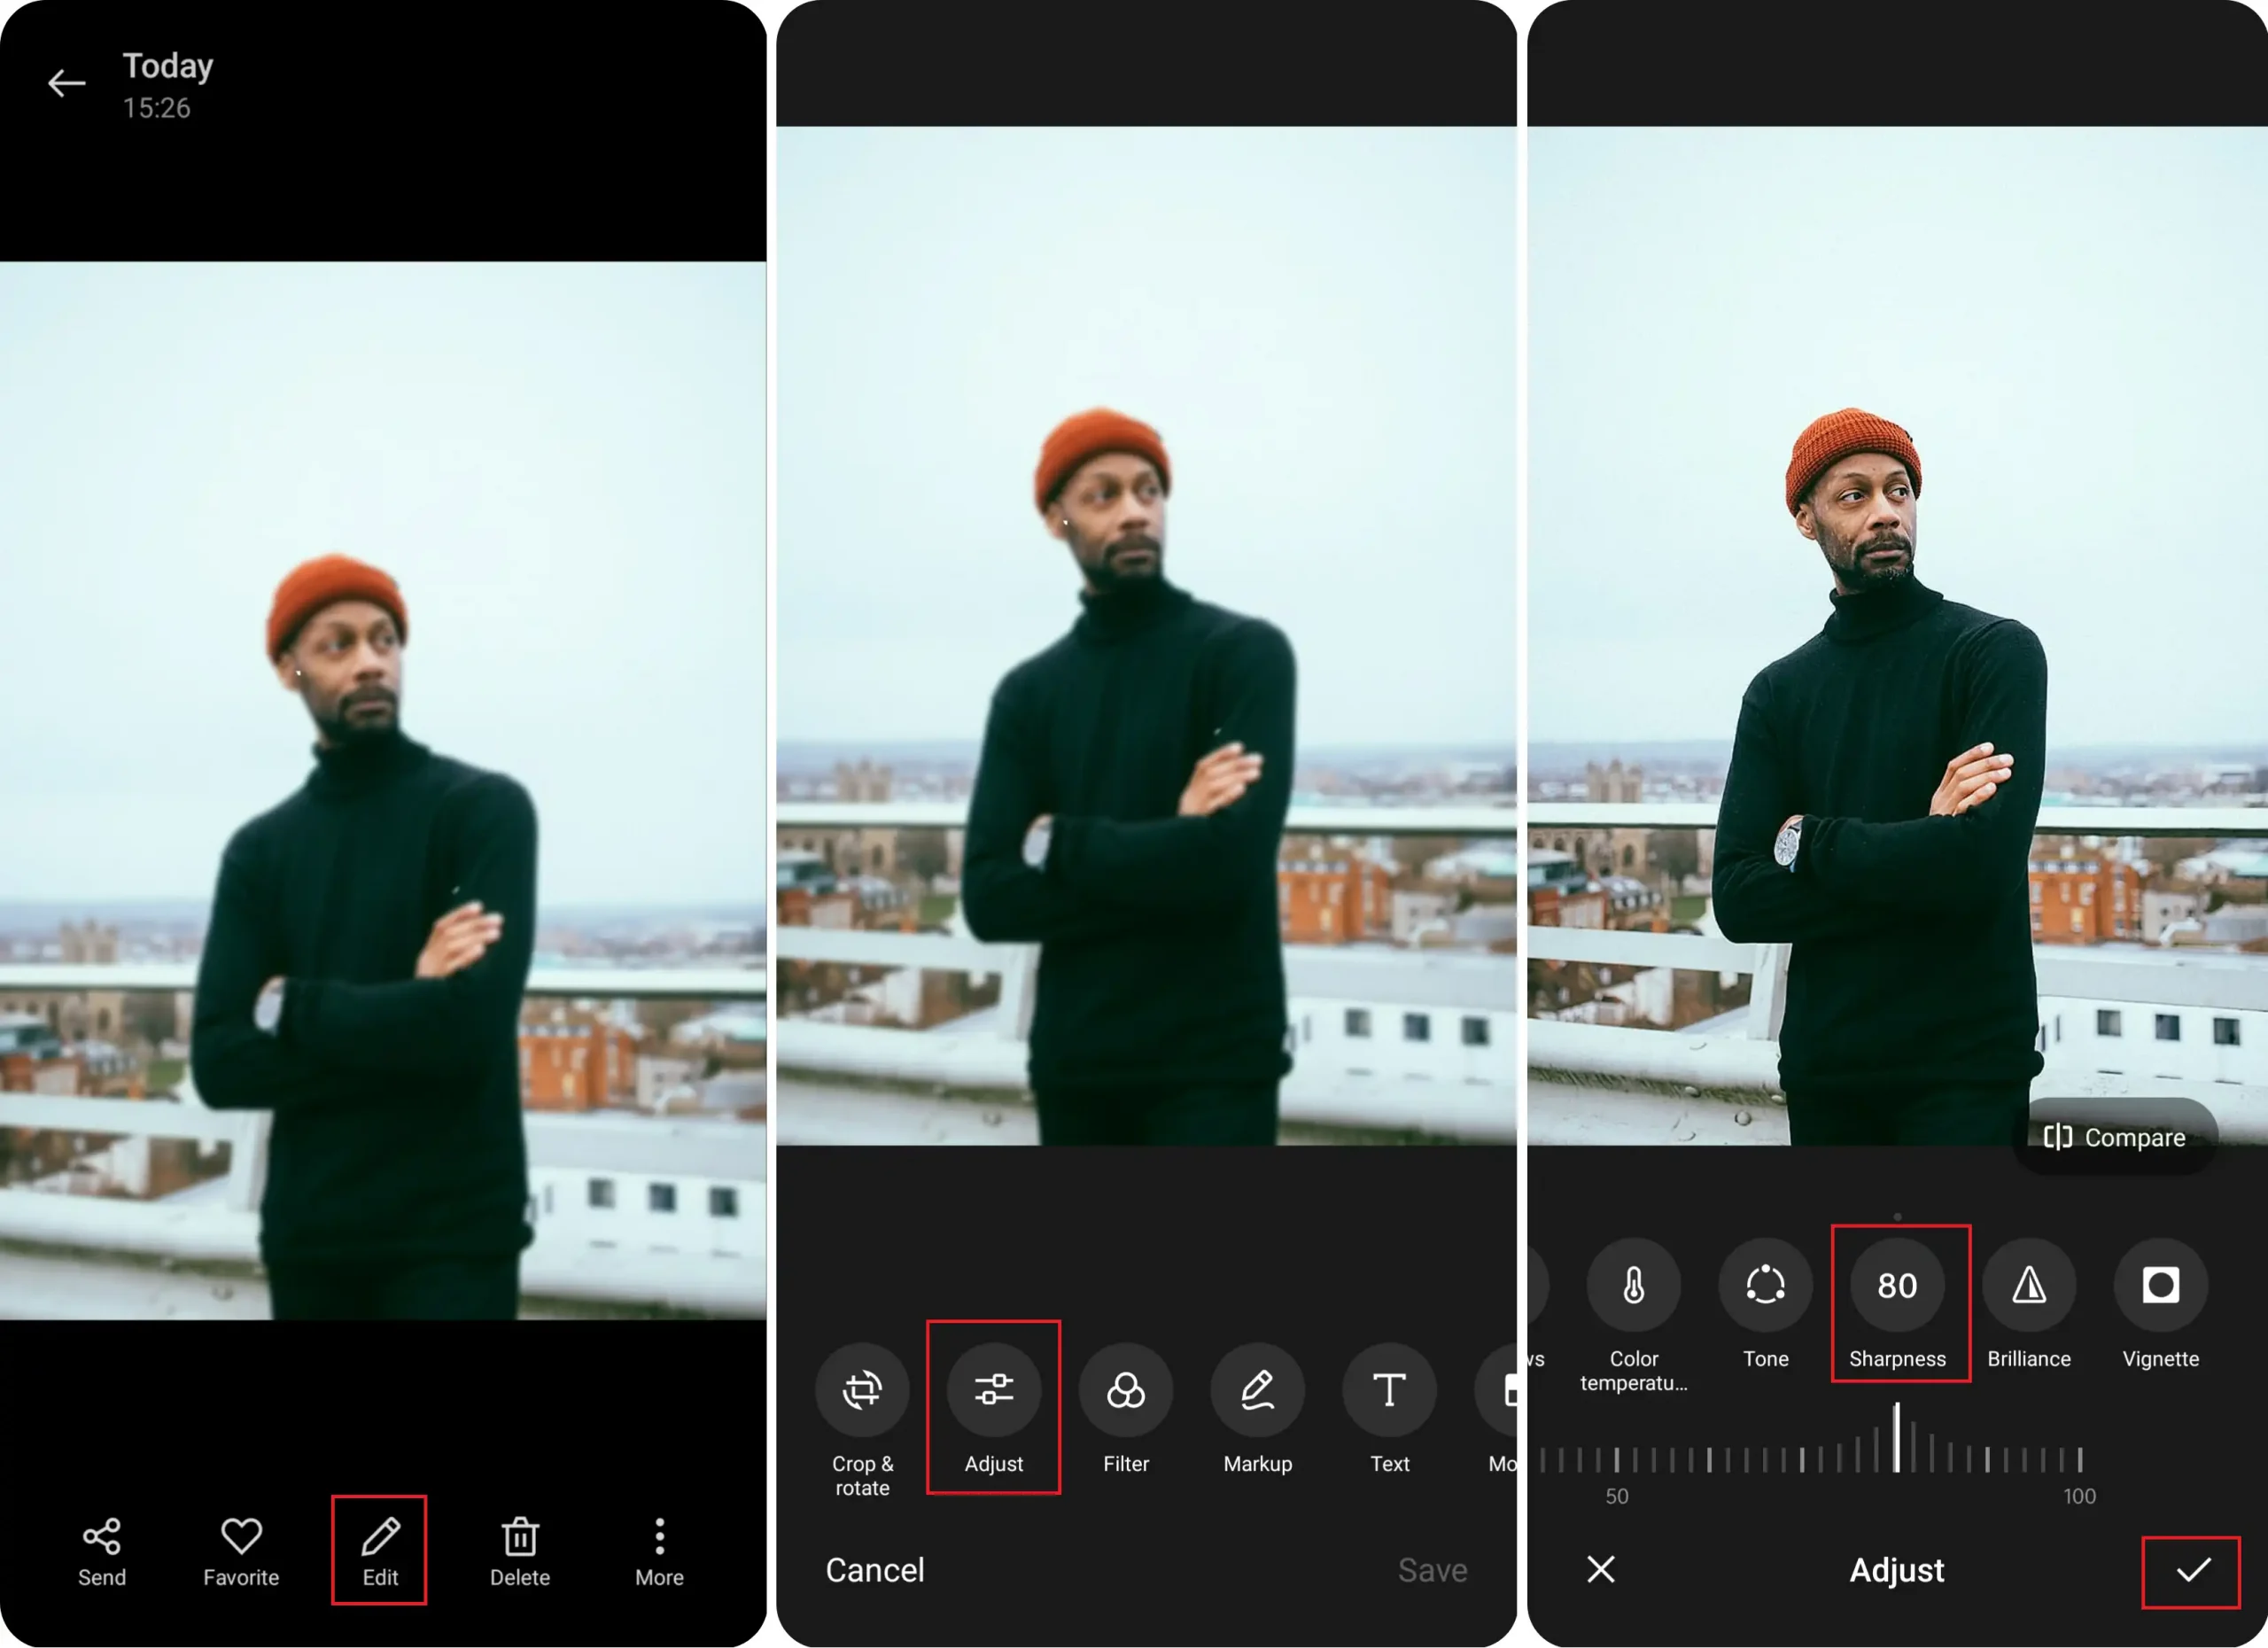
1. Open your target picture with the built-in Photo app.
2. Select the Edit option and click the Adjust button to configure the parameters.
3. Find Sharpness and change it when you are done. Save it again in your photo library.
How to Sharpen Photos on Facebook and Instagram
If you see that the images on Facebook are blurry, there are a few factors you might want to check as well.
| Lousy Internet Connection: | Facebook has a mechanism where if you upload any picture with a slow Wi-Fi network, Facebook will automatically lower your image quality or directly fail to upload. |
| Unsupported Image Format: | Actually, there are a lot of image formats that Facebook doesn’t support. Facebook only supports JPEG, GIF, and PNG file formats. So, if you upload some unsupported images, Facebook won’t be able to optimize them, which leads to blurry pictures. |
| Update Facebook App: | Another situation is that if you forget to update the Facebook app, there could be an error between this software and your phone device. Anything you upload to Facebook could also go wrong if something like this happens. So, remember to check if it is updated when you see blurry pictures on Facebook. |
Also, we all know that Instagram has its own editing options when you are about to upload pictures or videos. Here is also a solution on how to fix blurry pictures using Instagram:
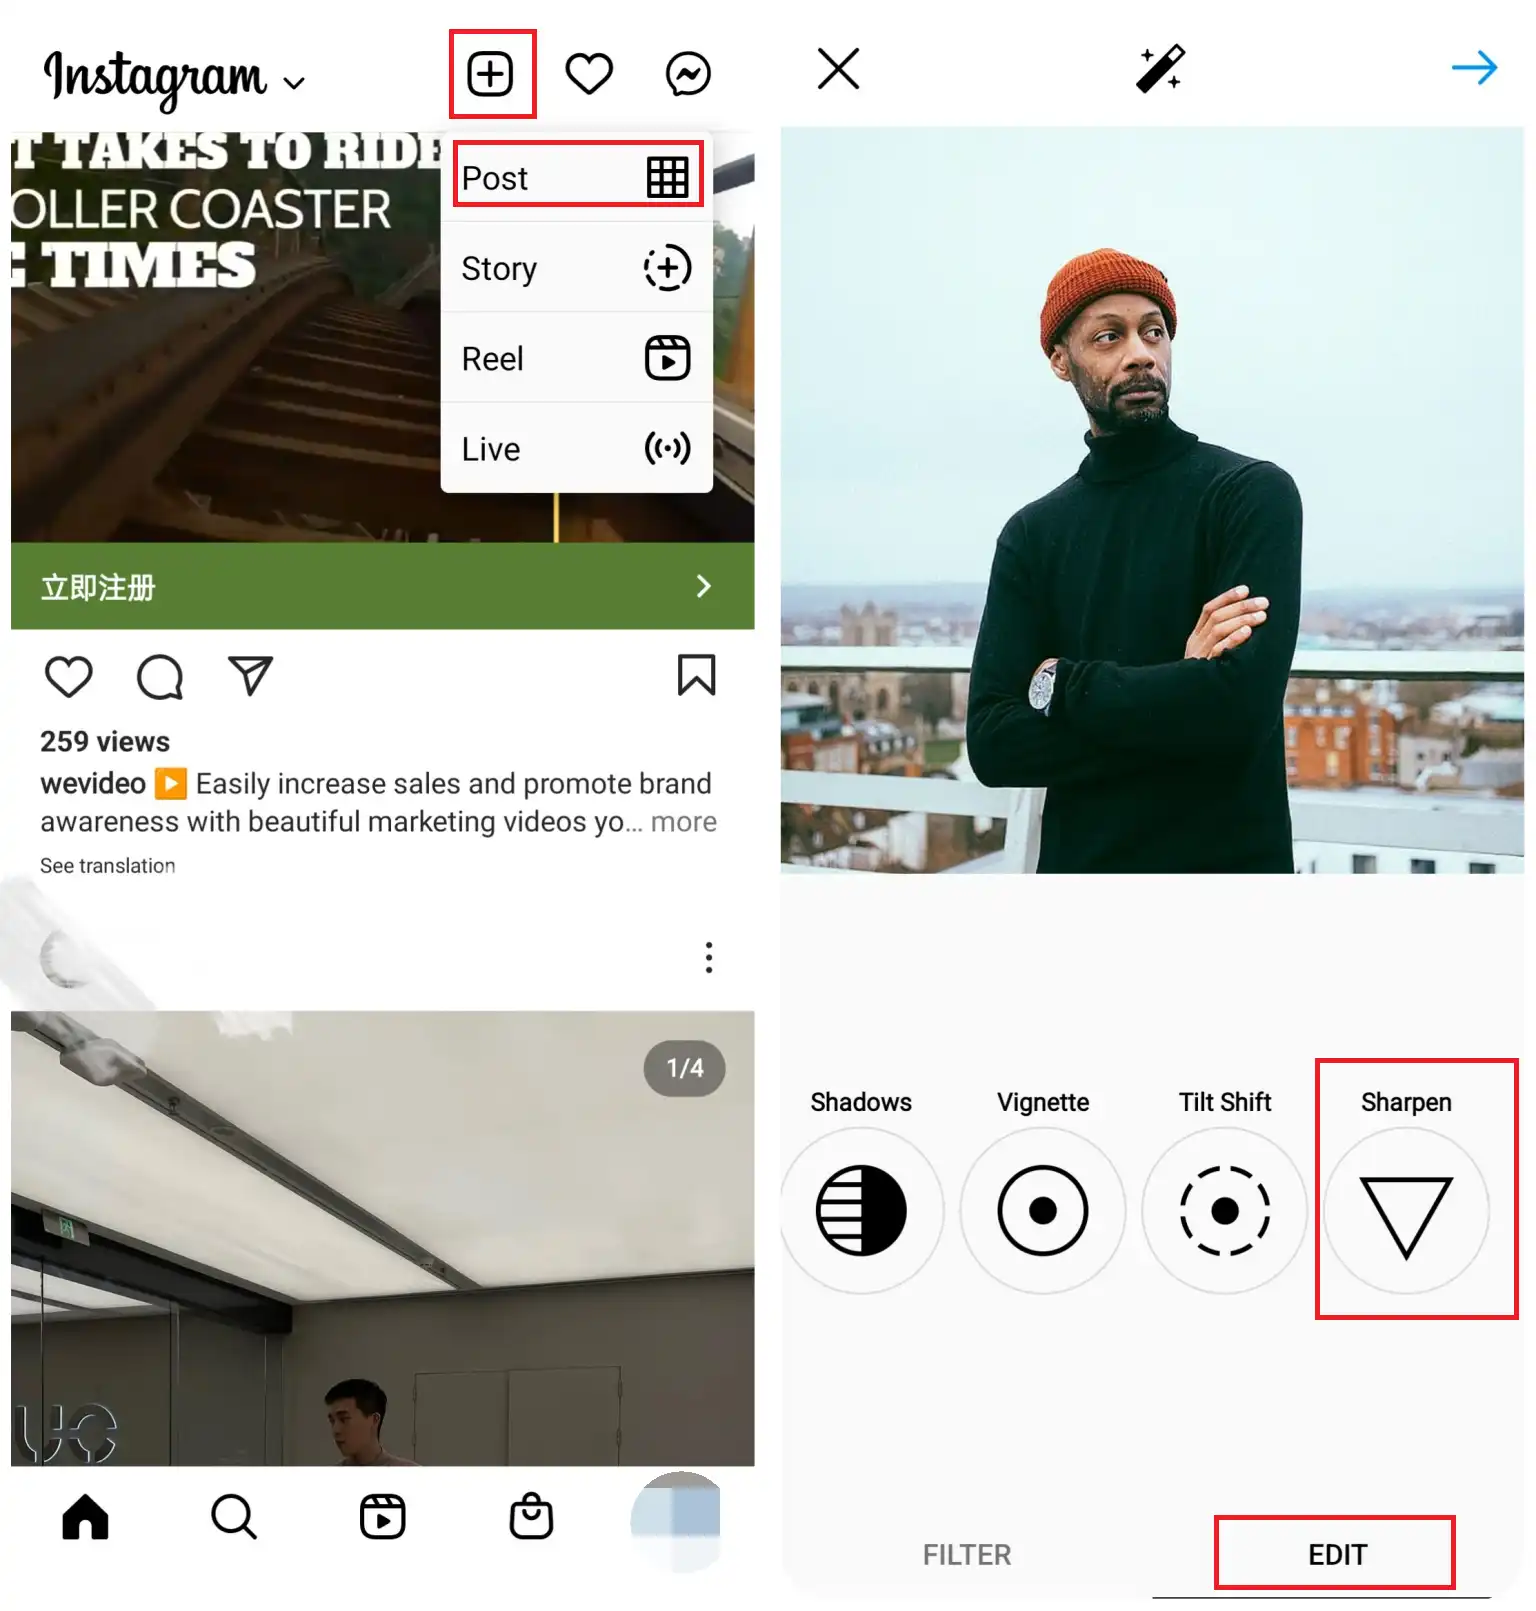
- Open Instagram on your phone and click the plus button to post the target picture.
- Find the image, move to the EDIT option, and go to the last parameter: Sharpen Function.
- Adjust it until you can see the details, then you can save it or upload it. This is your call.
Conclusion
In this article, we have concluded the best methods on how to fix blurry pictures on different devices, including desktop Windows, Android, iPhone, and even social media platforms like Facebook and Instagram. Here you will be able to know the factors why you take blurry pictures and the methods to make them right. All the approaches we provide here are free to use without any hidden charge. We have tested them to be available before writing this article so that you can rest assured.
If you have any suggestions or encounter any problems, feel free to contact us at any time.


Related Article
 How to Remove People from Pictures Quickly and Easily 2024 How to Create Makoto Shinkai Anime Pictures Like Suzume How to AI Generate Cat Profile Pictures: Best AI Cat Generator