How to Change Audio Speed Without Changing Pitch on PC
When you scroll through plenty of videos on your social media, you may be amazed by how some speed-up or slow-down music without pitch change could perfectly fit the video content. Do you want to create your own speed-changing music or audio? Please spare a few minutes for this blog post on how to change audio speed without changing pitch with the help of five music speed changers in 2024.
🎯Windows–WorkinTool VidClipper and Audacity
🎯Mac–QuickTime Player and iMovie
🎯Online–123 Apps
We hope you will find it far from challenging to realize this goal with the aforementioned audio speed changers according to your preferred platforms. However, if you are using a Windows OS, it is strongly advisable to try WorkinTool VidClipper since it is easy to use and powerful enough to change the speed of your whole audio file or fine-tune that of a part of it to present an audio outcome with different speed in different sections.
Please experience it, along with other solutions, by yourself and start your reading now to learn about specific information.
How to Change Audio Speed Without Changing Pitch on PC in 2024 | 5 Ways
[Music Speed Changer for Windows, Mac and Online Use]
When you scroll through plenty of videos on your social media, you may be amazed by how some speed-up or slow-down music without pitch change could perfectly fit the video content. Do you want to create your own speed-changing music or audio? Please spare a few minutes for this blog post on how to change audio speed without changing pitch with the help of five music speed changers in 2024.
| 💻Windows | 💡WorkinTool VidClipper [🔥Hot] |
| 💡Audacity | |
| 💻Mac | 💡QuickTime Player |
| 💡iMovie | |
| 💻Online | 💡123 Apps |
Now, let’s start our journey.
Words Before We Start
📌Why do you need to change audio speed?
Audio is an important part of a video, serving as a crucial addition to feeling or emotional expression. For example,
- Slow-down music: It adds a cinematic sense to your clip or gives the audience a feeling linked to highlighting or underlining. It is extremely suitable for videos in slow motion or with freezing frames.
- Speed-up music: It makes your video hilarious or endows it with a hurrying or emergent sense. It applies to a video with materials to show a certain status of a scene, such as weather in the day, city traffic or crowds in the street.
So, how can I speed up or slow down music without changing pitch easily? It seems to be a professional task. Please read on to unlock five practical ways to change audio speed and you will find it less challenging to accomplish this mission.
How to Change Audio Speed Without Changing Pitch on Windows
In this chapter, I will show you two handy tools to effortlessly adjust audio speed–WorkinTool VidClipper and Audacity.
✅How to Change Audio Speed on Windows Using WorkinTool VidClipper?
WorkinTool VidClipper is initially designed to be a powerful video editor. With several rounds of upgrades, more than just a music speed changer, it has now become a multi-functional video/audio tool with an array of valuable features, including audio editor/converter/extractor, video converter/splitter/merger/compressor/ watermark adder and remover, text-to-audio converter, etc. Therefore, installing it on your PC helps to save you the time and energy of finding each of them individually.
Besides, VidClipper video editing software boasts a simple and clear interface that is friendly enough for IT beginners. However, its abundant editing features will be helpful to shape you into a professional video editor. When it comes to audio speed changing, VidClipper targets effortless multi-speed adjustments. Also, you can preview the effect and make further changes until a satisfactory outcome is achieved. Here are more reasons for picking it.
Please follow the steps below to adjust music speed in WorkinTool VidClipper.
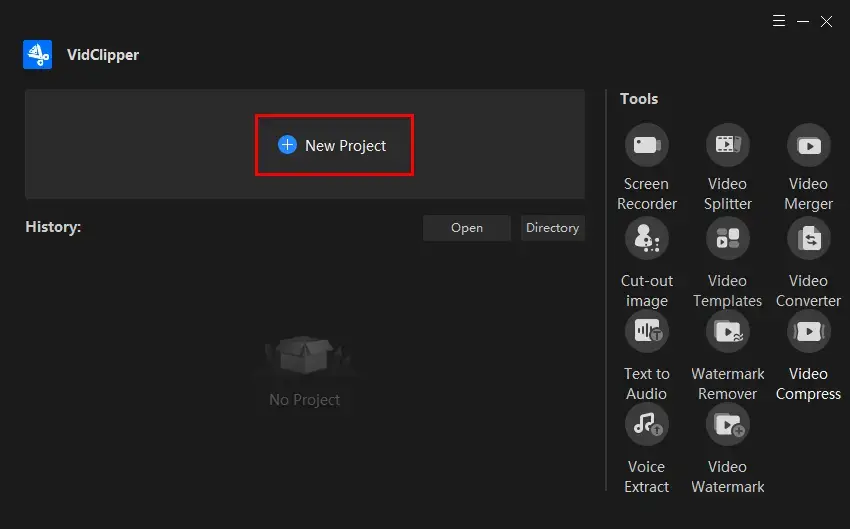
Step 1. Launch the tool and then click +New Project to activate its editing page.
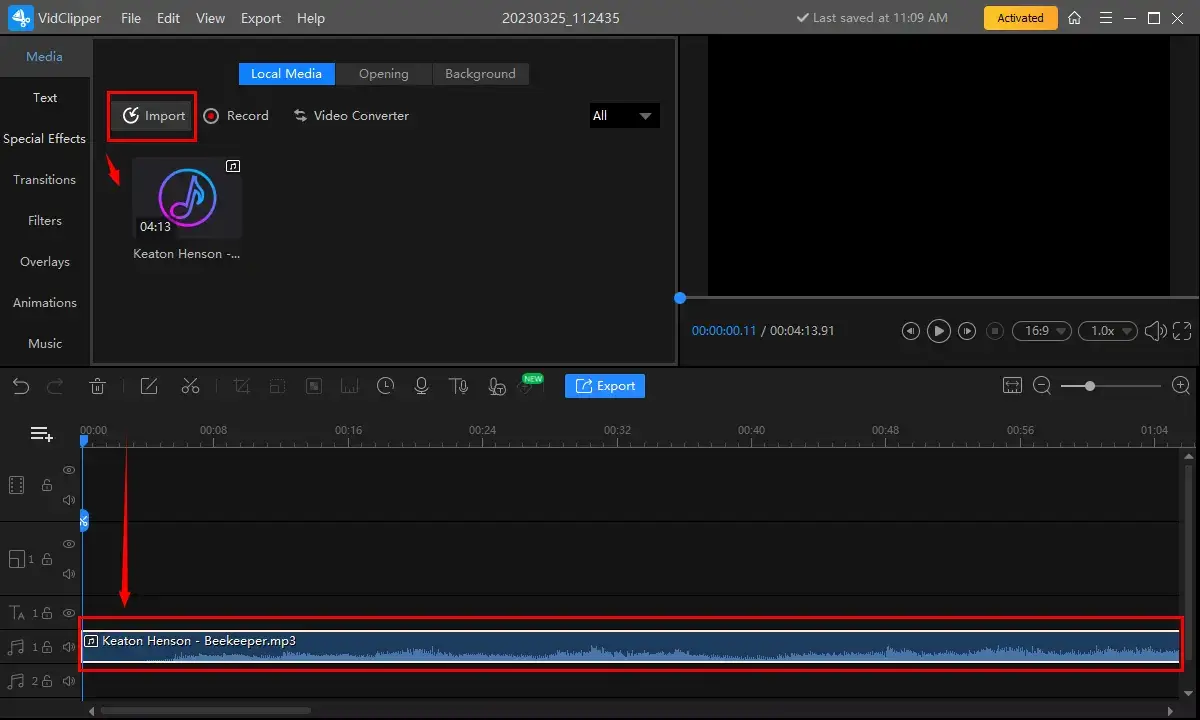
Step 2. Hit Import to upload your music file and then drag it to the timeline below.
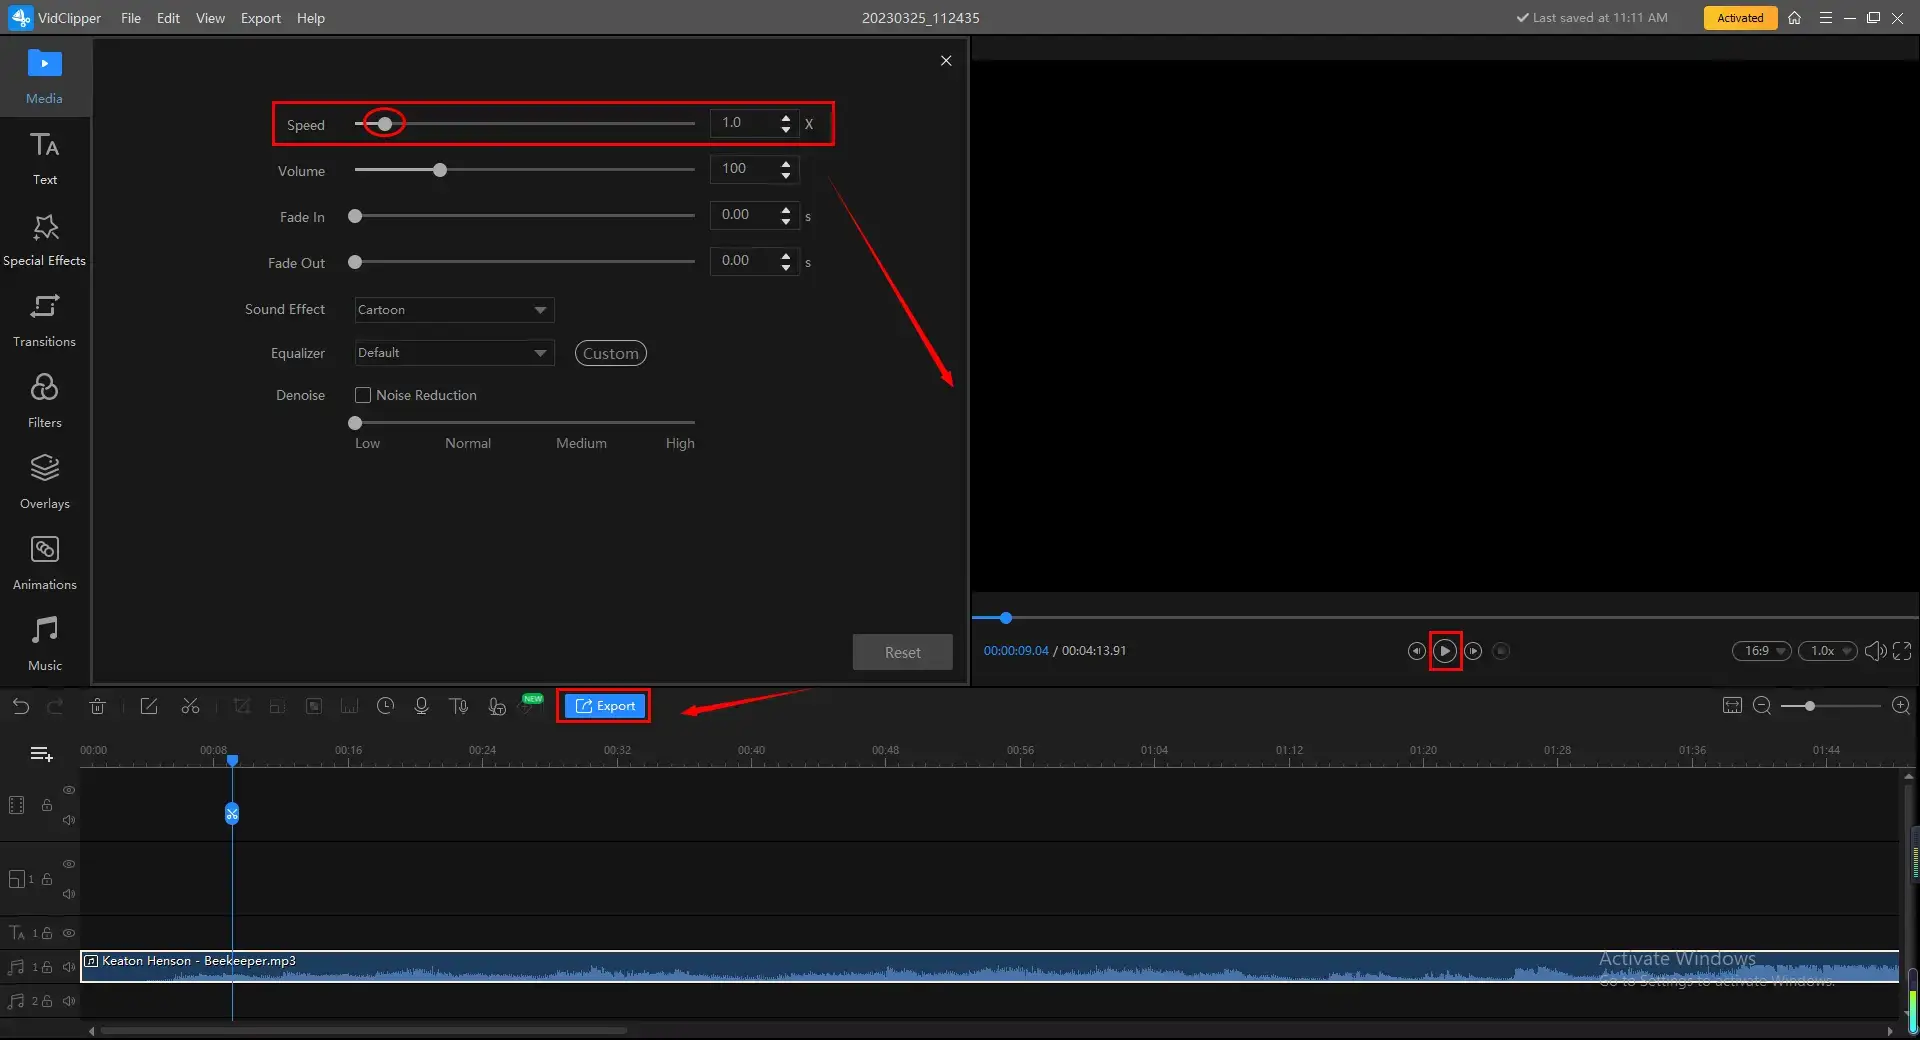
Step 3. Single-click your music file to open the audio adjustment console, find Speed, move the slider to change audio speed and then press Export.
(Move the slider to the left to slow down the music and to the right to speed up the audio.)
📢Note
You can edit your audio further with the assistance of other features in VidClipper
| Volume | Increase or lower the sound of your audio file. |
| Fade in | Add a sound effect to the intro (a few seconds in the beginning) of your audio file, making it grow louder and louder until it reaches its original volume. |
| Fade out | It is also a sound effect that makes the outro (the last few seconds) of your audio file become lower and lower until it becomes mute. |
| Sound Effect | Change the pitch to offer a special sound effect to your original file. |
| Equalizer | To make detailed adjustments to the sound to present different effects. You can choose custom to adjust the parameters by yourself or use the preset ones in the drop-down box, such as SKA, dance/electronic/country/light music, bass, etc. |
| Denoise | Remove background noise from audio based on your needs. From low to high. |
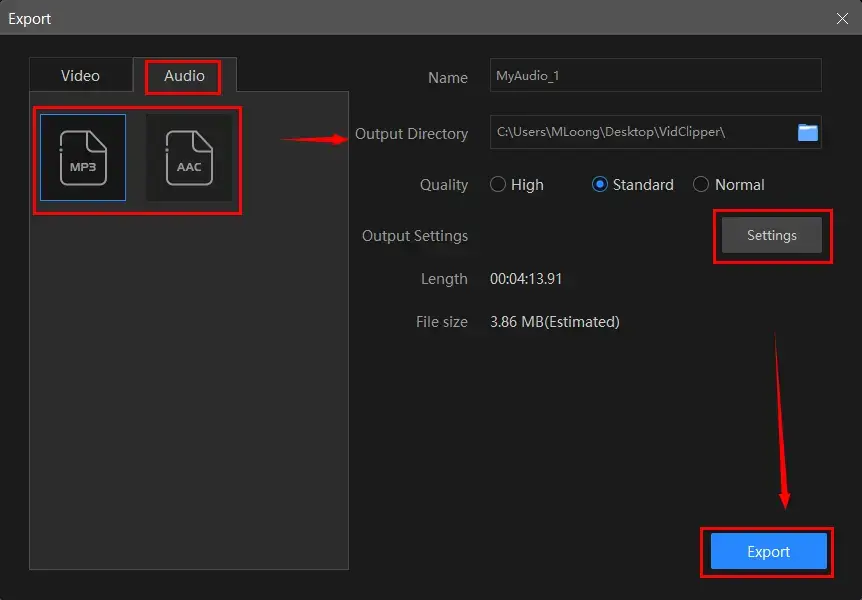
Step 4. Select Audio > the audio type, name your file, set the save path, make your settings and then tap Export.
📃Notes for Additional Audio Settings
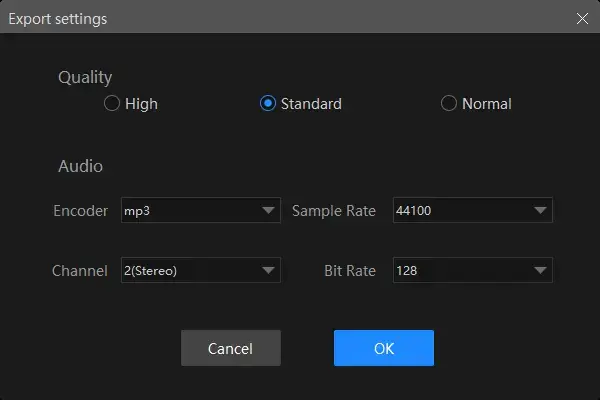
| Encoder | An algorithm that compresses and decompresses digital audio data according to a given audio file format or streaming audio format. | MP3 |
| Sample Rate | A measurement of the samples per second taken by the system from a continuous digital signal. It determines the range of frequencies captured in digital audio. | From 16000 to 48000 |
| Channel | A representation of sound coming from or going to a single point. | 1 (Mono) and 2 (Stereo) |
| Bit Rate | The amount of data that is stored in the audio file you are listening to. | From 32 to 320 kbps |
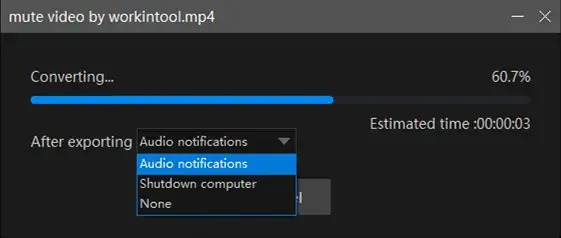
📢PS: The reminder or post-export status can be customizable when your speed-changed audio is in the pipeline, including a ringtone reminder, PC shut down and no further operation.
🙋♀️Bonus Tip
You can even use WokinTool VidClipper to fine-tune the speed of individual clips by dividing them into ranges at different speeds. It means VidClipper allows you to change the speed of a certain part of your audio clip only. This sort of audio has always been the trick for the most popular social media songs. Here is what you should do.
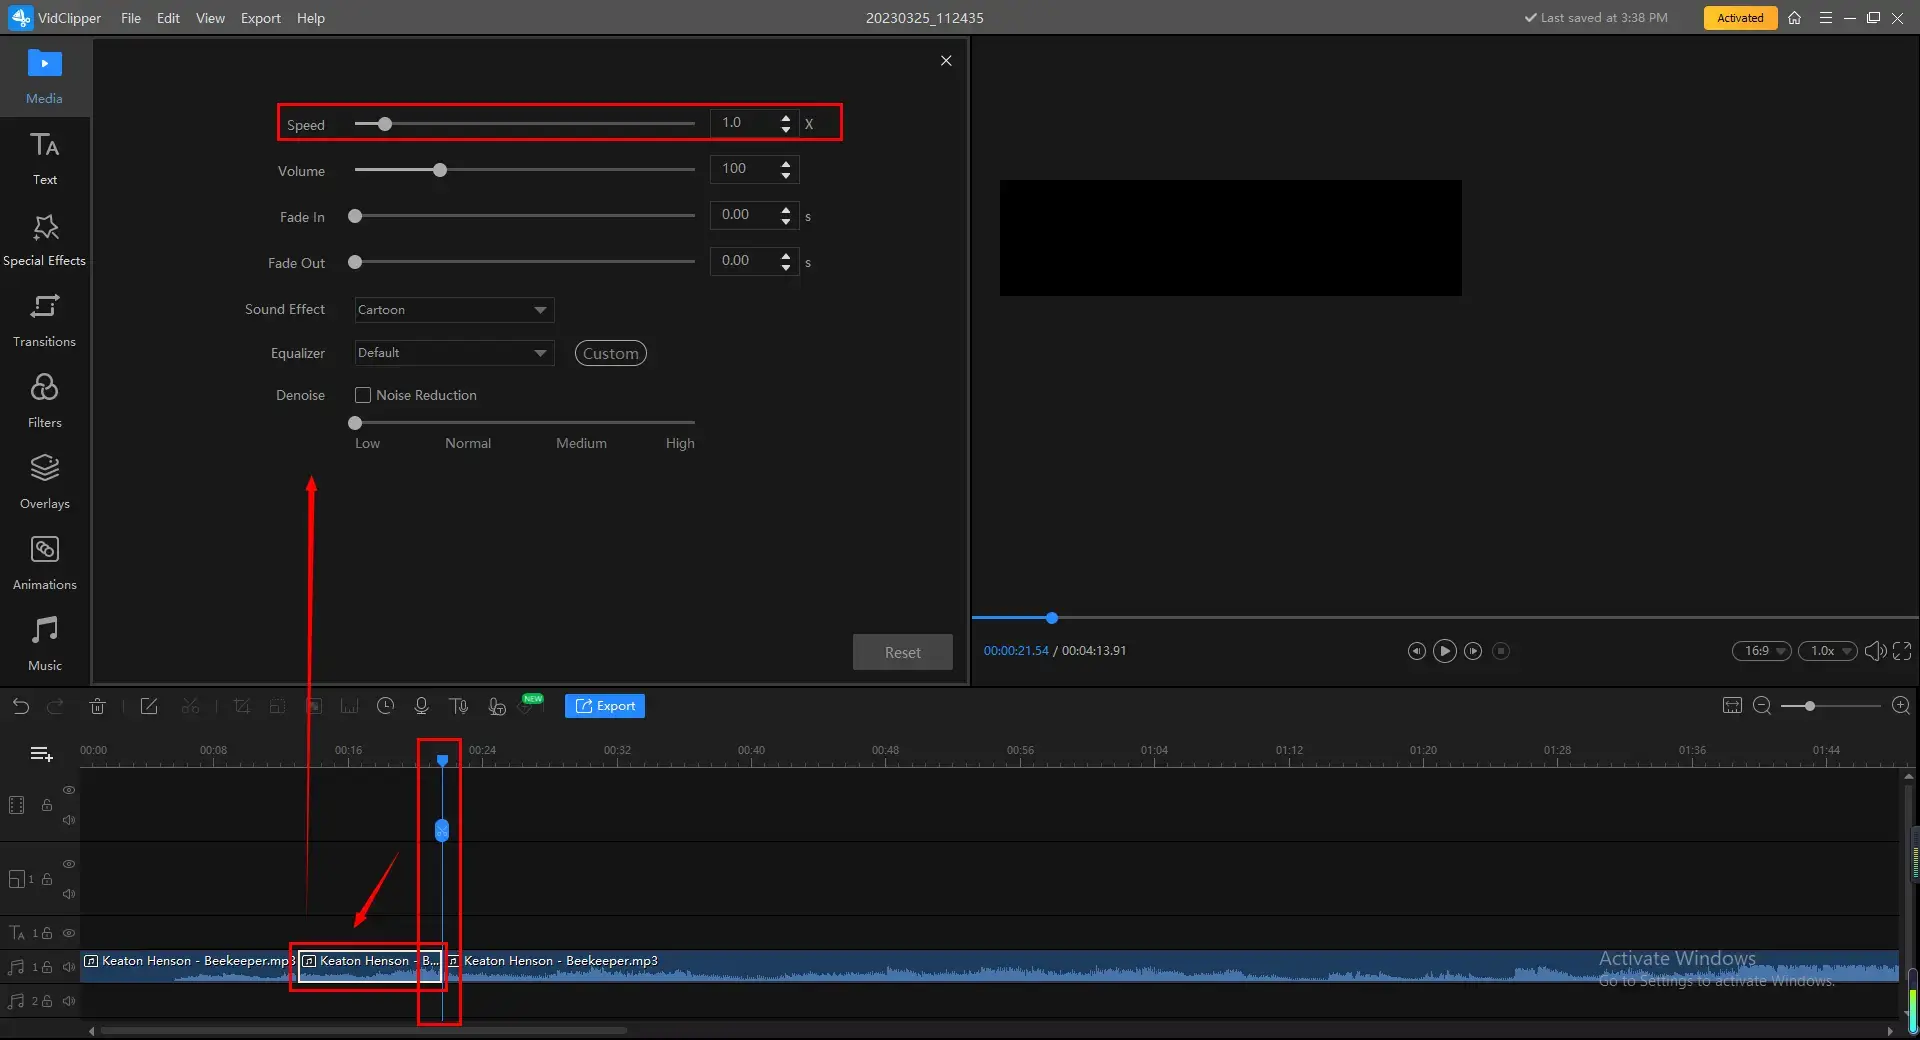
- Move the blue editing arrow bar to the starting location and then click the Split icon (scissor-like button) to cut your audio.
- Locate the end part of your audio by moving the bar and then repeat the video-splitting operation above.
- Single-click the split clip to open the video adjustment console, find Speed and then move the slider to control the audio speed.
- Hit Export to save your new audio.
🙋♂️More to Share About WorkinTool VidClipper
🧐What else can WorkinTool VidClipper do with audio files?
You can rely on it to
✨Our Advice
✅How to Adjust Audio Speed on Windows in Audacity?
Audacity is quite a familiar tool if you have frequent interaction with audio. It is a free and open-source audio player and editor compatible with various platforms. It supports a range of audio formats and enables you to undertake professional audio editing, including audio speed changing. However, its interface is complex and unfriendly for beginners.
Please read the following instructions on music speed adjustment in Audacity.
1). Open Audacity and then click File > Open to import your audio file.

2). Perform the shortcut operation–Ctrl+A to select the whole audio clip.
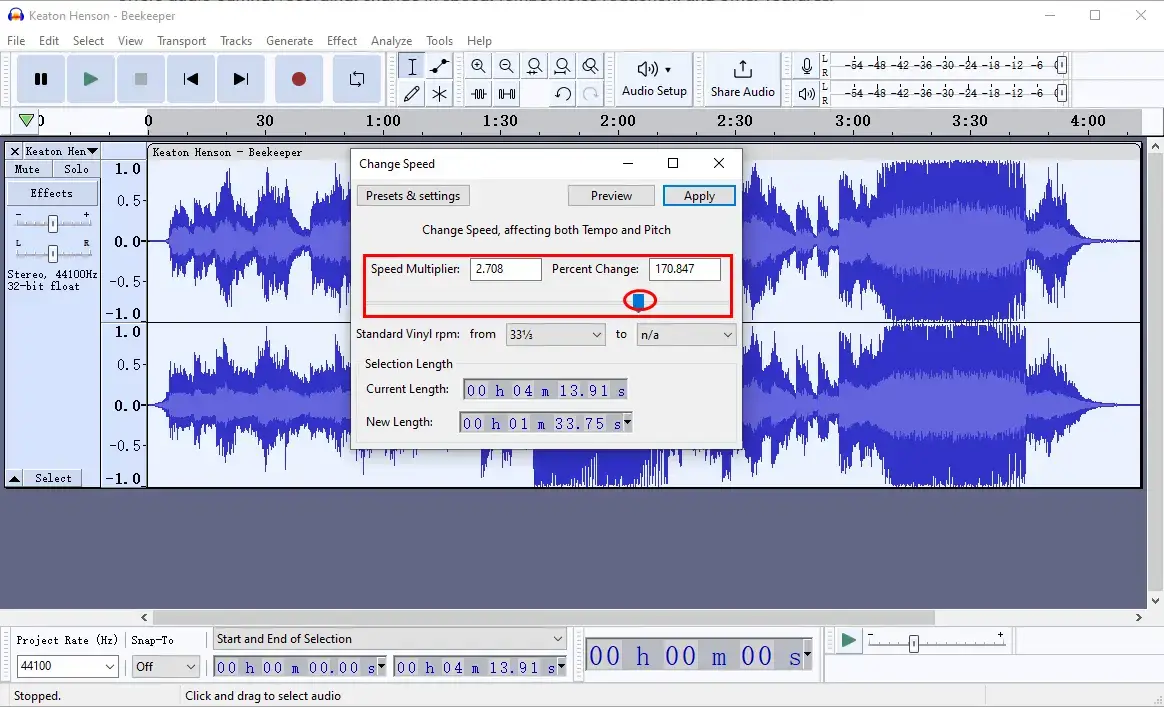
3). Then, navigate to Effect > Pitch and Tempo > Change Speed.
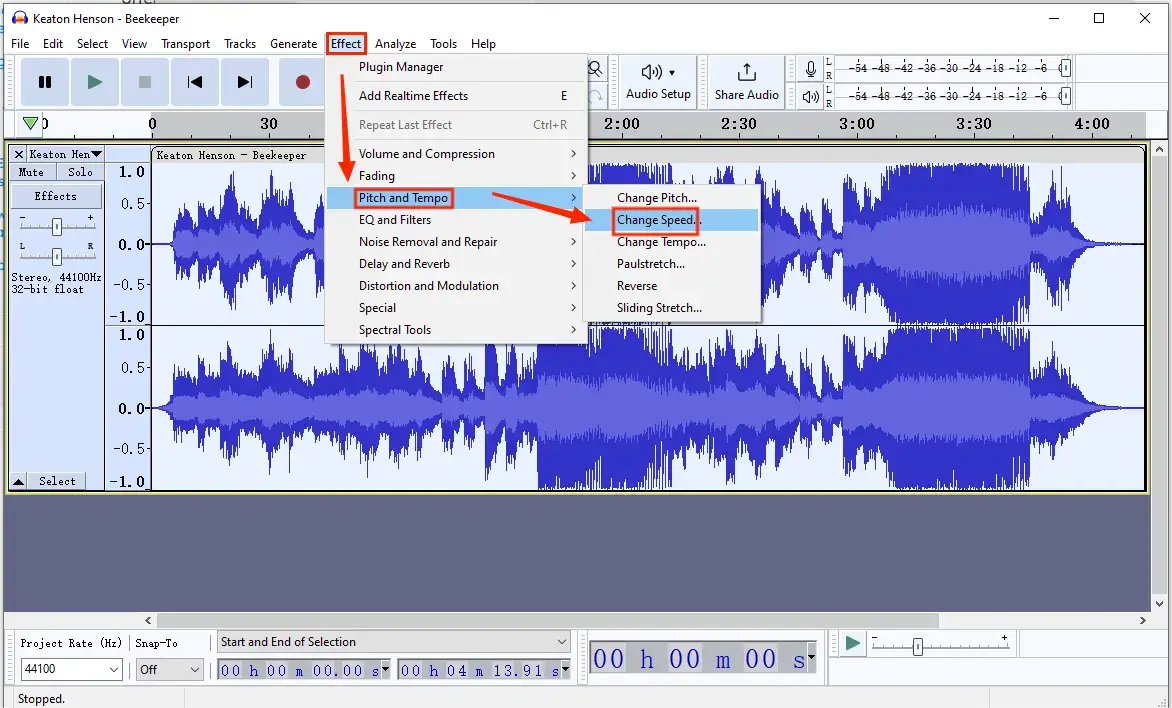
4). Move the blue arrow slider to slow down or speed up audio and then hit Apply.
(You can also type the number to change audio speed. The maximum speed is 5.0X.)
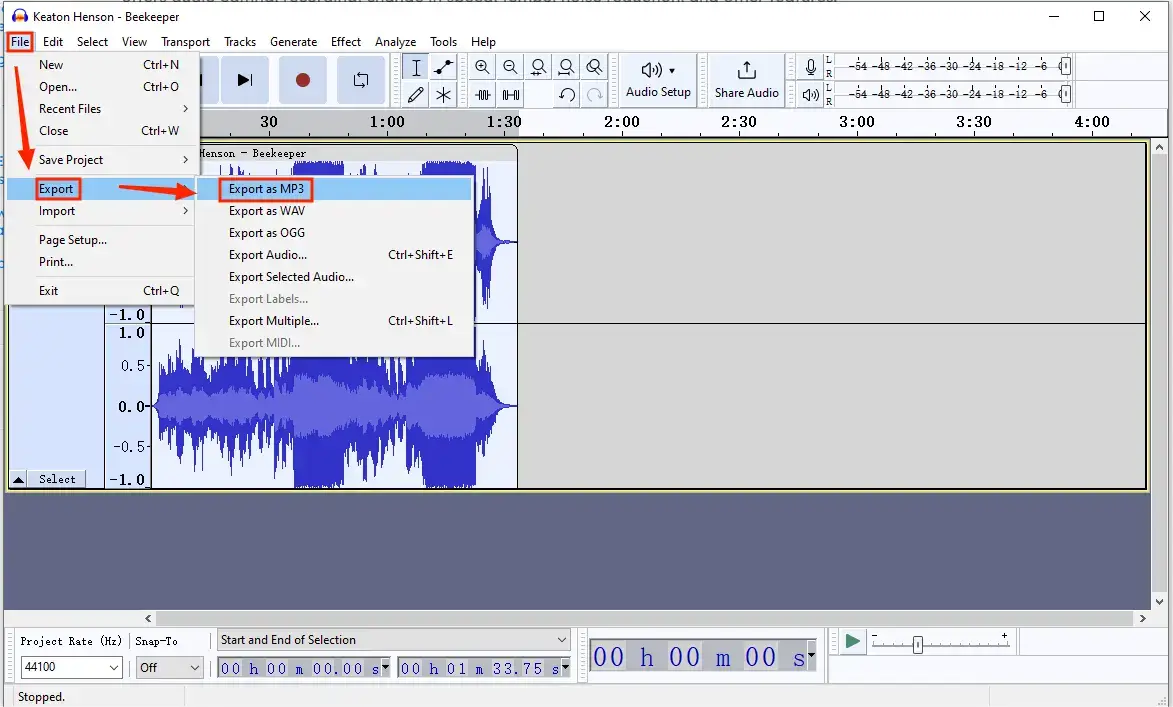
5). Go to File > Export > Export as MP3 to save your speed-adjusted audio file.
✨Our Advice
How to Adjust Audio Speed Without Changing Pitch on Mac
This chapter will be suitable if you are a Mac user. In addition to Audacity, you can turn to two built-in tools–QuickTime Player and iMovie for help.
✅How to Slow Down or Speed up audio on Mac in QuickTime Player?
Quick Time Player is a built-in media player on macOS-powered devices. On top of being a video/audio player, it serves as a basic video/audio editor. As a result, it can be used as an audio speed changer designed to slow down or speed up audio in an instant.
Please refer to the guidance below.
Step 1. Locate your music on your Mac and open it with QuickTime Player.

Step 2. Hold alt or option on your keyboard.
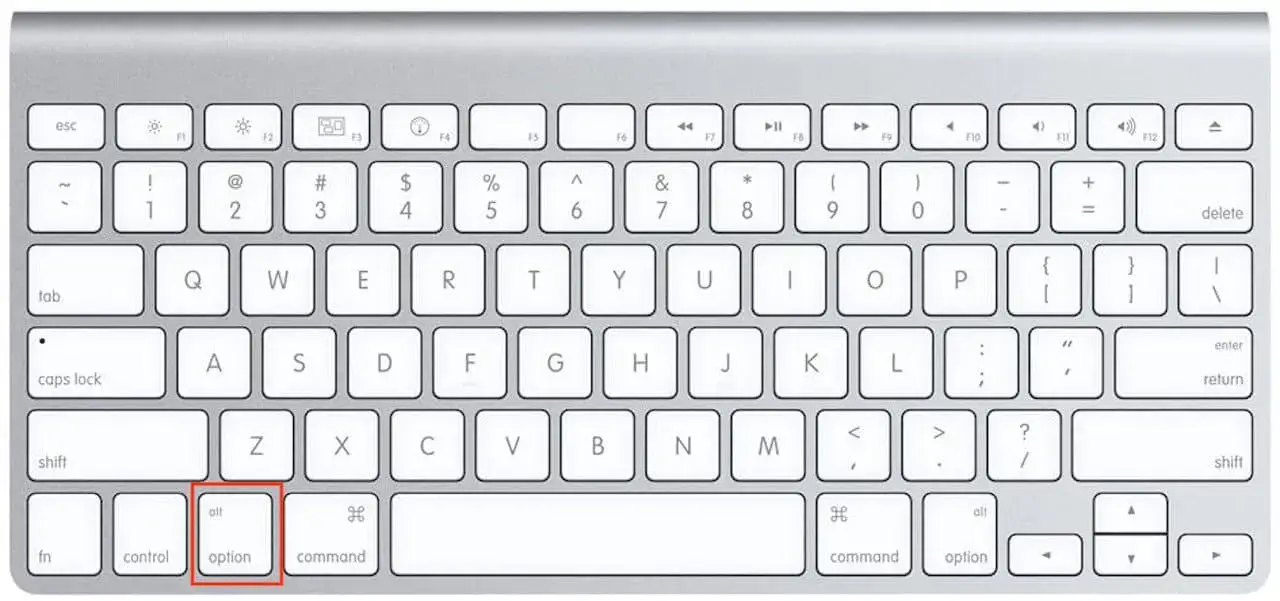
Step 3. Click the Reverse or Fast Forward button to control the audio speed.

- Hitting the Fast Forward icon while pressing the alt or option button will speed up and play the song at a higher playback speed.
- When you click Fast Forward again while pressing the mentioned key, your playback speed will keep increasing by small increments.
- Alternatively, you can hold the Command button and tap the Fast Forward button to speed up the song by larger increments.
✨Our Advice
✅How to Speed up or Slow Down Audio on Mac in iMovie?
iMovie is the pre-installed video editing software on Mac, which makes it possible to edit audio and video without hassle. It is equipped with various editing features to help you complete common editing tasks, such as audio speed adjustment. It is completely free to use, so you don’t need to worry about the limitations.
Please find the guidelines below.
1). Launch iMovie, import your audio and then drag it to the timeline.
2). Find the Speed icon on the right top and then choose Slow or Fast from the drop-down box.
(Take audio slowing-down as an example.)

3). Adjust the speed by choosing the percentage presented.

4). Export your new audio with a changed speed.
✨Our Advice
How to Control Audio Speed Without Changing Pitch Online
If it truly bothers you to install and use any desktop software, you can resort to a free online audio editor. Here, you can look at the audio speed changer provided by 123 Apps.
123 Apps is a website that consists of a set of free online video/audio tools to assist users with easy video/audio editing. To control the audio speed, you will need its tool–Change Audio Speed. It allows you to adjust the speed of audio with minimal effort. Meanwhile, as an online tool, you need not worry about its compatibility. Although it is generally free to use, limitations still apply to this tool, such as the daily task limit.
✅How to Change Audio Speed Online via 123 Apps?
1. Open the 123 Apps tool–Change Audio Speed and then click Open file to import your audio file.
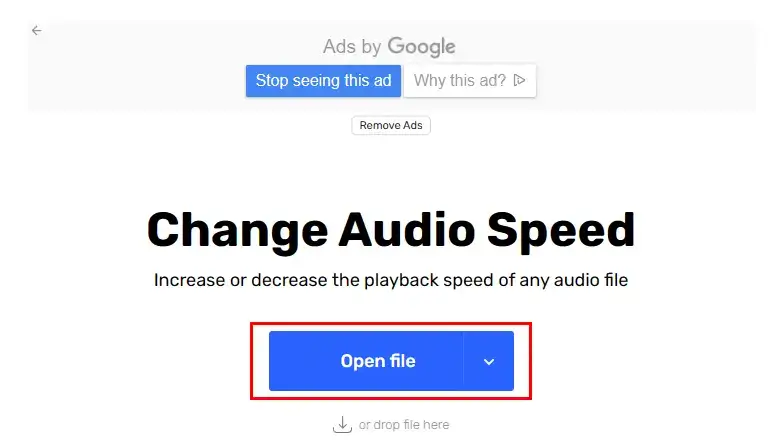
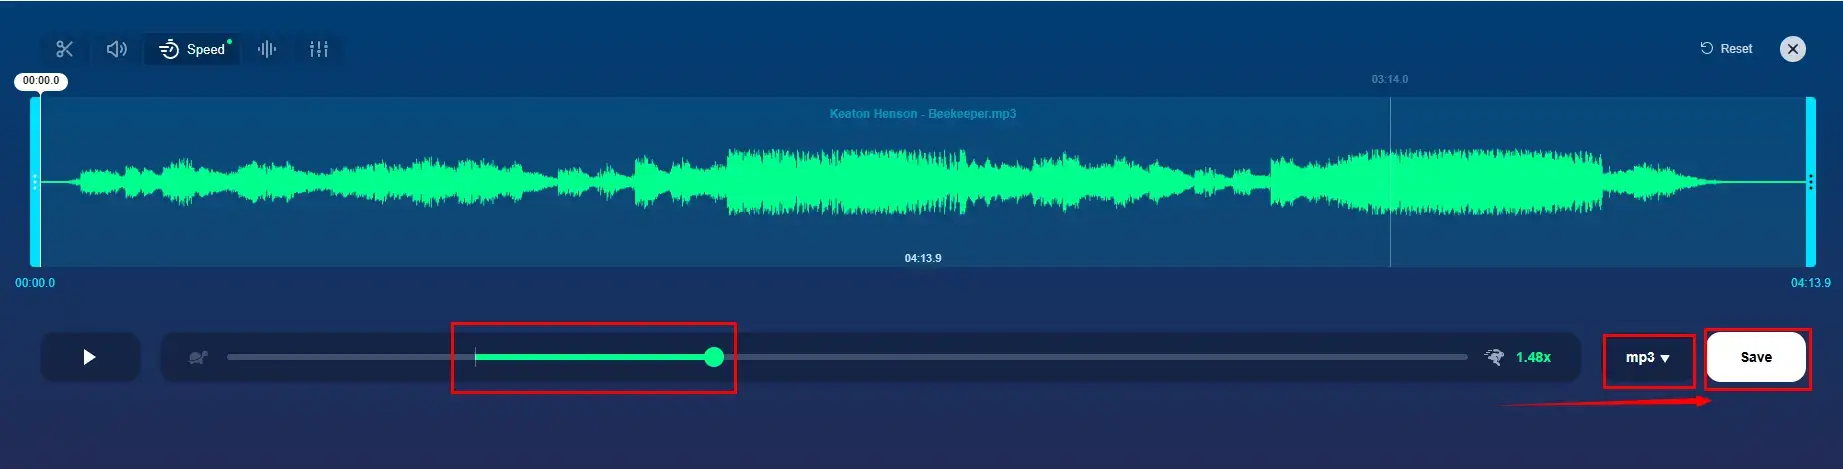
2. Move the green slider to change the speed of your audio, pick the format and then hit Save.
(Speed: Slow–0.5x to 0.95X, Fast–1.05X to 3.0X. Audio formats: .mp3, .m4a, .m4r, .flac, and .wav)
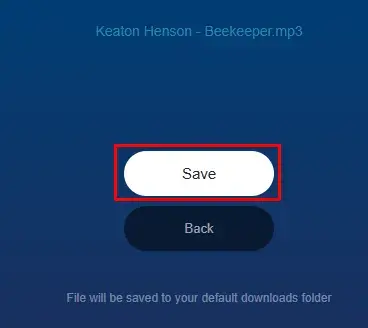
3. Press Save to export your new audio music.
✨Our Advice
Final Thought
This section marks the end of our discussion on how to change audio speed without changing pitch on Windows, Mac and online. We hope you will find it far from challenging to realize this goal with the aforementioned audio speed changers according to your preferred platforms.
However, if you are using a Windows OS, it is strongly advisable to try WorkinTool VidClipper since it is easy to use and powerful enough to change the speed of your whole audio file or fine-tune that of a part of it to present an audio outcome with different speed in different sections.
Now, are you ready to adjust audio speed by yourself?
![]()


