How to Video Record Yourself Presenting a PowerPoint on PC in 2024
It is essential to record yourself giving a PowerPoint presentation if you have a job related to teaching, training or coaching. So you can create your own video tutorial out of the recorded materials with ease. Do you want to know some easy and quick methods of recording a PowerPoint presentation and yourself? Then, you’d better spare a few minutes for this blog post on how to video record yourself presenting a PowerPoint on multiple PC platforms in 2024. All approaches prove to be simple and practical.
📌Traditional Way: Microsoft PowerPoint Inbuilt Recorder
📌New Ways: Windows – WorkinTool VidClipper, Mac – OBS Studio and Online – Clipchamp
🙋🏻♀️Recording yourself presenting a PowerPoint can effectively share your ideas with others or create training materials. Through the aforementioned third-party screen recording software or the inbuilt recorder in PowerPoint, you can easily capture both your presentation and your face to create a more engaging and interactive experience for your audience.
🙋🏻♂️However, if you use a Windows computer, please take a closer look at WorkinTool VidClipper since it is user-friendly, easy to use and super multi-functional to solve many of your problems.Now, please start your reading to learn about specific solutions and experience all of them by yourself.
How to Video Record Yourself Presenting a PowerPoint on Windows/Mac/Online in 2024
It is essential to record yourself giving a PowerPoint presentation if you have a job related to teaching, training or coaching. So you can create your own video tutorial out of the recorded materials with ease. Do you want to know some easy and quick methods of recording a PowerPoint presentation and yourself? Then, you’d better spare a few minutes for this blog post on how to video record yourself presenting a PowerPoint on multiple PC platforms in 2024. All approaches prove to be simple and practical.
| 💡Traditional Way | 📍Microsoft PowerPoint Inbuilt Screen Recorder |
| 💡New Ways | 📍Windows – WorkinTool VidClipper [🔥Recommended] |
| 📍Mac – OBS Studio | |
| 📍Online – Clipchamp |
OK. Here we go.
Before Video Recording Yourself Presenting a PowerPoint
📌Why do you need to record a video of a PowerPoint presentation?
There are so many reasons for getting a recorded PowerPoint presentation with yourself:
📌Can I Record myself while presenting in PowerPoint?
Yes. You can either resort to the built-in screen recorder inside Microsoft PowerPoint or a handy external screen recording app to assist you in achieving this goal. Please read on to learn about specific solutions.
How to Record Yourself Giving a Presentation in Microsoft PowerPoint
If you are a subscriber of Microsoft 365, you will have access to advanced features of the Microsoft Office suite, like the screen recording feature in Microsoft PowerPoint. With its help, you can video record yourself presenting a PowerPoint with minimal effort.
✅How to Record Yourself and Your Presentation Screen with the inbuilt screen recorder in Microsoft PowerPoint?
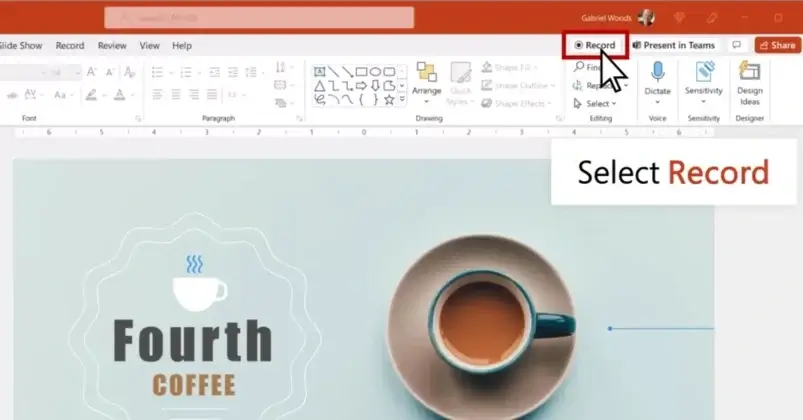
1. Open your .ppt or .pptx file with Microsoft PowerPoint and then select Record option on the Record tab.
2. [Not Necessary] Choose Select more options to pick the desired background and use the Views icon to change the layout option.
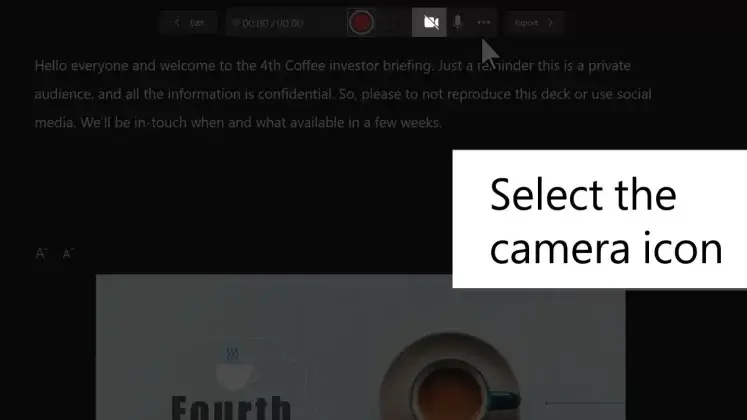
3. Click on the camera icon to turn on your camera on the top side of PowerPoint.
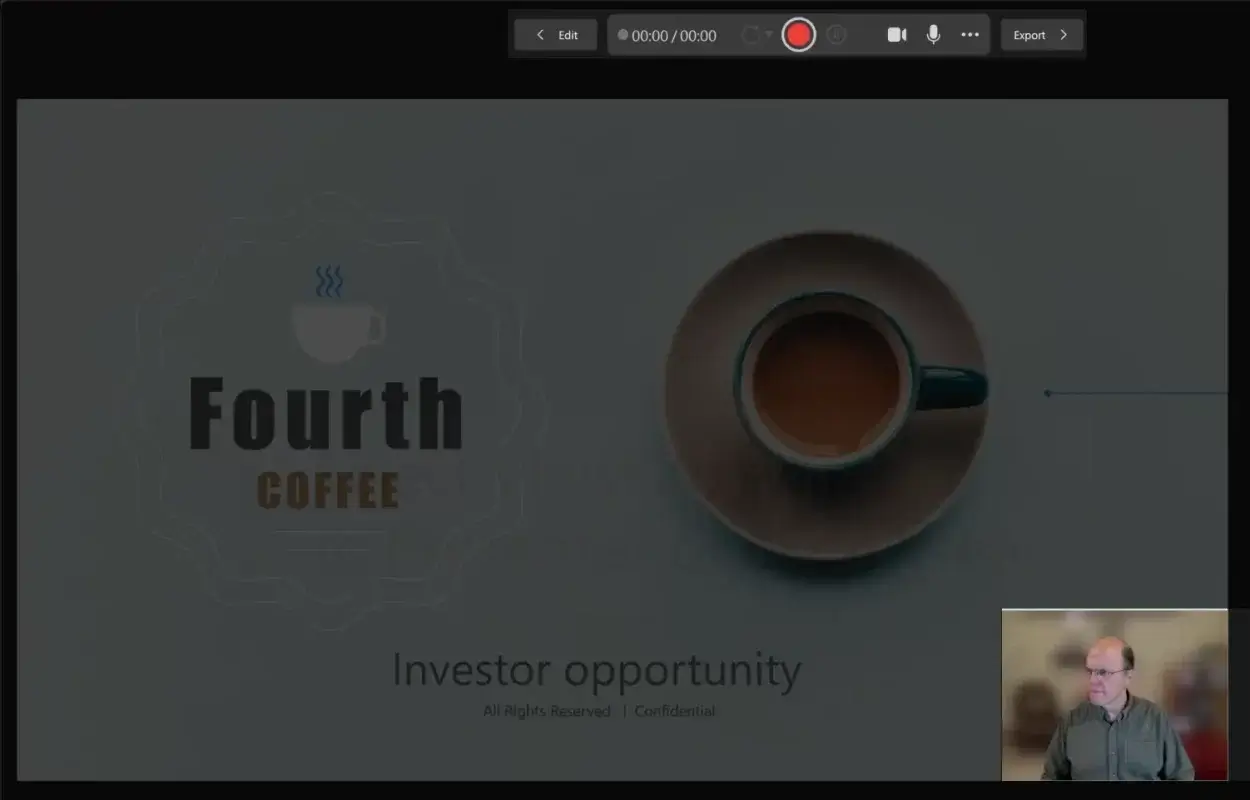
4. Press the red recording button to begin recording yourself giving a PowerPoint presentation.
(The recording will start after the countdown. Meanwhile, to navigate around your slides, simply click the previous or next arrow.)
5. Go to File > Export to save your recording.
✨For Your Reference
How to Video Record Yourself Presenting a PowerPoint with External Screen Recorders
It will be simpler to record yourself while presenting a PowerPoint if you rely on a useful screen recording tool. This chapter will introduce you to three practical screen recorders to meet your different needs.
1️⃣How to Video Record Yourself Presenting a PowerPoint on Windows?
To fulfill this purpose on Windows, you can turn to WorkinTool VidClipper for help.
✅WorkinTool VidClipper
WorkinTool VidClipper was initially developed as a video editor. However, always intending to present a practical tool for everyone, its designers have upgraded it to a super multi-functional program boasting the following (but not limited to) features:
Therefore, you save the trouble of finding and installing them individually, which is efficiency-boosting and space-saving.
Using VidClipper as a screen recorder, both beginners and professionals will find it convenient and useful. With its simple interface and clear instructions, VidClipper requires no learning curve. Besides, users can customize the recording area, audio, quality and format at their will. Additional screencast settings are also available to personalize your recording. For professionals, the drawing toolbar and auto-stop feature are equipped to facilitate their recordings.
To capture yourself presenting a PowerPoint, you need to record video from Webcam and computer screen with both system and microphone audio, which can be easily and instantly done with WorkinTool VidClipper.
🌟How to Video Record Yourself Presenting a PowerPoint with WorkinTool VidClipper?
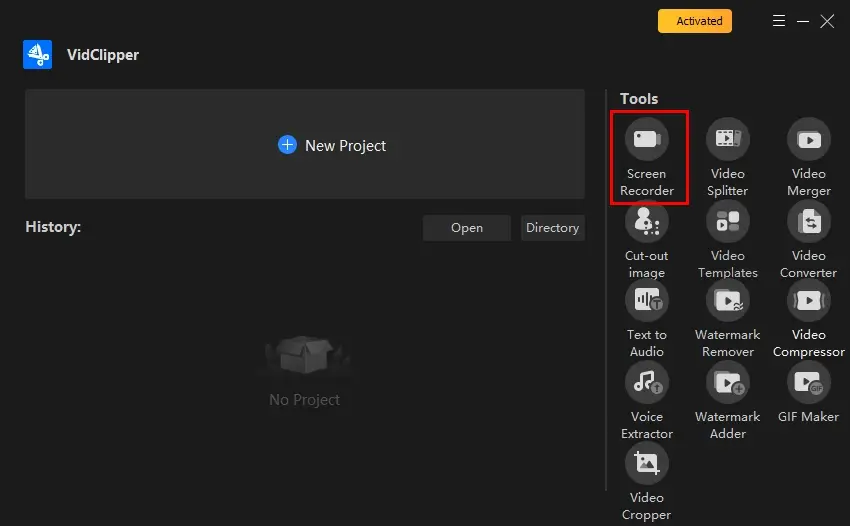
Step 1. Launch the program and then find Screen Recorder on the right menu.
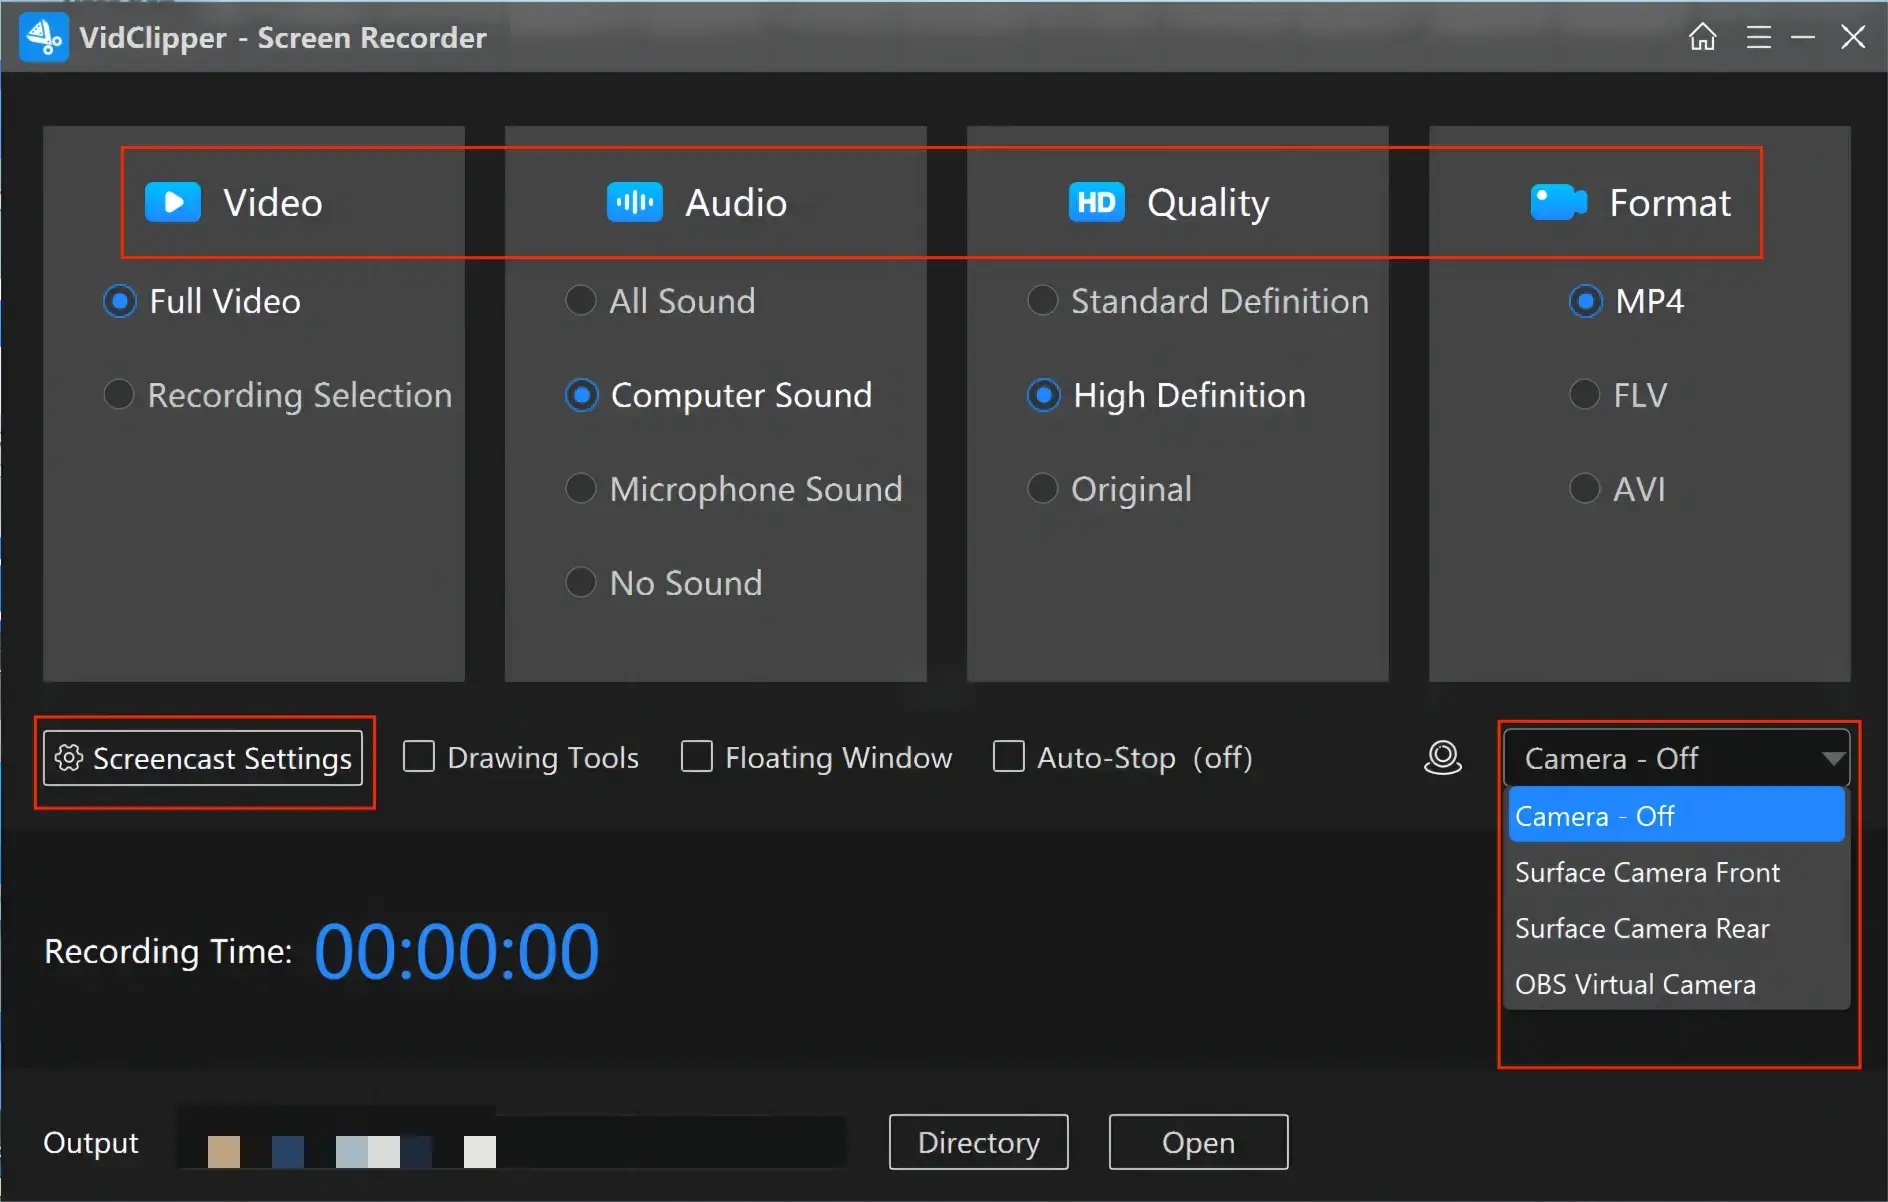
Step 2. Confirm your options (recording area, audio, quality and format), adjust the screencast settings and then choose your camera from the drop-down box beside the camera icon.
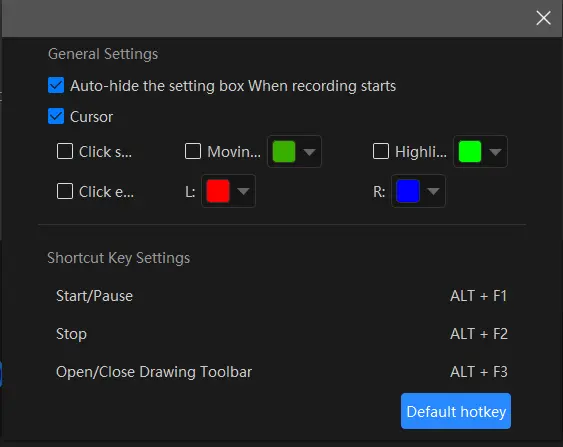
📝Notes for Its Screencast Settings
Step 3. Activate the drawing toolbar and/or auto-stop feature as you like.
Drawing Toolbar |
Auto-Stop |
 |
 |
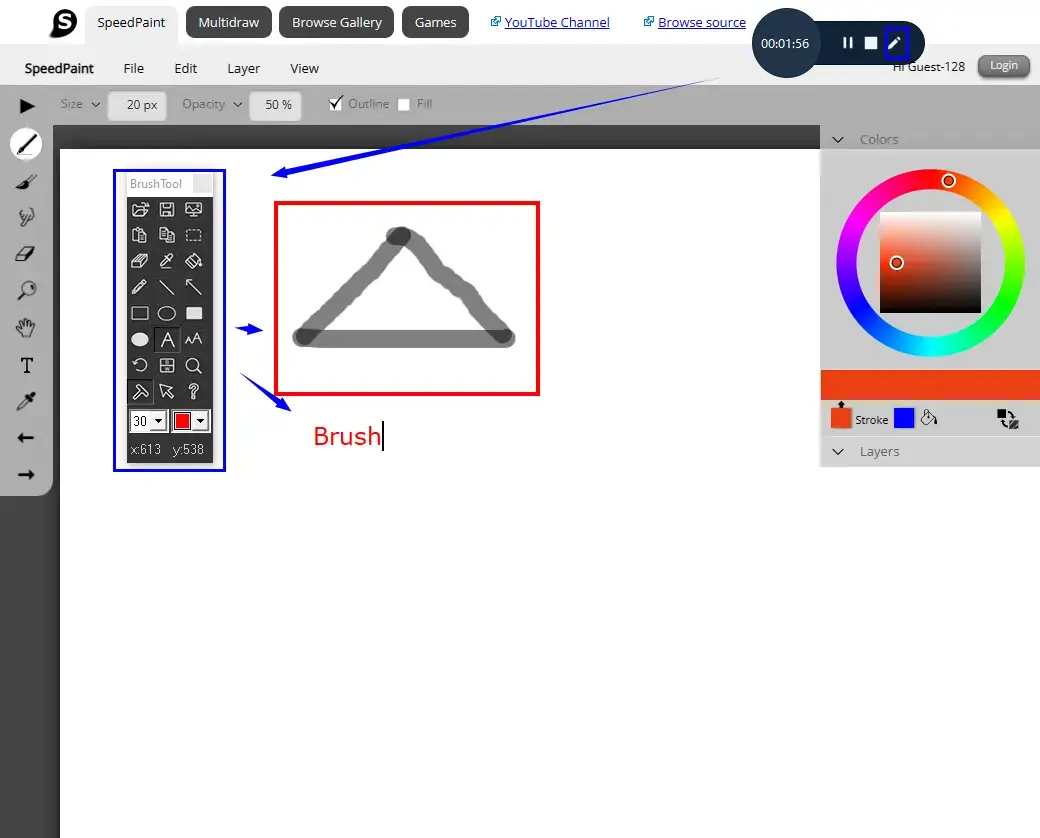
A drawing toolbar is available to draw lines/shapes and annotate your recording directly. Therefore, you save the trouble of having to complete the relevant operations after your recording. You can activate it by
|
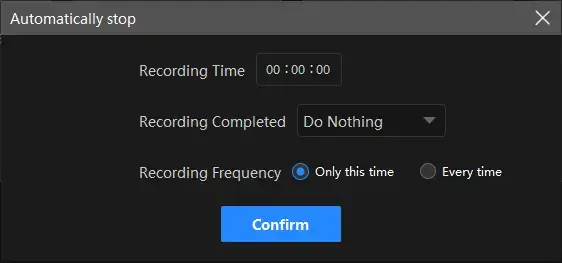
The auto-stop feature is designed to end your recording automatically after the full recording length is set. Therefore, you don’t have to worry about your recording, even when being away from your computer.
|
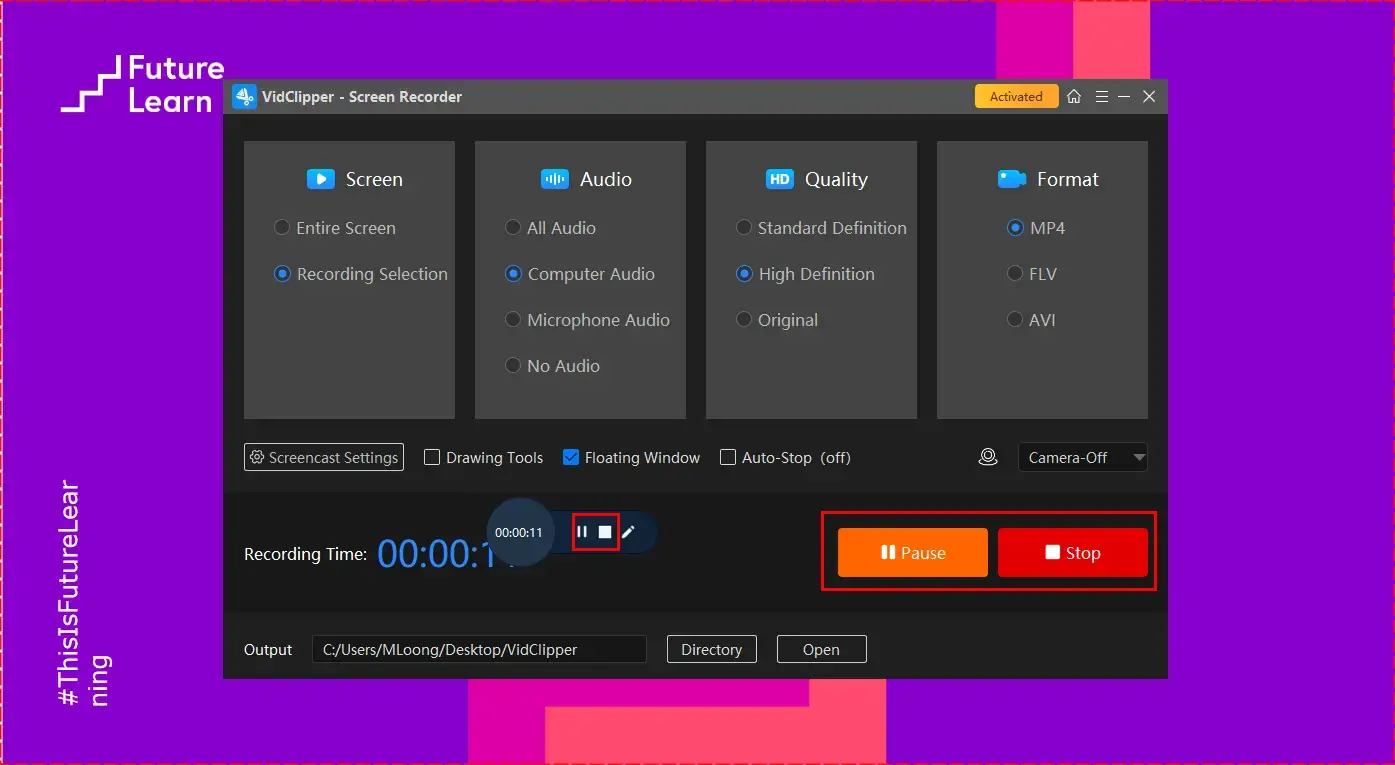
Step 4. Hit Start (shortcut key-Alt+F1) to begin your recording.
Step 5. Click Pause (Alt+F1) or Stop (Alt+F2) on the floating window or the recording page to suspend or end and save your recording.
Step 6. Choose your next move.
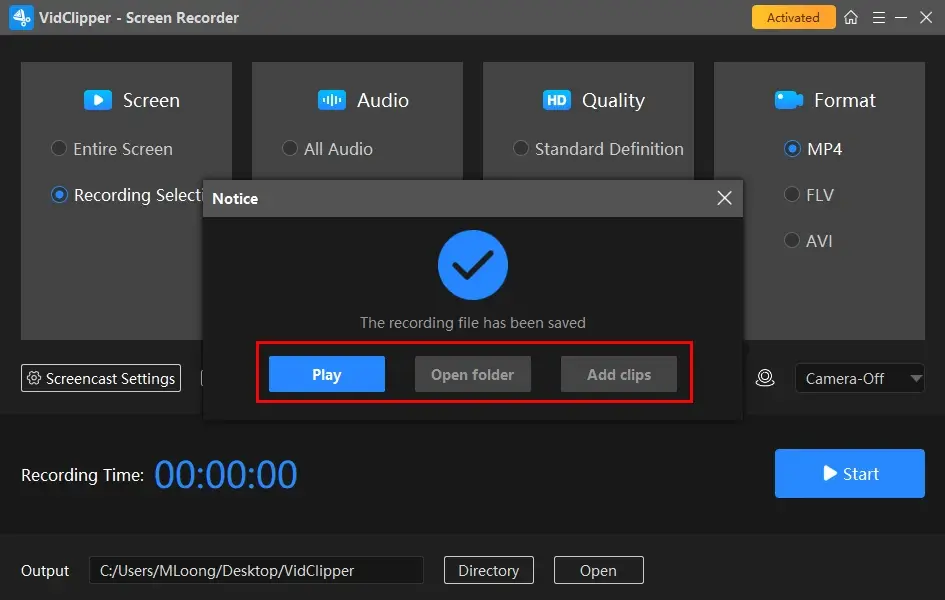
*Add clips is so useful a feature that it helps to add your recording to VidClipper’s editing console for further editing. Therefore, you can edit it as follows:
📣PS: In which scenarios can you use WorkinTool VidClipper as a screen recorder?
✨For Your Reference
2️⃣How to Record Yourself Giving a Presentation on Mac?
OBS Studio will be an ideal choice if you are a Mac user.
✅OBS Studio
OBS, short for Open Broadcaster Software, is a free and open-source screen recording program for video recording and live streaming. Owing to its strong compatibility with plenty of platforms, OBS is widely used by content creators, gamers and professionals to capture and broadcast their content.
Additionally, OBS Studio enables you to capture video and audio from various sources, including webcams, microphones and computer screens. It also provides a number of tools for editing and enhancing the captured content, such as video filters, transitions and audio mixing. Hence, it will be conducive to recording video and PowerPoint presentation at the same time.
🌟How to Record Yourself and Your Presentation Screen with OBS?
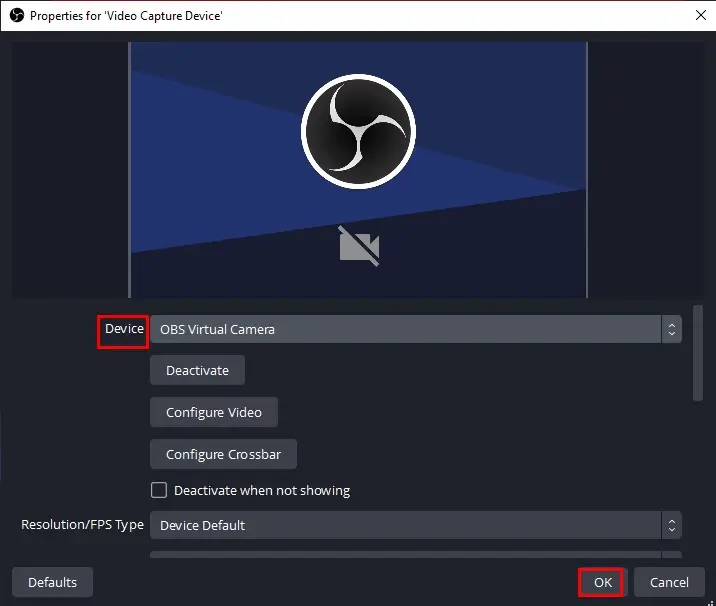
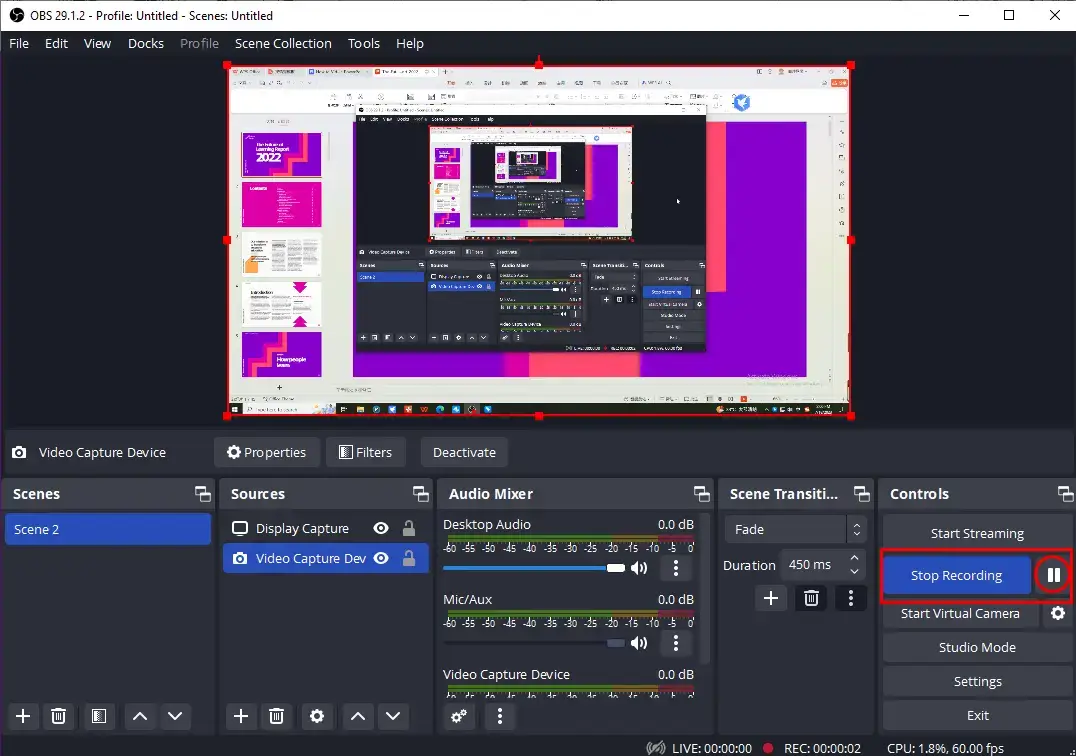
1). Open OBS and then go to Source > + icon > Video Capture Device.
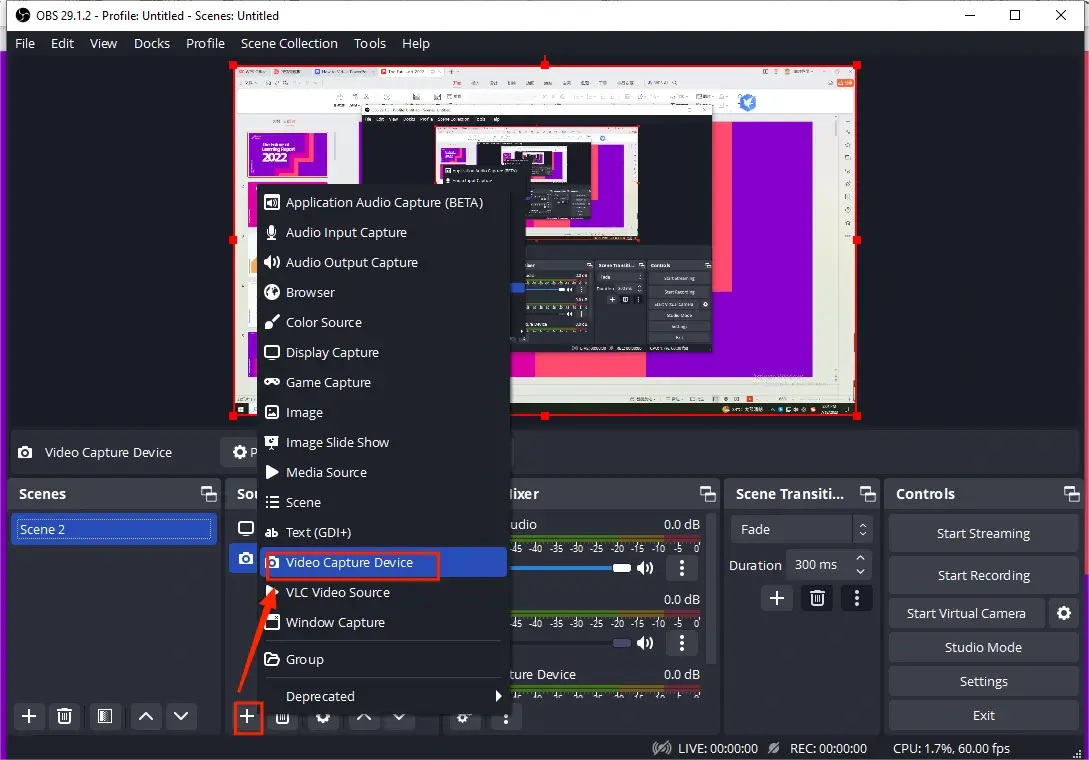
2). Choose your camera from the drop-down box beside Device and then press OK.
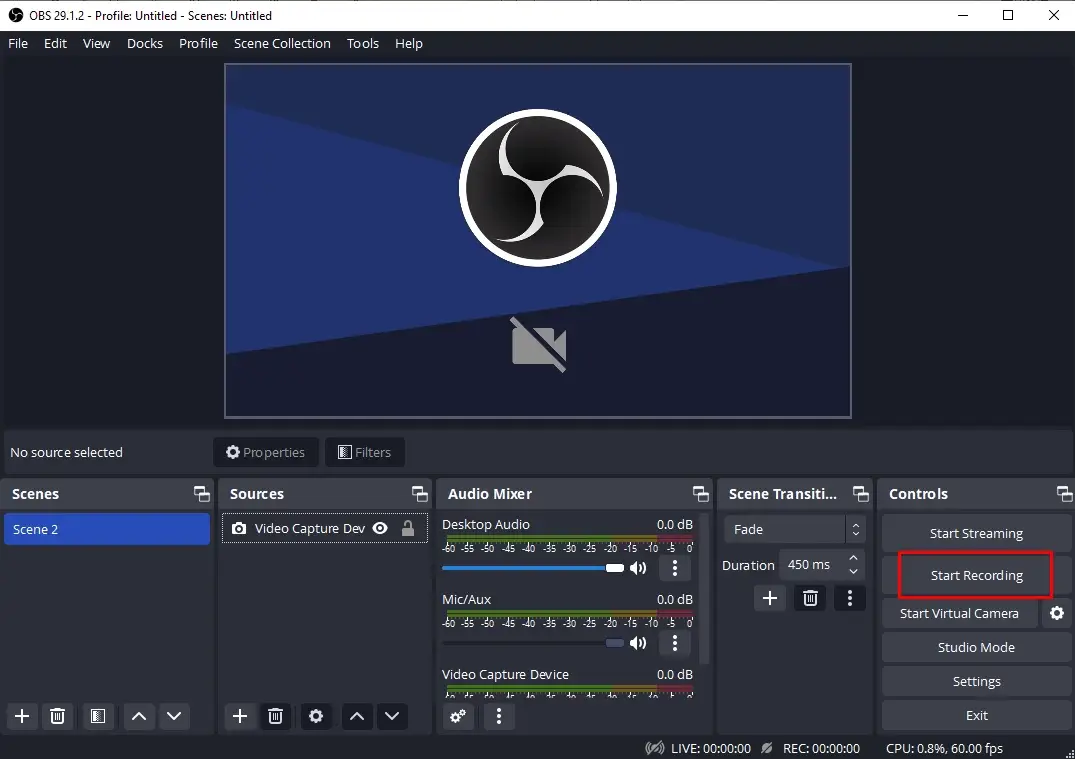
3). Click Start Recording under the section-Controls.
4). Then, navigate to Source > + icon > Display Capture.
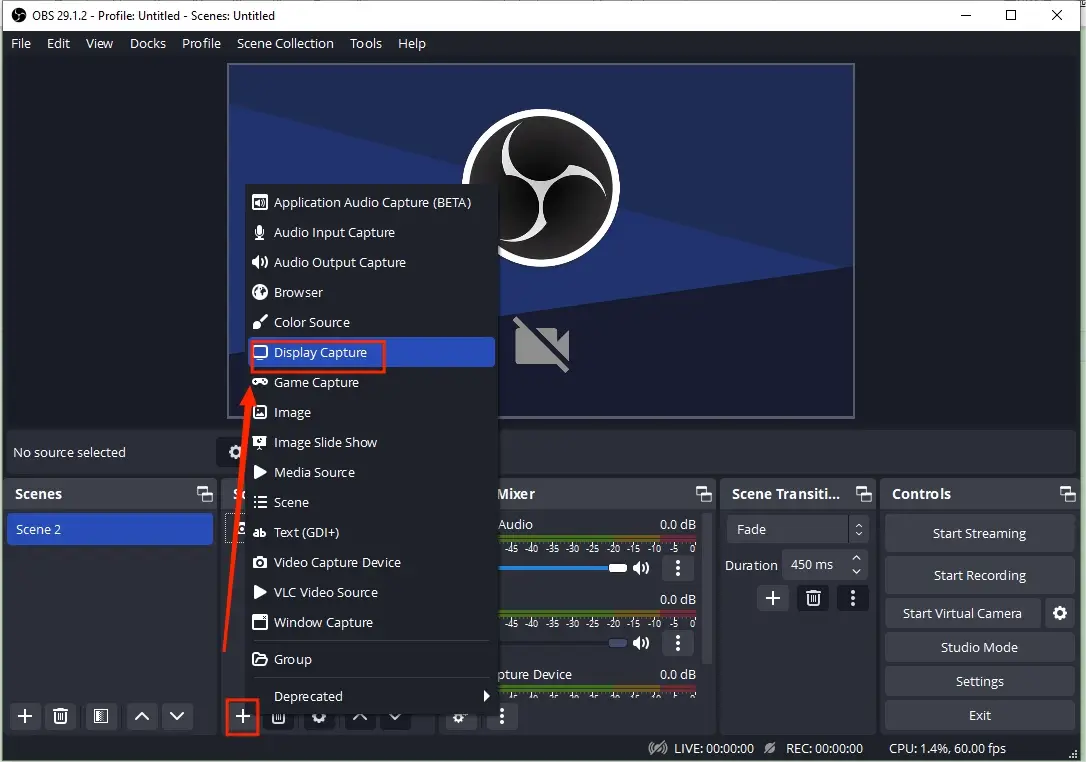
5). Name your project and then hit OK.
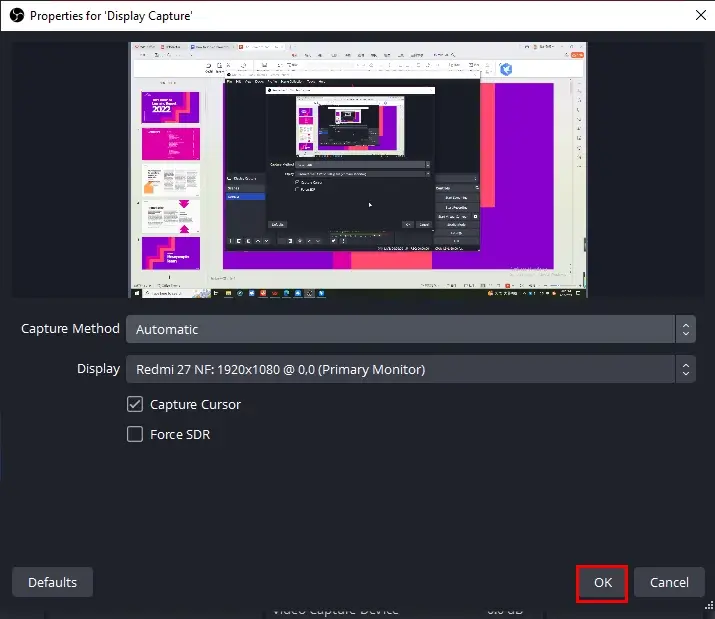
6). Select your capture method and then hit OK.
7). Determine your audio options in the section-Audio Mixer.
8). To end and save your recording, press Stop Recording.
(To temporarily stop your recording, press the small pause icon.)
📣PS: To view your recording, please go to File > Show Recordings.
✨For Your Reference
3️⃣How to Record a PowerPoint Presentation with Yourself Online?
If it truly bothers you to download and use any desktop software, a free screen recorder online could be your perfect solution. Here, we will show you Clipchamp.
✅Clipchamp
Clipchamp is a cloud-based video creation and editing platform that aims at online video creation, editing and sharing. It offers a variety of tools and features, including a video editor, converter, compressor and screen recorder. All of them can be accessed directly in a web browser without installing any software. For its screen recording feature, Clipchamp enables you to capture any content on your computer screen and Webcam with(out) microphone and/or system sound. Furthermore, you can record your screen in three modes: window, browser tab and the entire screen.
Meanwhile, Clipchamp is generally free to use; however, you need to upgrade this tool if you feel like enjoying its advanced features, including filters, elements and more. Also, users can expect a maximum 30-minute recording. Hence, you must repeat the operations several times if your presentation is too long.
🌟How to Record Yourself While Presenting a PowerPoint with Clipchamp?
1. Open Clipchamp, click Log in to sign in to your account.
2. Hit Create a new video to open its editor.
3. Find Record & create on the left menu.
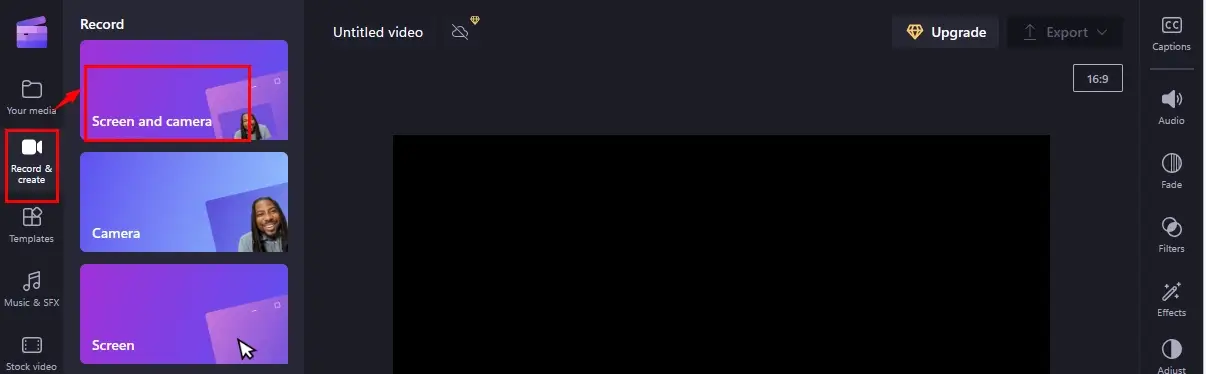
4. Set up your microphone, select your camera device and then hit the red recording button.
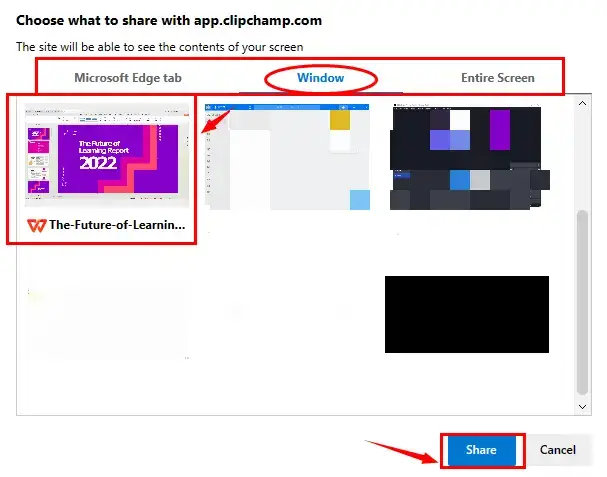
5. Select the content to share with Clipchamp and then press Share.
(Advice: Window)
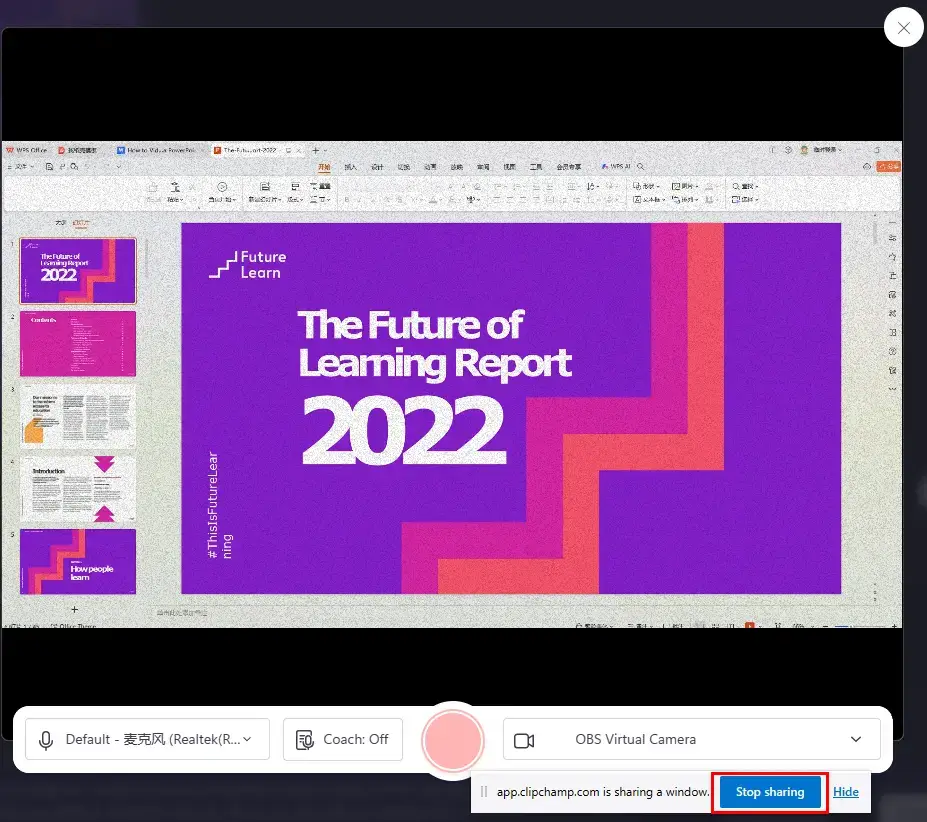
6. Click Stop Sharing to end your recording.

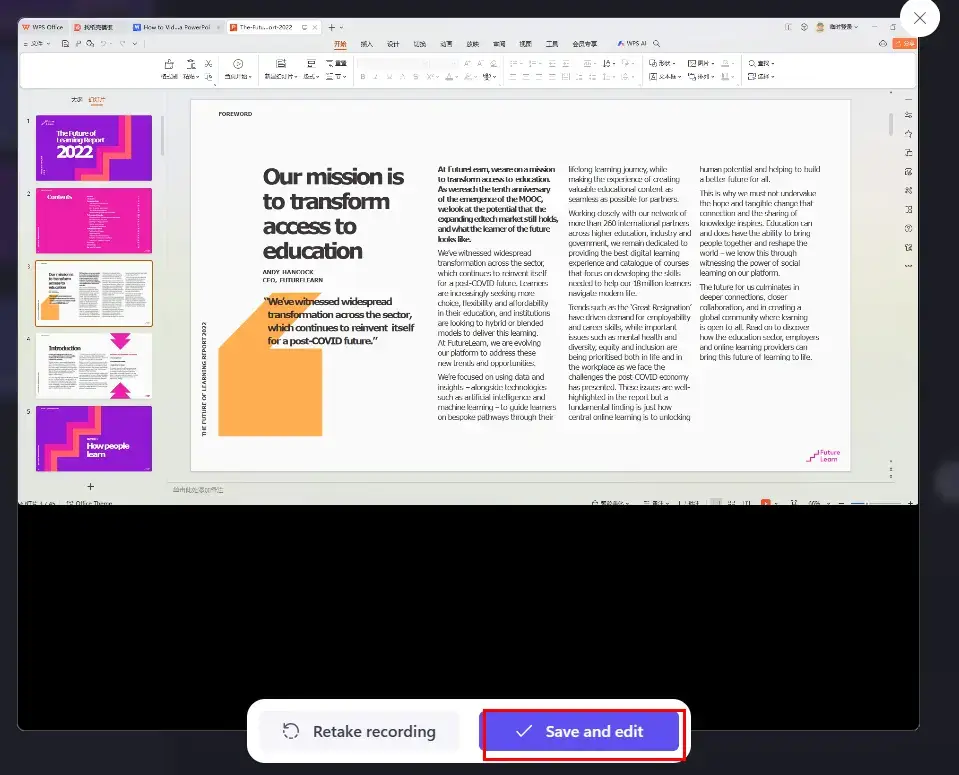
7. Hit Save and edit to export your recording.
(The download notification will pop up automatically and your recording will appear on its editing page. Simply close the window if you have no editing requests.)
✨For Your Reference
More to Share
🎯Why my PowerPoint can’t record my face?
One common reason for such a situation is that you may have forgotten to enable the recording tab. To do this, simply follow these steps:
- Click File > Options > Customize Ribbon.
- Mark the box next to Recording under Main Tabs on the right-hand side,
- Press OK to save the changes.
Once the recording tab is activated, you should be able to see the Record Slide Show option. Then, you can record yourself presenting a PowerPoint presentation.
🎯How to record audio on PowerPoint?
Two ways are available to assist you in realizing this goal.
✅In Microsoft PowerPoint
- Select Insert > Audio > Record Audio.
- Name your audio file, select Record and then speak.
(Your microphone should be enabled in order to record audio.) - To review your recording, select Stop and then select Play.
- To stop your recording, choose OK.
✅With an audio recorder
If you are a Windows user, you can depend on another WorkinTool tool–Audio Recorder to get an audio file from both system and microphone sources. It is completely free to use.
- Launch the tool and then enable both computer and microphone sound.
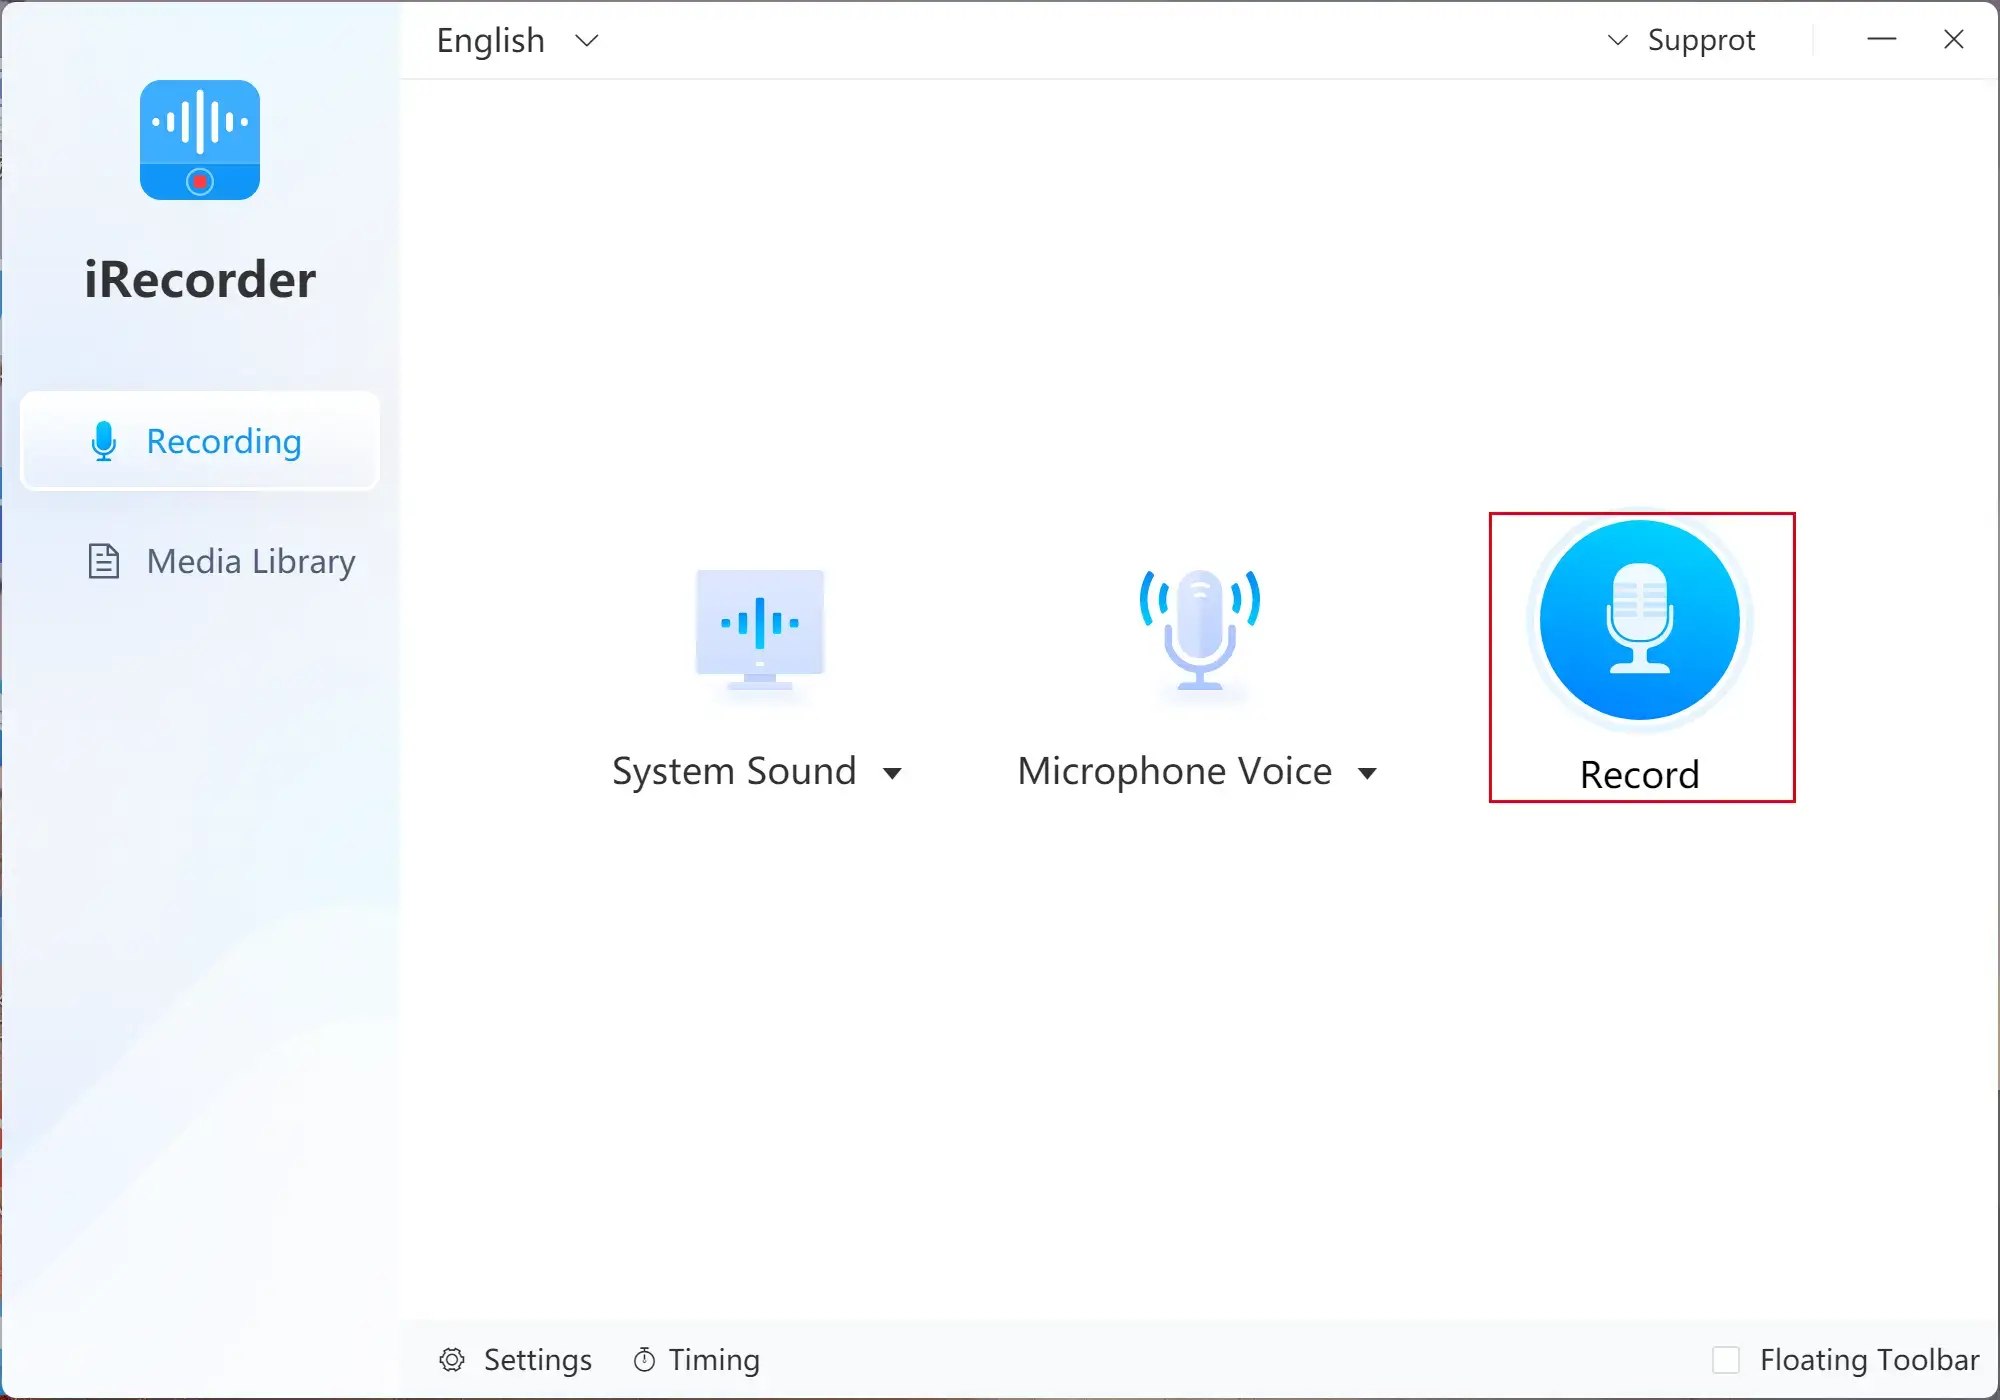
- Click the blue Record button.
- Hit the Pause or Stop icon to suspend or end and save your recording.
📢Note: You can create an MP3 or WAV file through WorkinTool Audio Recorder.
Wrapping up
This chapter marks the end of our discussion on how to video record yourself presenting a PowerPoint on your computer. Generally speaking, recording yourself presenting a PowerPoint can effectively share your ideas with others or create training materials. Through the aforementioned third-party screen recording software or the inbuilt recorder in PowerPoint, you can easily capture both your presentation and your face to create a more engaging and interactive experience for your audience.
However, if you use a Windows computer, please take a closer look at WorkinTool VidClipper since it is user-friendly, easy to use and super multi-functional to solve many of your problems.
![]()
Now, are you ready to capture yourself giving a PowerPoint presentation?
