How to Screen Record with Voice on PC and Phone in 2024
People rely more and more on online office software. Especially after the baptism of the epidemic, remote telecommuting is gradually becoming mainstream. So what follows is surging demand for screen capture software. So how do you screen record with voice that is of speed and high quality at the same time? In this post, we have introduced different solutions for different devices.
📌PC: 💻Windows–WorkinTool Capture Screen Recorder and 💻Mac–QuickTime Player
📌Phone: 📱Android/iPhone/iPad–Inbuilt screen recoder
🙋🏻♀️Please feel free to try all the new aforementioned solutions. However, for the Windows system, it is strongly advisable to try WorkinTool Capture Screen Recorder (a feature in VidClipper Video Editor). It is a comprehensive video recording software. With it, you can record any content you want with or without a specific sound. More importantly, it requires no learning curve to use all its features.
🙋🏻♂️Now, please start your reading and experience the magic!
How to Screen Record with Voice on PC and Phone in 2024
During the time of this post-epidemic era, remote telecommuting has become the norm of life. People often use online meetings to get work done and study done. It also frees up more time for leisure and recreation. Whether you’re trying to copy online meeting content to finish your duties, saving an online Twitch gameplay tape that you want to watch later, or keeping some TV films for family movie night, it is always a better idea to screen record with voice and other audio. A few mouse clicks will help you record any content that you want together with screen and audio.
But how exactly to screen record with voice? Well, you will need a practical and handy screen recorder to help you with that. Here in this article, we will give you a detailed introduction on how to record your screen with voice and other audio in it. Four different methods guide you to the best solution on different platforms (both pc and phone) and how to screen record with voice-over without hassle. Come and check it out.
Page Content:
-
How to Screen Record with Voice on Windows?
-
How to Screen Record with Voice on Mac?
-
Methods to Record Screen with Audio on Android/iPhone/iPad
-
More to Share
How to Screen Record with Voice on Windows
If you are trying to search for a Windows-based screen recorder that is stunning in features and easy to use, there is one that can satisfy all these requirements that you want–WorkinTool Capturer Screen Recorder. We are going to break it down into this screen recording software in every aspect, including screen capturing, audio recording, user-friendliness, and additional features.
💖 Easy Solution: WorkinTool Capture Screen Recorder
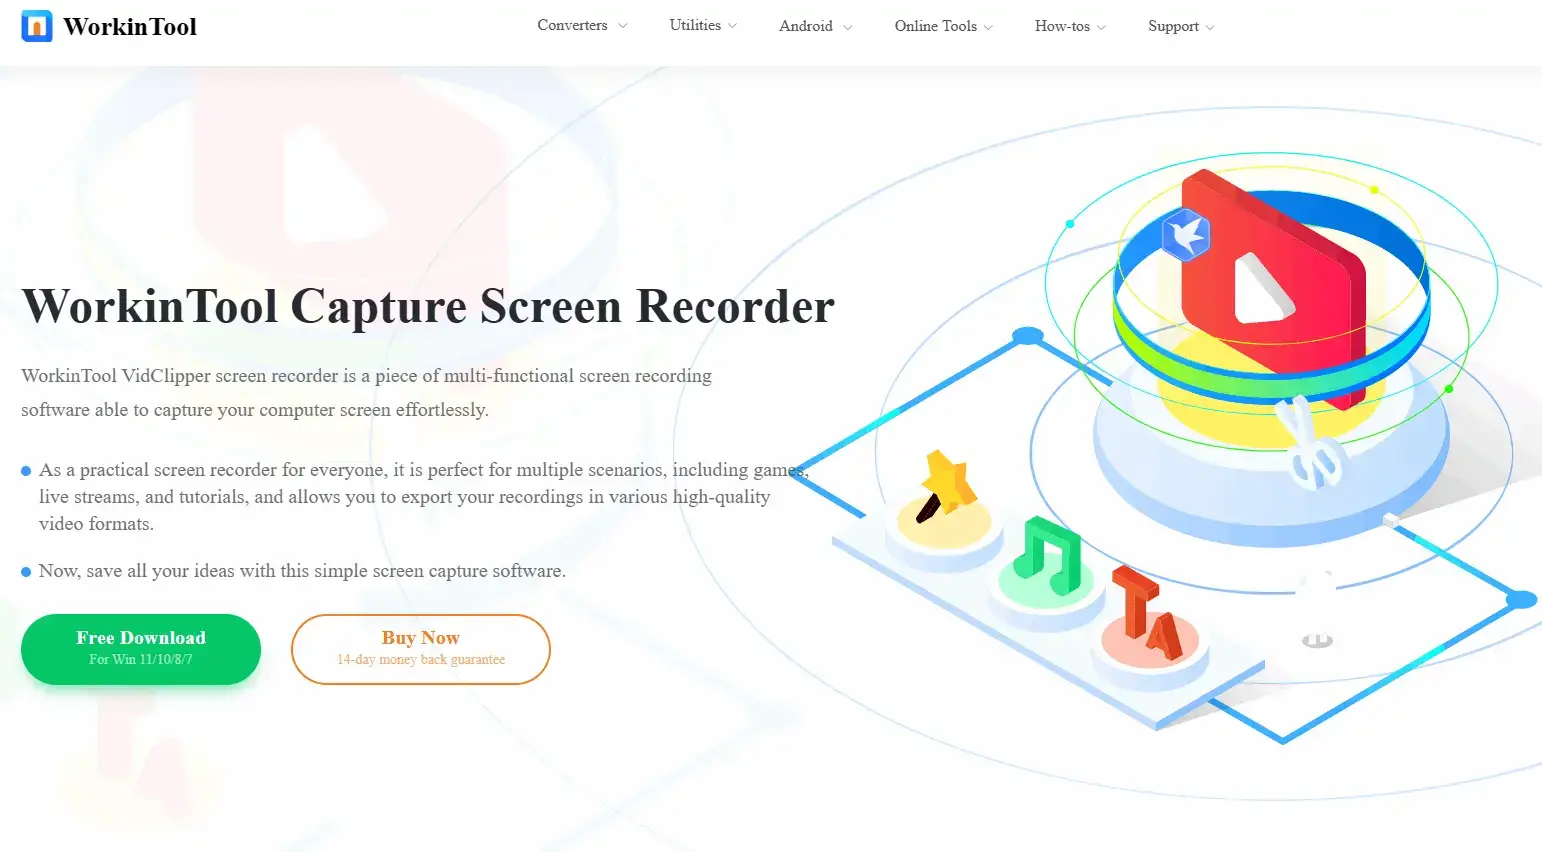
WorkinTool Capture Screen Recorder is an important feature in WorkinTool Video Editor – VidClipper. Though it is a new product, it is as good as any screen recording software on the market. It is a practical and useful tool for everyone. Beginners will find it simple and convenient due to its intuitive interface and easy recording process. All their operations can be completed within one interface, which saves the cumbersome process of hitting “Next” continually.
Professionals can rely on its advanced features to present professional-looking recordings, such as additional screencast settings, the drawing toolbar and the auto-stop tool. Additionally, their recordings can be moved to the VidClipper video editor for further editing with one click.
With its powerful functions, users can easily screen record with audio of any content they want. Whether it’s an online meeting, video call, game tutorial or live-streaming, it can bring you the simplest enjoyment.
Furthermore, in addition to a screen recording app, WorkinTool VidClipper is a super multi-functional integration of video processing software. Therefore, one software can allow users to enjoy the following (but not limited to) features:
🌈Key Features of WorkinTool Capture Screen Recorder
(📃More Info: WorkinTool Capture Screen Recorder Review)
💡How to Screen Record with Voice Using WorkinTool VidClipper?
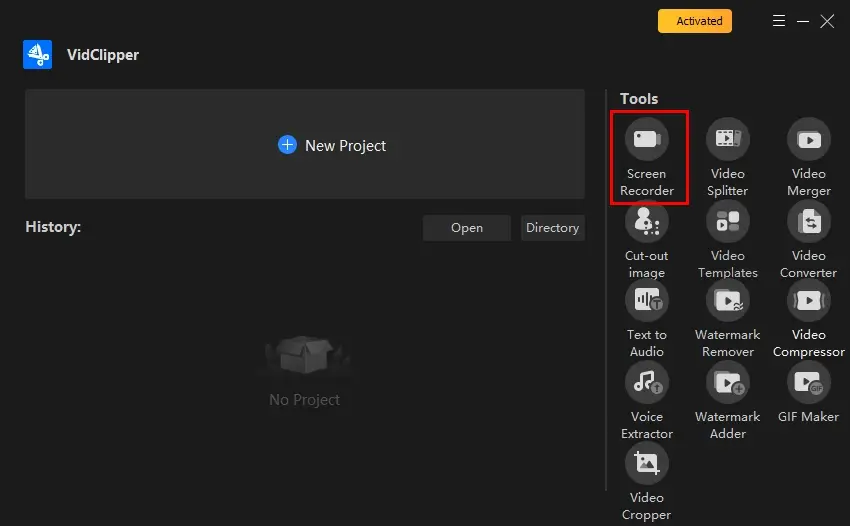
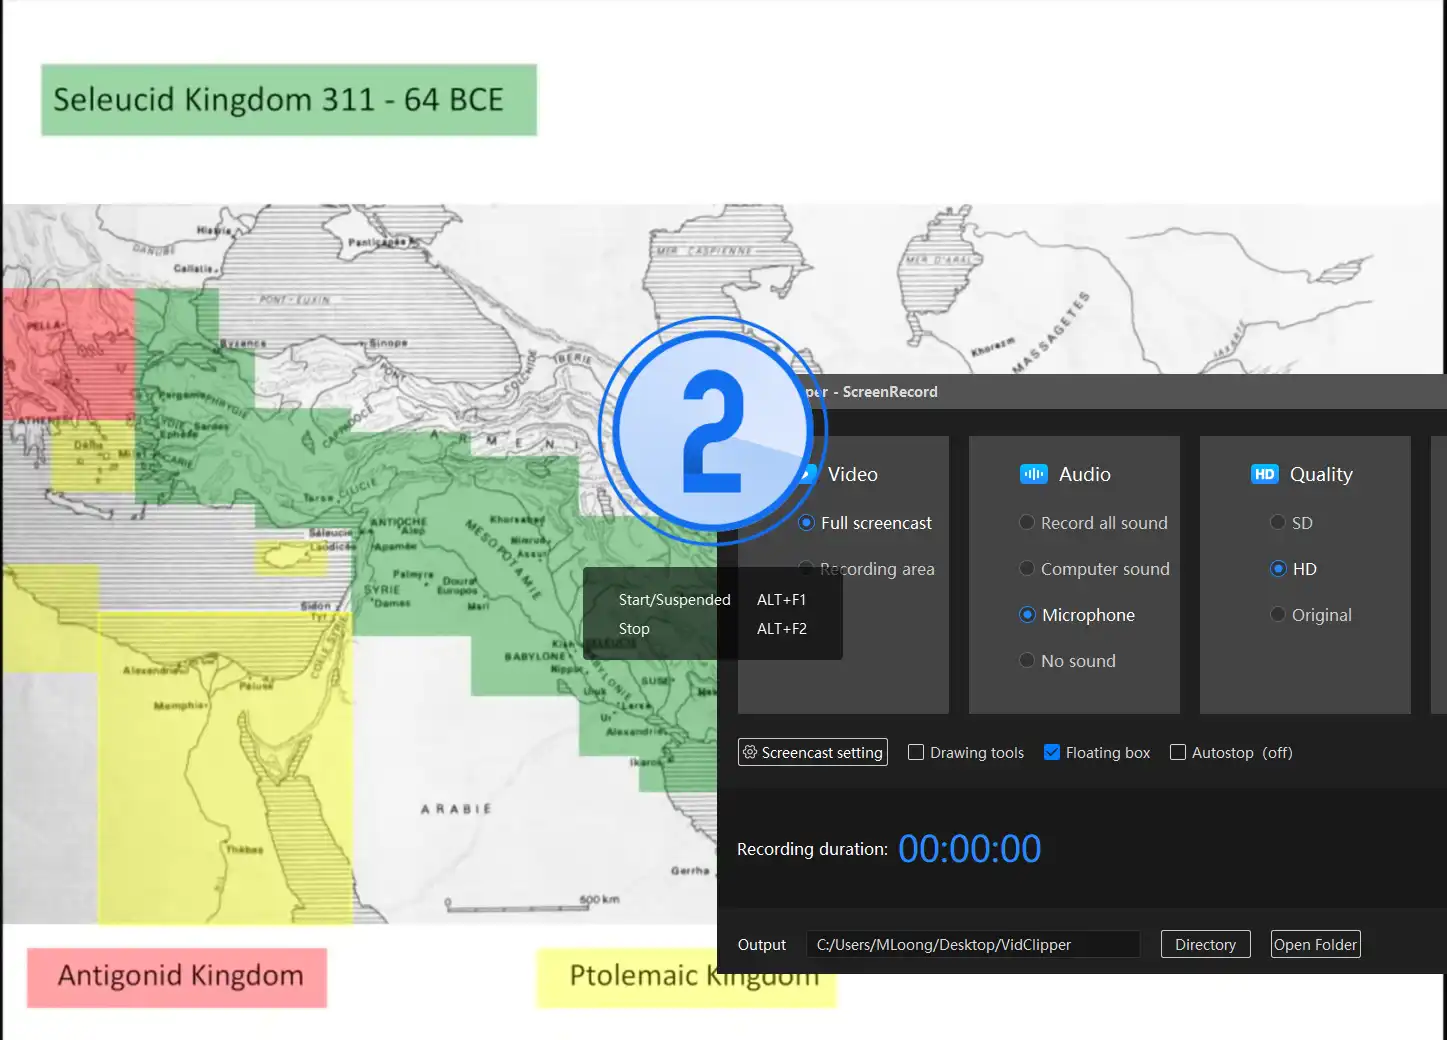
1. First, go download and launch this amazing software, click Screen Recorder on the opening page.
2. Then you need to configure your audio recording settings.
VidClipper has four different basic recording sections on the page for users to select from. One of them is the audio settings. Here, you can decide if you want to screen record with voice from a microphone or system audio or record a video without sound. It is of equal importance to other video recording settings. Now, let me break down to you the four basic recording options.
The software’s default setting is to record all sounds. If you only want a voice from your microphone, you will need to switch this option manually.
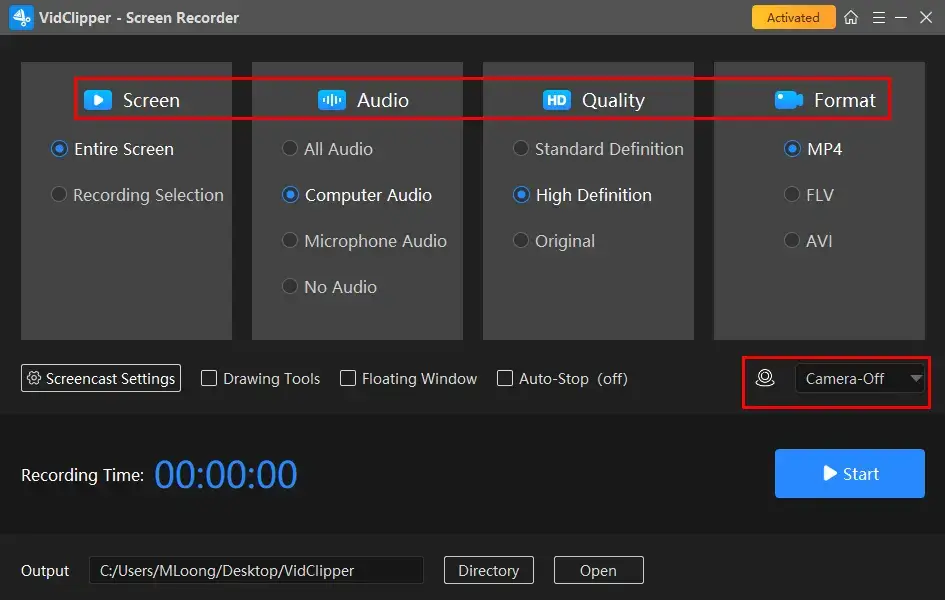
🎉 Basic Recording Options 🎉
| Screen |
|
| Audio |
|
| Quality |
|
| Format |
|
3. Lastly, start to record.
You can hit the Start button or use the shortcut key–ALT+F1, or ALT+F2 to start/suspend/stop the recording. Your video will then be saved to the preset output directory.
📣 Additional Options 📣
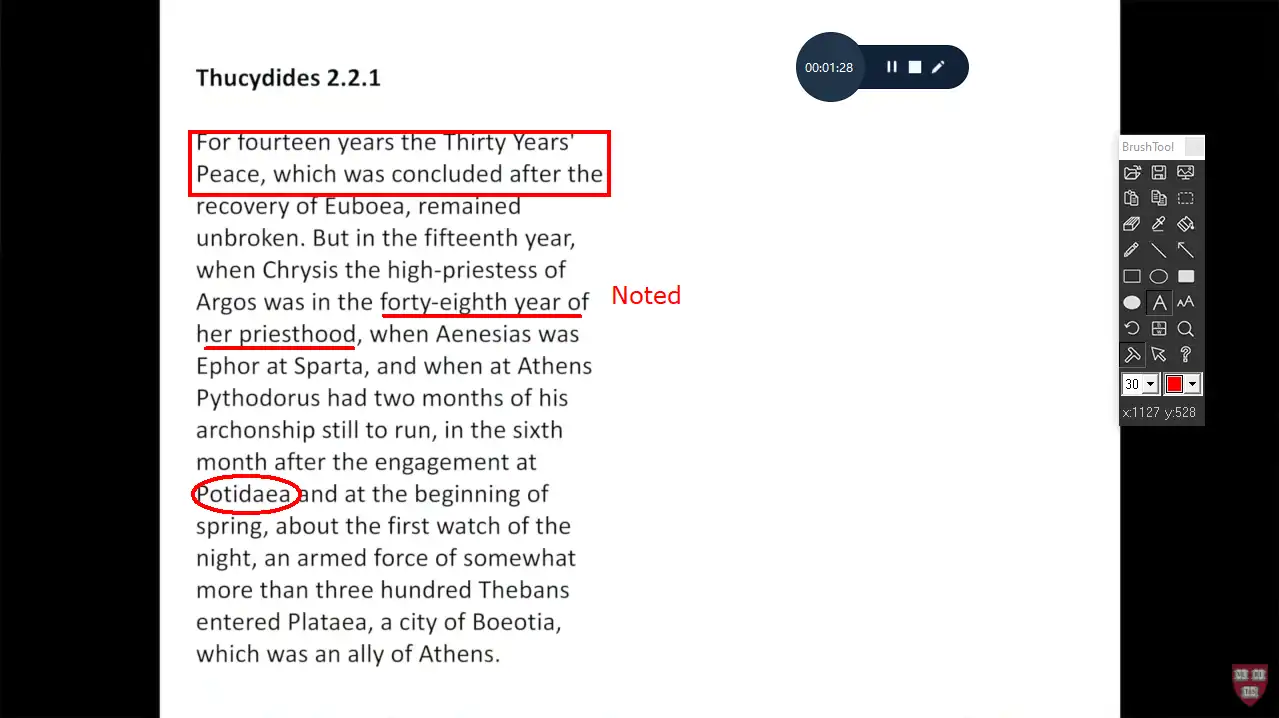
The four basic features mentioned above are enough to meet the needs of a large number of users. Of course, if you have more subtle needs, such as direct annotation on a video during the recording process, the software can satisfy users’ needs with the help of its feature-Drawing Toolbar.
✨Additional Settings & Tools✨
💖Why You Should Use WorkinTool
Just now we mentioned that it is a comprehensive video processing software. Instead of just recording, you can send the finished video directly to the edit function after you’ve done a series of recordings. You don’t need to download any more video editors. It already has all the features you need. For example:
🧐 You May Also Like
How to Screen Record with Voice on Mac
Recording on a Mac is easier and more convenient than on Windows. Because today we’re talking about free methods, we’re not going to add third-party software here. The best solution to screen record with voice on Mac here is to use the built-in app QuickTime Player.
📍 QuickTime Player
QuickTime Player is an application on the Mac system. You can use the screenshot utility to create a screen record, configure the audio recording settings, and record and save it on your Mac.
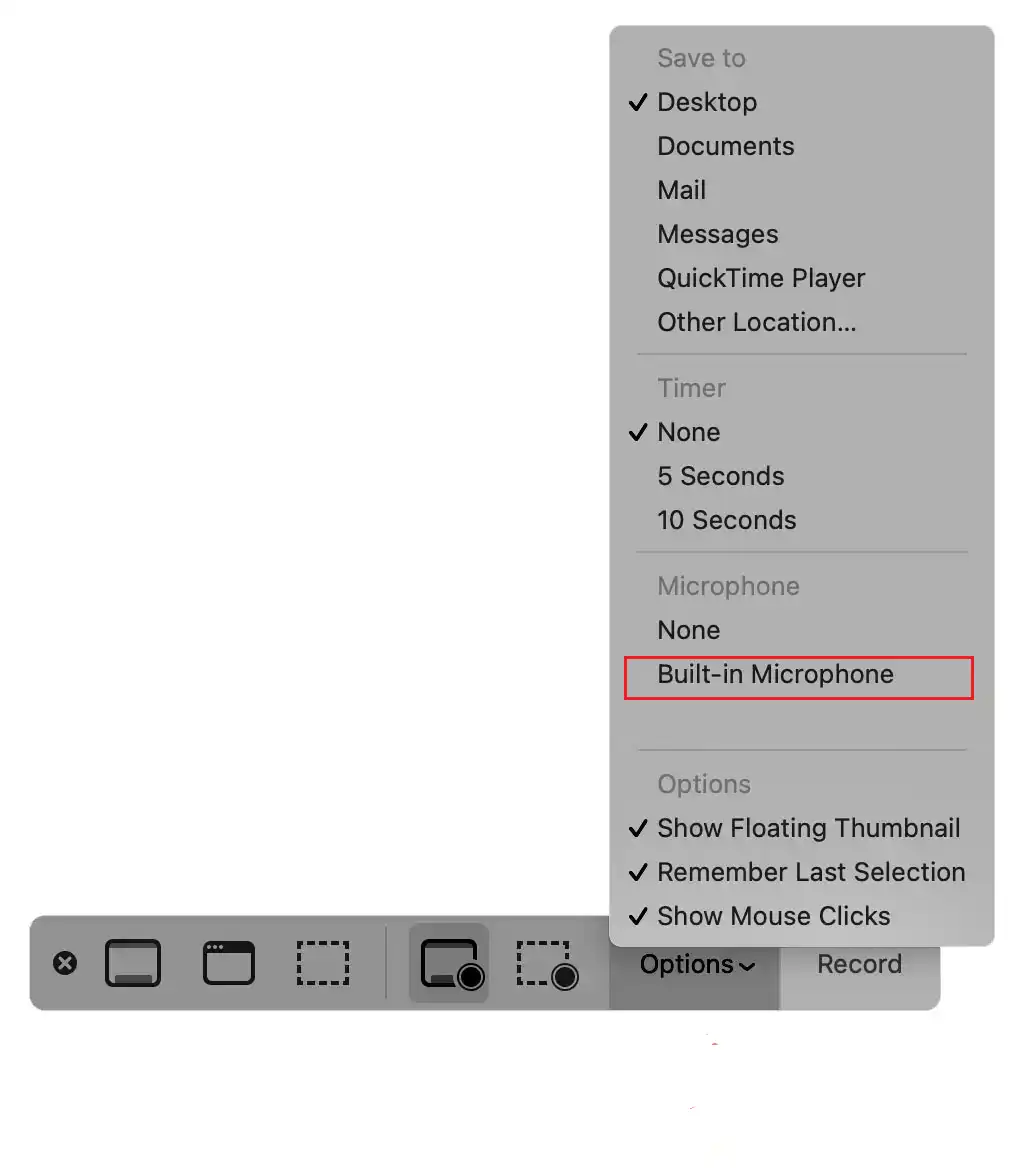
1. Press Command + Shift + 5 on your keyboard to open the QuickTime Player Screenshot and display the tools.
(Or you can open the QuickTime Player app first, choose File > New Screen Recording.)

2. Then you will see a video recording option bar. You can choose to record on the full screen or select part of the screen content for recording. The audio recording settings we need are in Options.

3. Click Options > Microphone, here you can choose if you want to record the screen with your voice from a microphone or some other external device. Once you are done setting, hit Record to start capturing your screen immediately.
Methods to Record Screen with Audio on Android/iPhone/iPad
Modern smartphones are all likely to have built-in screen recording apps that can work. Therefore, both Android and iOS phones can finish this job without the need for a third-party app.
Operations are generally the same, but let’s take a closer look at the details.
🎶 Screen Capture on iPhone/iPad
Preparation and notice:
① Your Apple device must meet the minimum requirements for iOS 14 or later.
② Some apps don’t permit you to record screens, for example, bank apps that contain your personal information.
③ Screen mirror function won’t work if you are recording and vice versa.
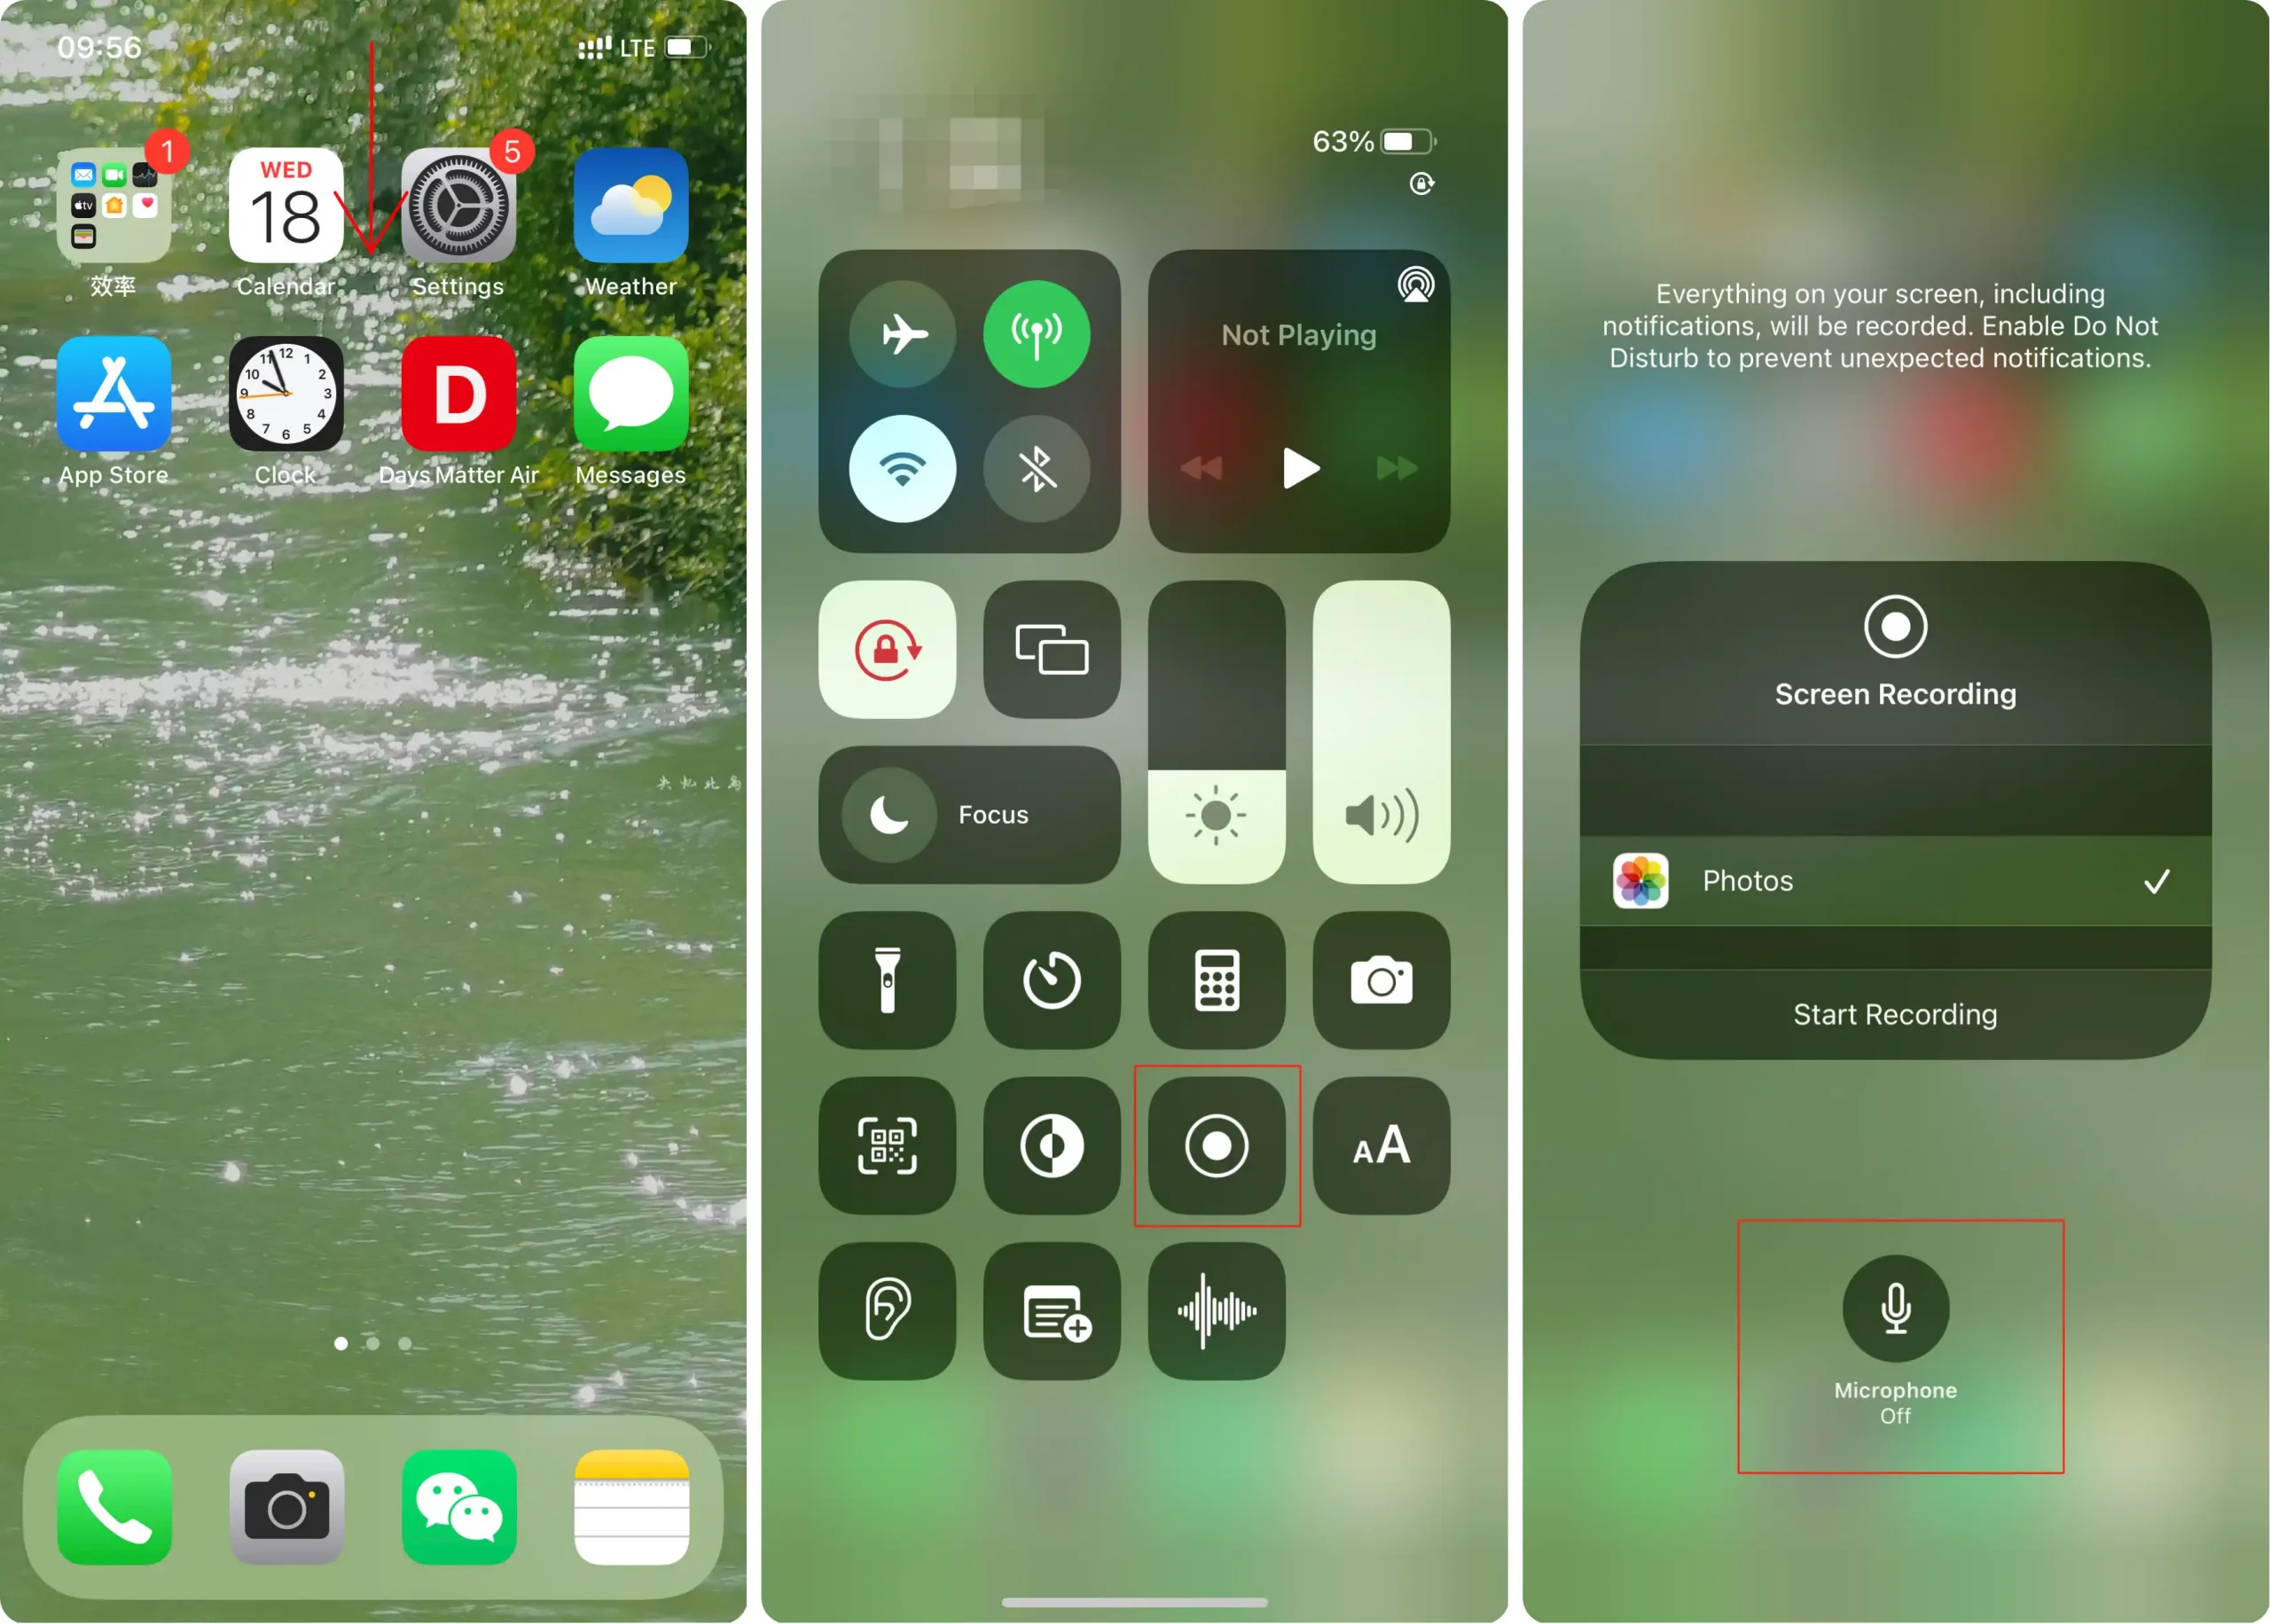
- Open your phone and swipe it down from the top of your phone’s home screen to get to the quick control screen.
- Find the Screen Recording function on the control screen. it is placed there by default. (If you don’t find it, go to Settings > Control Center, then add it to the control screen.)
- Select your recording screen and then tap the Microphone button to open it.
- Start to record, if you want to stop recording, you can tap the red record button or the red status bar to stop it.
🎵 Screen Capture on Android
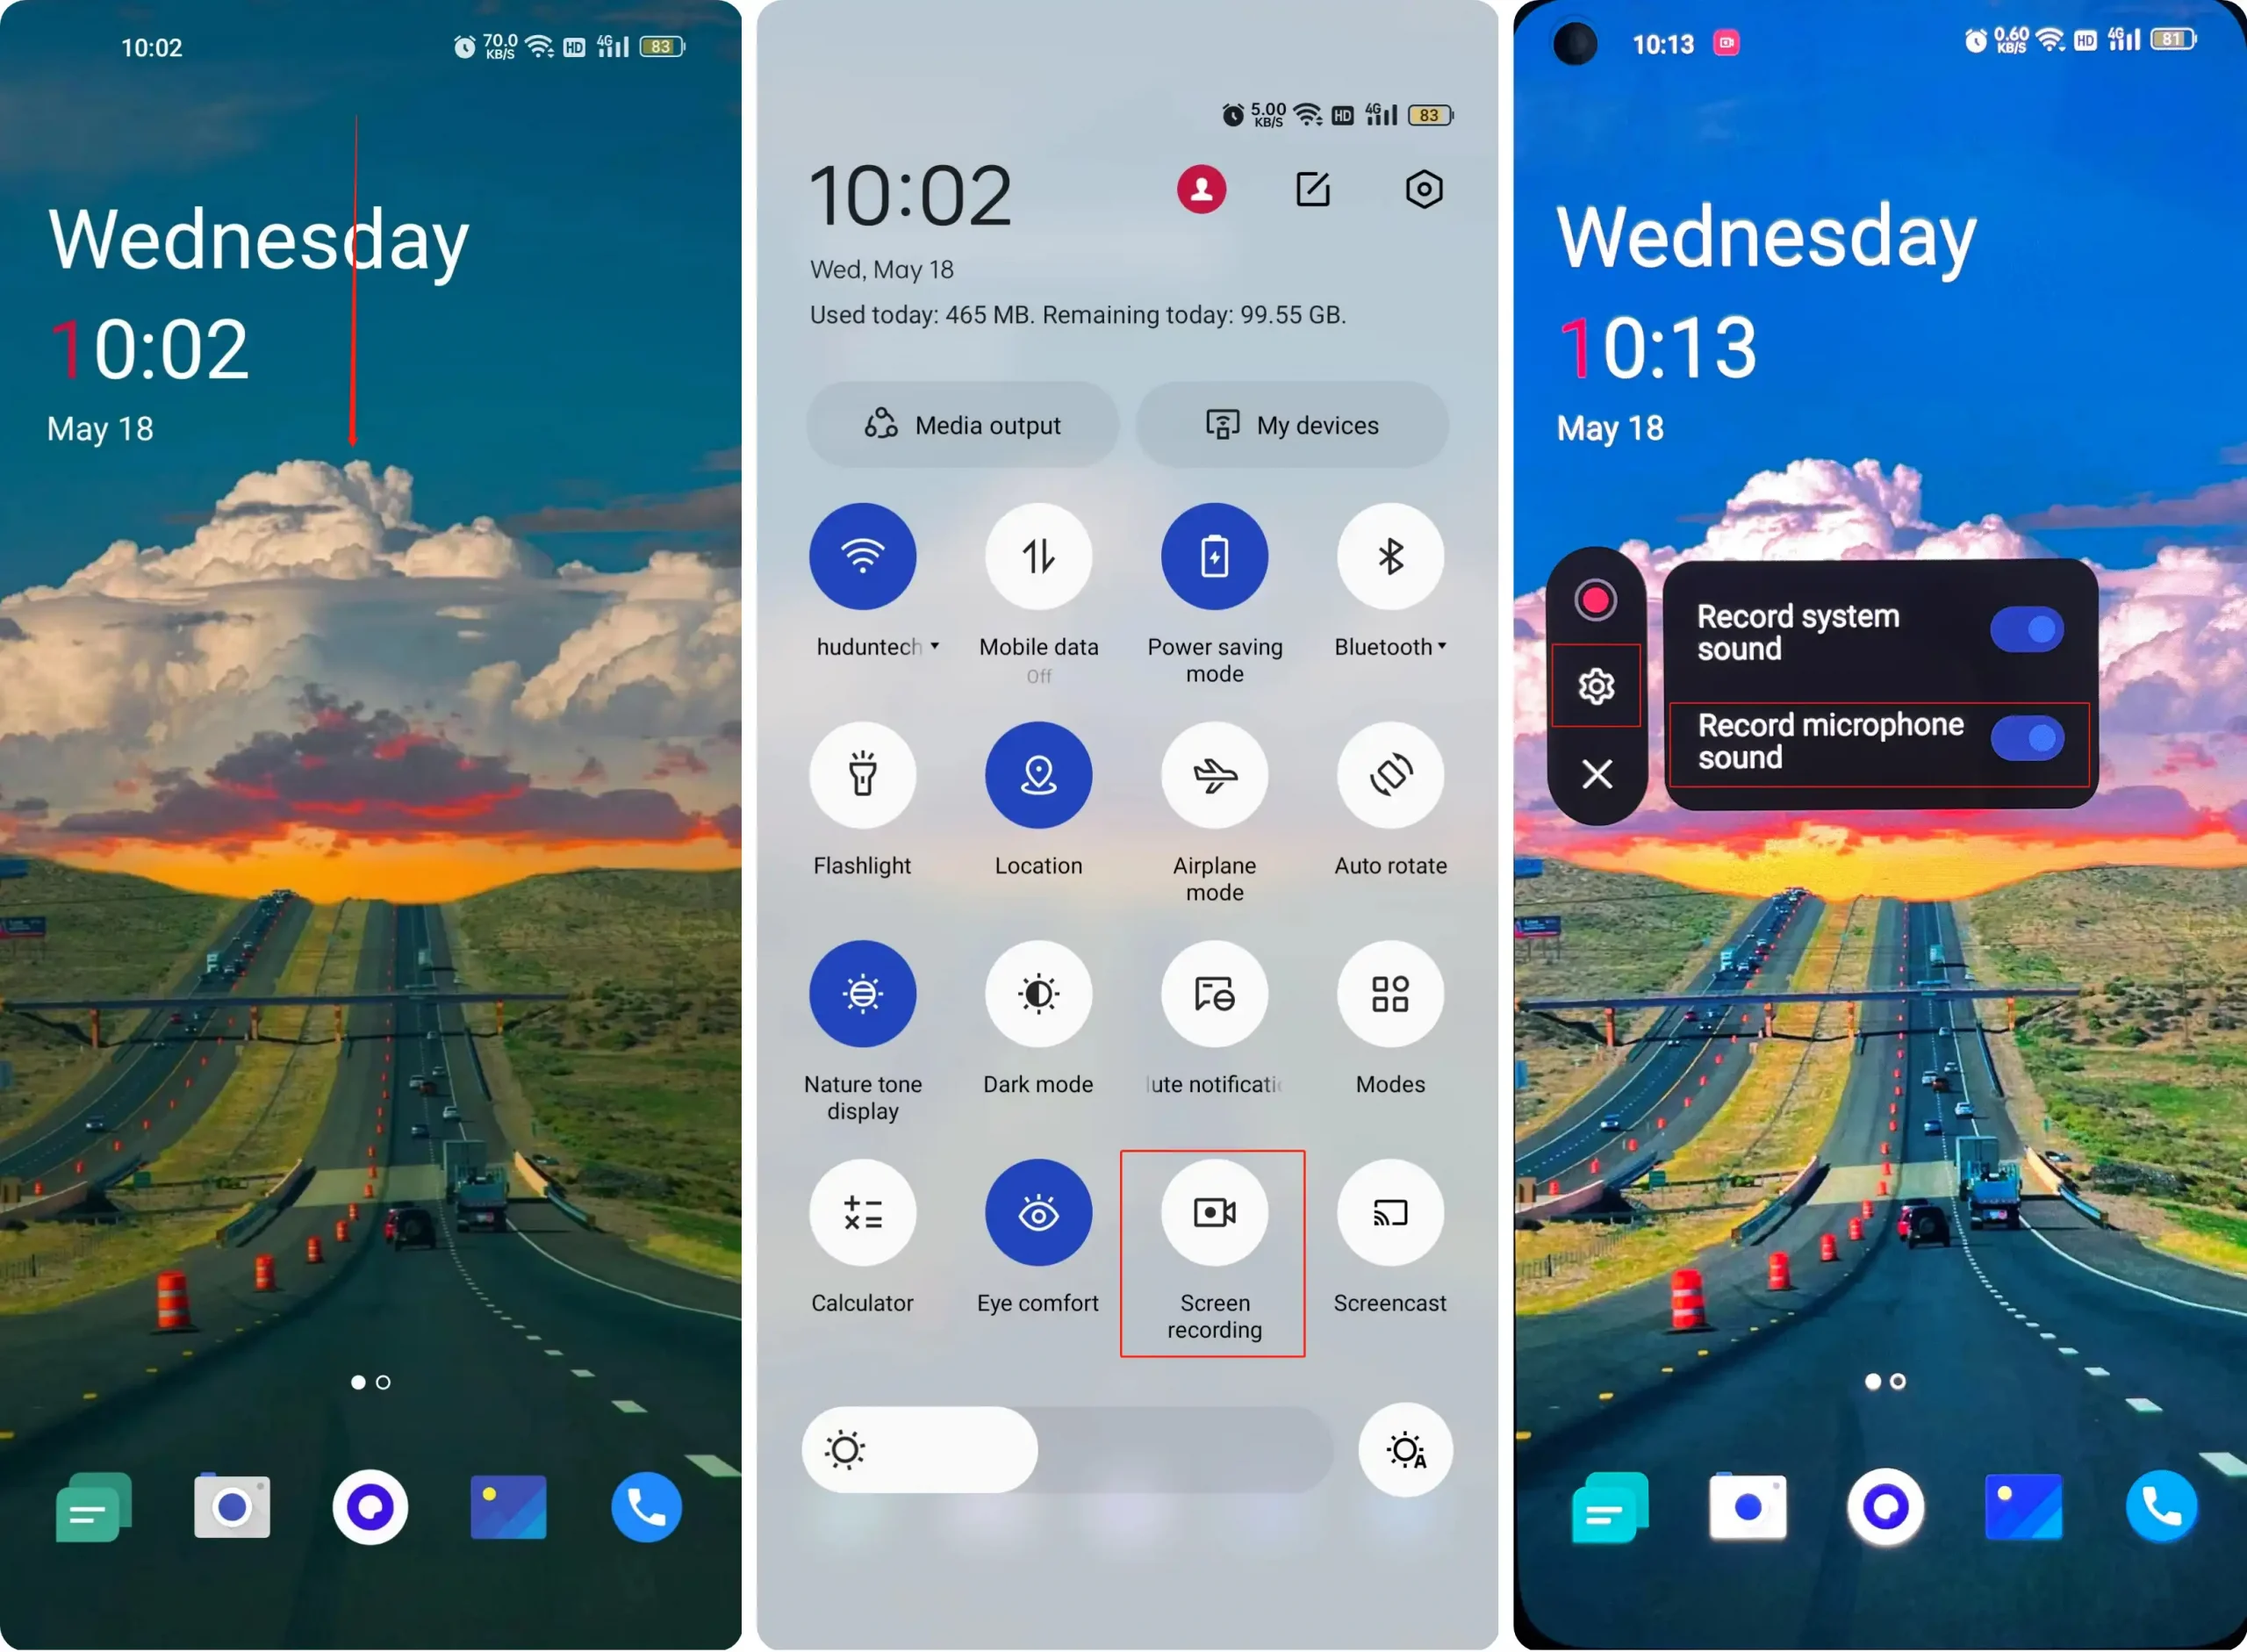
- Same with your iPhone, go swipe down the notification bar and get to the quick settings screen.
- Then, find the Screen Recording function in the list.
- Click on it and you will be notified to set the audio recording, if not, there will be at least one option to select.
- Lastly, you can start to screen record with voice. When it is done, click the red button again to stop it and check the video in the media library.
More to Share
🎯Why can’t I record my screen with sound on my computer?
There could be several reasons why you might be experiencing issues with screen recording with sound on your PC. Here are a few possible explanations and solutions to consider:
- Audio settings: Check your audio settings on your PC to ensure that the correct audio input source is selected for recording.
- Privacy settings: Certain operating systems, such as Windows 10, have privacy settings that control which applications can access your microphone and audio output. Make sure that the screen recording software you are using has permission to access your system audio.
- Driver issues: Outdated or incompatible audio drivers can cause problems with screen recording. Ensure that your audio drivers are up to date by visiting the manufacturer’s website or using driver update software.
- Software limitations: Not all screen recording software supports capturing system audio. Make sure that the software you are using has the capability to record audio from your PC or additional configuration or plugins are required to enable audio recording.
- Copyright protection: In certain cases, you may encounter issues with recording audio due to copyright protection measures implemented on specific applications or media content.
- Hardware limitations: Some older computers or laptops may not support screen recording with audio due to hardware limitations. Check the specifications of your device to ensure that it has the necessary capabilities for recording audio.
If you have tried the above suggestions and are still experiencing difficulties with screen recording with sound on your computer, it might be helpful to consult technical support or forums specific to the software or operating system you are using. They may provide further assistance based on the specific details of your setup.
Final Thought
In conclusion, we have summed up the best solution to screen record with voice on Windows, Mac, Android, and iPhone/iPad. All the methods that are mentioned above are practical and easy enough for beginners. After this post, I am certain you will find at least one method that suits your condition.
If you happen to use a Windows computer, then I truly suggest you try WorkinTool Capture Screen Recorder. It is 100% worth a shot for users with various needs with its intuitive interface, simple operations, strong reliability and highly multi-functional characters.
Don’t wait up and go to experience them now!
![]()

Related Article
 How to Screen Record Threads Videos 2024 | PC and Phone How to Screen Record on TikTok LIVE on Phone and PC How to Record Messenger Video Call on PC/Phone in 2024